If you want to increase your conversion rate without spending a cent, Google Optimize is the tool you should try out — or even better, use daily.
A/B testing is one of the tests to take advantage of in Google Optimize to improve performance and sales. Also, it’s free and is easy to set up.
If you’re unfamiliar with A/B Testing, it’s a method of creating two different versions of something. This can be an ad, a form, a landing page, etc. Traffic is then split between A and B.
With the help of A/B testing, you can quickly check which version delivers better results, attracts customers, and increases conversion rates.
Ready to get started? Just follow this guide and you’ll be setting up your first Google Optimize A/B test in no time!

What is Google Optimize and why use it?
Google Analytics has been a great starting point for site personalization and data tracking.
Now, with Google Optimize built on top of Google Analytics, you have a powerful testing tool at your fingertips.
Experimentation is the key to optimization. You need a way to test your hypotheses, and then a good way to gather the results to evaluate whether they worked or not. Google Optimize gives you everything you need for that.
It’s a great way to test out any changes you want to make before you implement them on your site.
Optimize provides a framework to run A/B tests and understand how visitors react to changes in a website. This can be achieved through the creation of experiences, which are experiments or test variants.
The best thing is, it’s a free and easy-to-use tool.
You can even test up to 16 individual elements on your page at once (this limit goes up to 36 in the paid version, Optimize 360). This will be valuable to pinpoint what changes are working best for each page. You also gain insight from the experiment results to improve your site’s design, navigation, and user experience.
The A/B Testing feature of Optimize lets you run experiments on your site to test different variations of content, layout, design, and more. It gives you the power to test changes to your website, measure their impact, and determine which ones are most effective at driving conversions.
Still unsure if you should run A/B tests?
Read our blog on the 5 key reasons to take advantage of A/B testing.
Creating your A/B Test on Google Optimize
When you’re ready to start creating tests, head over to the Google Optimize site and sign up for an account. You’ll need a Google Analytics account as well.
Once signed in, follow these simple steps to create a new A/B test:
1. Install the Google Optimize extension on Google Chrome.
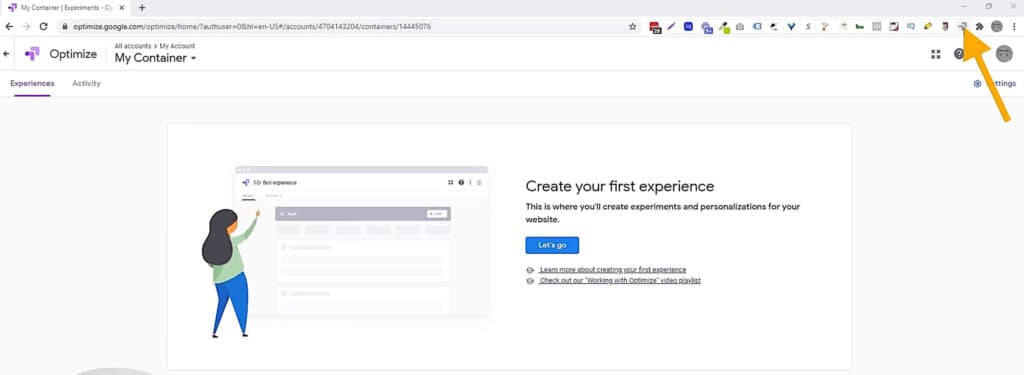
While installing the extension isn’t necessary, you’ll be able to use the visual editor with ease and get the most out of Optimize after the installation.
2. Click the Let’s go button to create a new experience.

3. Input the details of your experiment.
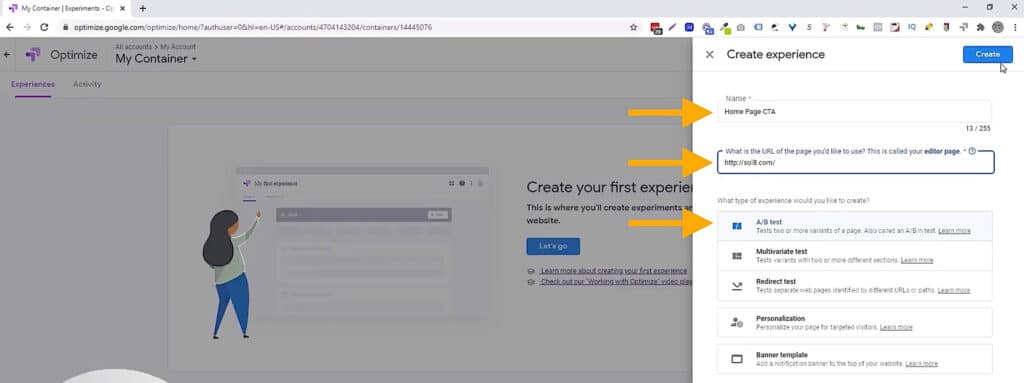
The details include:
- What you want to name the experiment
- The URL of the page you’ll test
- The type of experiment you’ll create (A/B test for this guide)
After adding the experiment details, click the Create button on the upper right.
4. Create variant(s).
Creating a variant is simply creating a copy of the page where you want to make edits.
To start creating your variant, click on the Add variant button
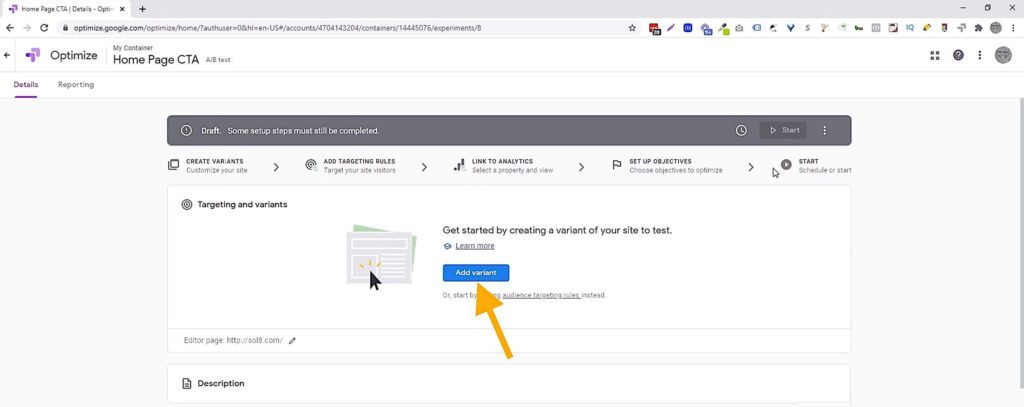
Set the name for your variant or leave it as the default variant name (Variant #).

For this guide, Kasim renamed it “Free Evaluation” since he’s testing the CTA language on the Solutions 8 homepage.
Click on the Done button after you’ve entered the desired name for your variant.
5. Edit the element for the experiment in the Optimize visual editor.
Once you have added the variant, it will now appear on the dashboard.
Next, click on the Edit button to start editing the element.
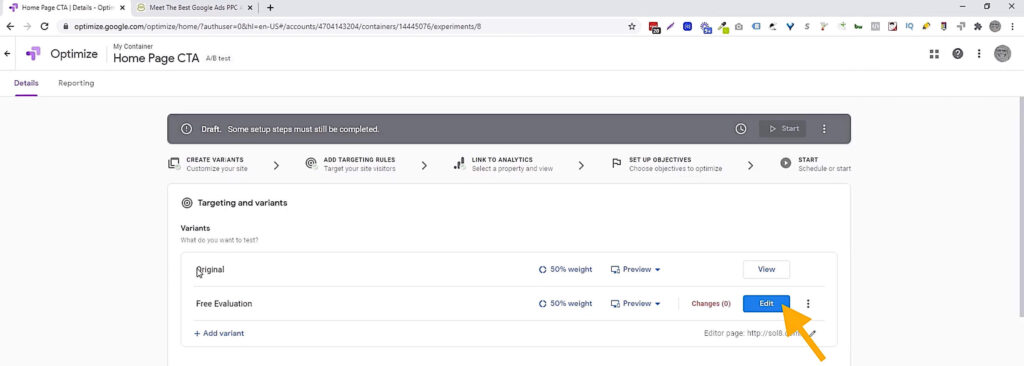
You’ll then have access to the Optimize visual editor where you can edit site elements easily without any assistance from a developer.
The Optimize visual editor has two main parts:
- App bar – the toolbar on top of your page where you can choose different features and where information like the title of your page and status of changes are displayed.
- Editor palette – the floating palette on the lower right corner of the page with editing choices relevant to the element selected.
To start editing, you need to do now is hover over the element you want to edit on your page and click on the Edit element button in the Editor Palette.
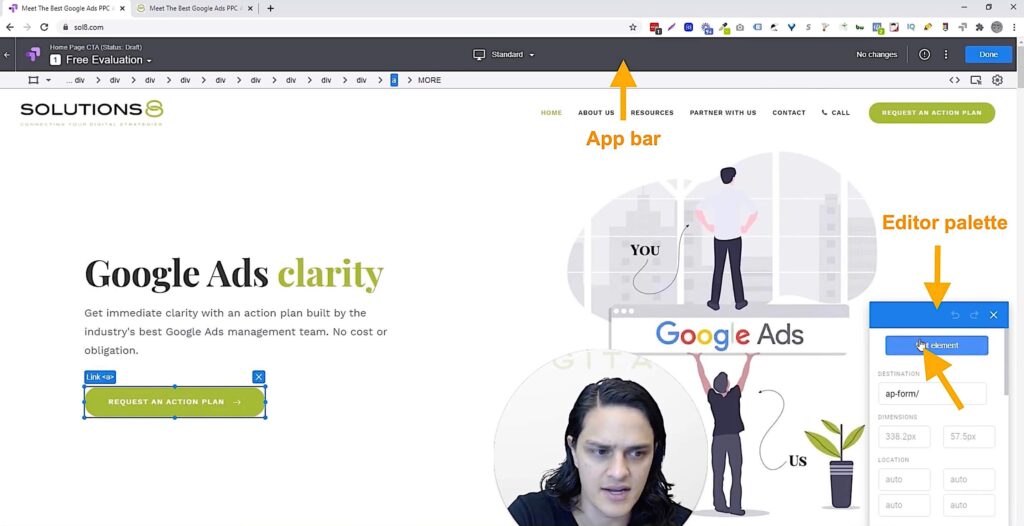
The editor palette displays the controls relevant to the type of element currently selected.
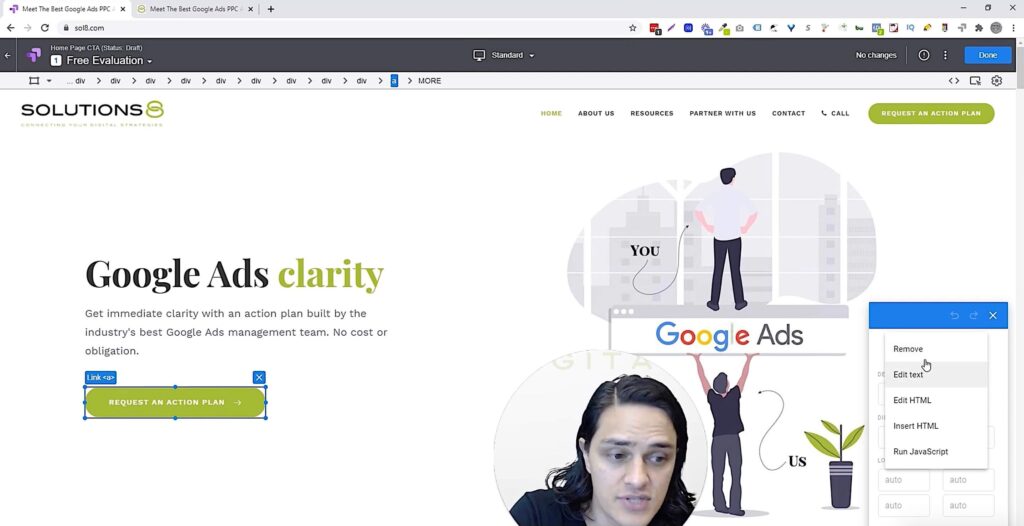
When you click the Edit element, a drop-down menu of editing choices appears, including the ability to edit the text, HTML, add HTML, or add JavaScript to run.
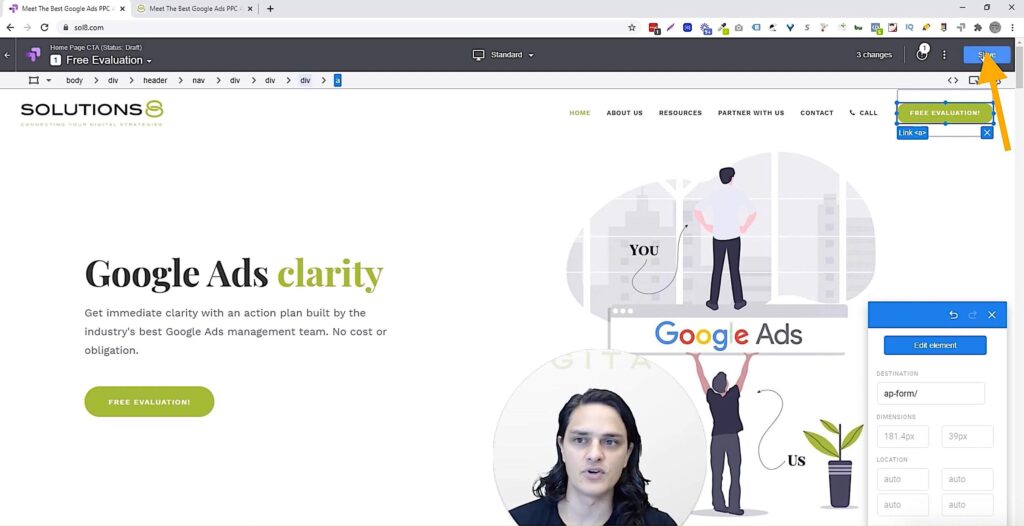
Once you’re done editing the elements, you can click on the Save button in the upper right corner of the App bar.
6. Target the audience for your experiment.
The next important thing you need to do is to set parameters for user targeting.
This specifies who will see your experiment variants and when they’ll see them.
You can do this by clicking on the Customize button under Audience targeting.
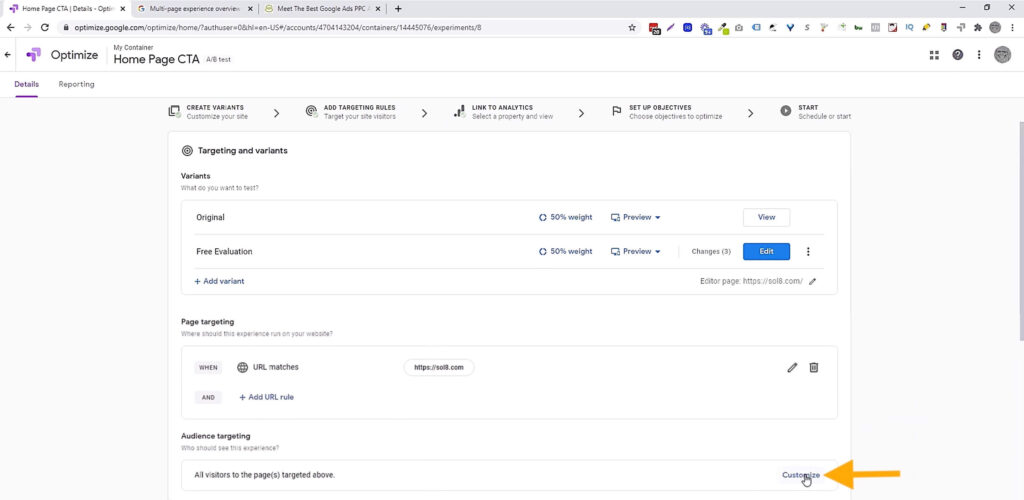
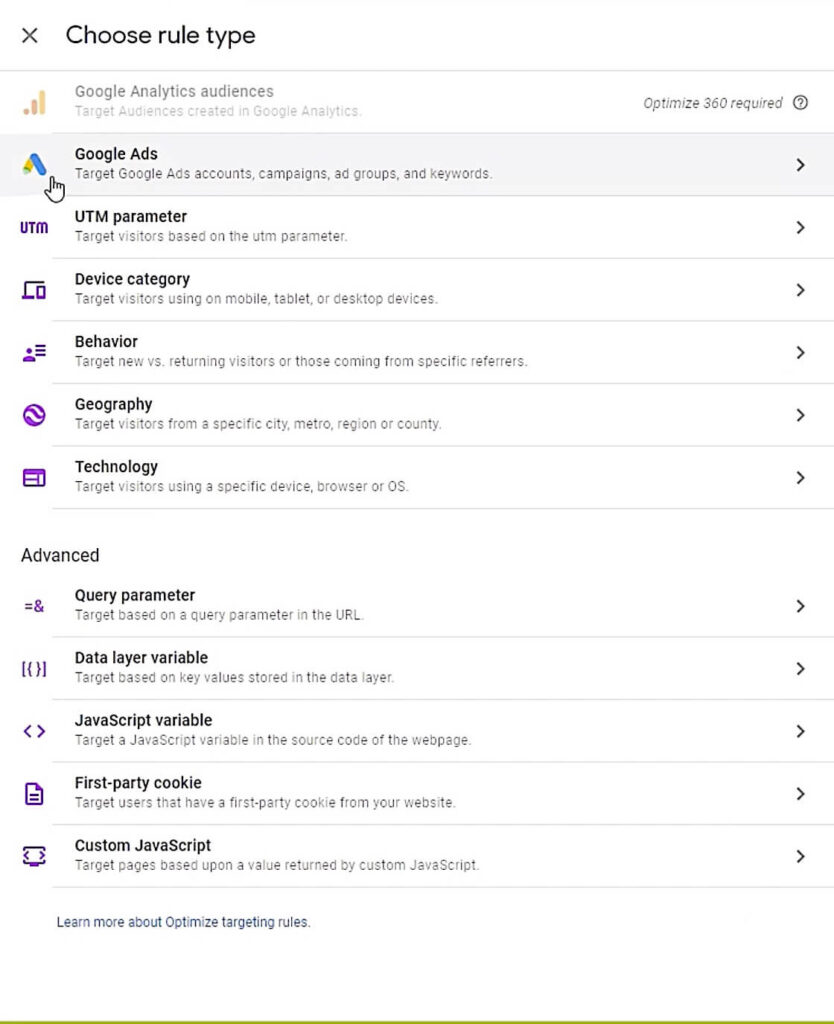
Optimize provides twelve rule types under targeting. Here are some basic parameters you can use in targeting:
- Physical location
- Which channel a user comes from, what pages they visit, and what they do on your site.
- What a visitor has done (for example, if they’ve purchased something or interacted with a specific offer).
- The type of device, browser, or operating system the user is on while visiting your site.
Just click on the rule type(s) you want and set your values and conditions.
7. Add an Objective.
This is to define what you want to measure through the test.
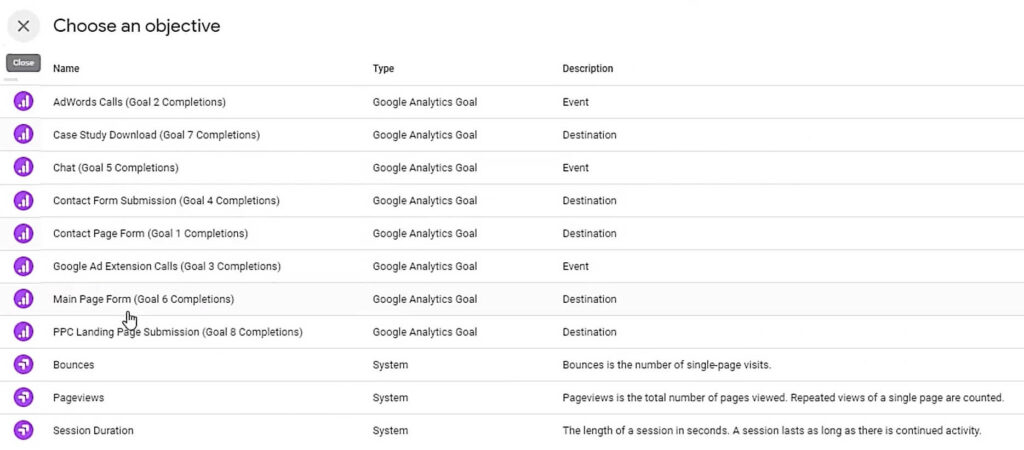
Click on Add experiment objective and you can either choose from list or create custom depending on your goal.

Here’s the objective list you can choose from:
8. Edit Settings.
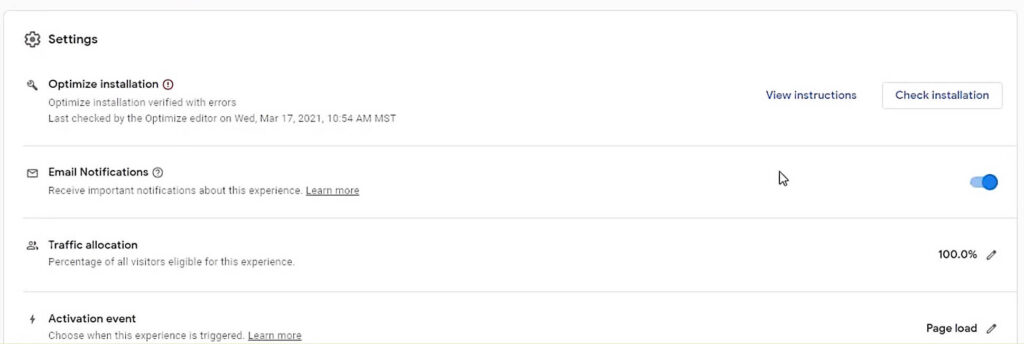
After choosing your desired objective, here are the settings we recommend you can enable/install for a more effective A/B test using Google Optimize:
- Make sure you have Optimize installation verified successfully. This ensures proper configuration for a smooth experiment.
- Turn on Email Notifications to be updated on the progress and results of your experiment.
- Set your Traffic allocation to a lower value if you want some percentage of your traffic to not be affected by the test.
9. Start the A/B test.
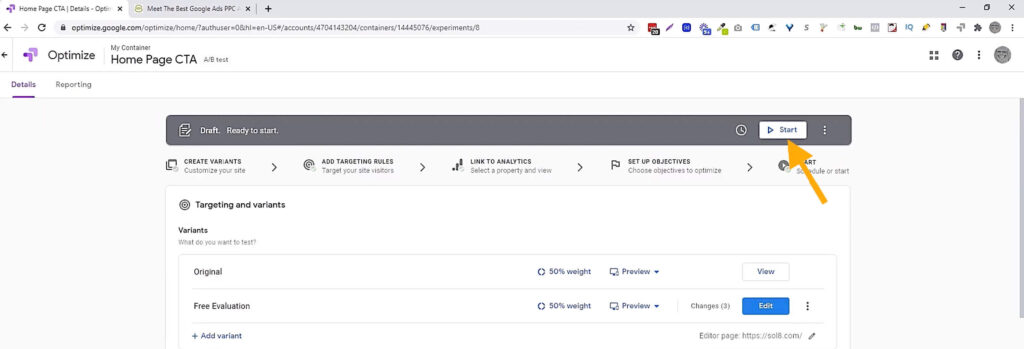
Once everything is set, just click on the Start button on the top right corner of the Optimize dashboard. The status field will display “Running” as soon as your experiment goes live on your site.
There you have it- your first A/B test on Google Optimize!
Want to get more tutorials like this? Be sure to head over to our YouTube channel for even more conversion-boosting tutorials! Every single day, we film a video to bring you the most recent news, updates, strategies, and step-by-step tutorials about everything Google! On Mondays, we do a live Q&A every 8:30 AM PST to help you improve your Google ad campaigns!
Author
Joan is the YouTube Growth Manager at Solutions 8. When she’s off the clock, you’ll find her chilling with her 10 fur babies, pushing her limits in CrossFit sessions, or basking in the serenity of the beach.
 Joan Porio


