Are you planning to use Meta tools and technologies for your business, including Meta Ads?
If so, your first step will be to set up a Meta Business Account through Meta Business Manager.
In a series of short videos, beginning with Part 1 here, Solutions 8 Meta Ads Account Manager Jonathan Paquin walks viewers through the simple 8-step process. You can watch Part 2 and Part 3 here, or read on for a full breakdown of everything Jonathan covers.
Table of Contents
Step 1: Create your Meta Business account
Use this link to get started and create your business account. Then, says Jonathan, just follow the very simple steps there.
You will be asked to enter your name and the name of your business, but there is one catch: You are allowed only two business names per profile in your lifetime. (If you max out, you can always ask friends or family to create an account for you and they can share admin access with you.)
Basically, this keeps everything in place with security verifications to ensure your information remains private.
Step 2: Add assets to Business Manager
The next step is adding your assets to the Business Manager account; Jonathan uses the Solutions 8 page as an example.
Note: According to Meta, the Meta Business Account, sometimes called a Business Manager account, was renamed. It’s now known as a business portfolio.
If you are just creating your Business Manager account, the first step would be to add the actual page under Business settings → Accounts → Pages.
Typically, you will have a Facebook page already created for your business, so you can just click here and add the page. If not, you can click the option to Create Facebook Page. From there, you will need to create a Page name and select your Category, as well as other important configurations such as setting up the description and location.
Jonathan notes here that if you create a new page, it will often result in a higher CPM (cost per mille, or cost per 1,000 ad impressions), so it’s best to use an existing page if possible.
Under Accounts → Instagram accounts, you can also add your Instagram (IG) account. This step is optional, but it is recommended. If you do link your Instagram account, once your ads are created, they will automatically connect with your Instagram page. If there is no IG account and you or your client does not want to create one, you can still use the Facebook page to advertise on IG; however, if users click the business profile, it will not go to an actual profile, and you will not be able to manage comments.
Creating or adding ad accounts
Go to Accounts → Ad accounts to do this. Typically, each profile has a personal account, which you can convert into a professional account by adding it to the Business Manager. Simply add your Ad account ID, which is usually somewhere in the URL.
You can also select the option to Create a new ad account, just keep in mind that you will have a $50 spending limit. As you continue to spend, it will increase, but this is something that is relatively new in Meta, says Jonathan.
In the video, Vivek points out that there is a limit to the number of Ad accounts users can create, but Jonathan explains that there really isn’t a need for many ad accounts.
Setting up the Meta Pixel
The next thing you want to do is set up the Meta Pixel (formerly Facebook Pixel), which helps you track website activity, optimize campaigns, and build targeted audiences.
This used to be under Data sources → Pixels, but that has now changed, says Jonathan.
Instead, go to Data sources → Datasets → Create a new dataset. Then, under Connected assets, you will want to connect the Datasets to your ad accounts.
Creating a catalog (eCommerce)
For eCommerce businesses, catalogs enable you to showcase your products in dynamic ads tailored to individual users, provided those products comply with Meta advertising policies.
Go to Data sources → Catalogs to create your product catalog.
If you use the Shopify integration, your catalog will be set up automatically, so you should not have to do anything.
Setting up a shop
For U.S.-based businesses only, setting up a shop allows for direct product sales on Facebook and Instagram.
With Meta, explains Jonathan, you have the option to either send people only to the website or to the website and shop (Meta will choose where it thinks users are most likely to convert).
You will use the Commerce Manager tool to set up your shop.

Adding team members
Finally, you can add team members and give them access to your Meta Business account.
Go to Users → People → Invite people and you can either give admin access or partial access.
Step 3: Share assets with partners or request access
This step allows you to share assets securely with partners or request access to their assets while maintaining control over permissions.
You can do this under Users → Partners, and you will need the Partner business ID to share or request access.
Note: When requesting access, it is important to get both the page and the ad account.
Step 4: Pixel installation
When setting up your Meta Business account, pixel installation is an important step.
For Shopify, Jonathan recommends using the free-to-install Facebook & Instagram official app for Conversions API and setting it to Maximum for optimal tracking.
Integration is also available for other platforms, including WooCommerce, Magento, HighLevel, and Salesforce.
If it is a landing page or a custom-coded site, you can grab the pixel code from the Meta Events Manager tool and then add it manually to the website. You can then use the user-friendly event setup tool to set up events based on URL.
If you want to have multiple pixels, says Jonathan, you can also use Google Tag Manager (GTM) to simplify the management of multiple tracking codes and provide more flexible event tracking.
Finally, if it is not your domain, you will be required to verify the domain with the iOS 14 updates. You can do this by going to Brand Safety and Suitability Center → Domains.
Step 5: Ad account setup
The next step is setting up your ad accounts, beginning with the daily ad spend.
Daily spending limit
In Ads Manager, go to Billing & payments → Payment settings, and that is where you will see the daily spend limit on the ad account.
It is important to note that new ad accounts come with a $50 per day spend limit that increases relatively quickly; Jonathan recommends starting at about $45/day to be safe, and make sure not to cap it so it increases faster.
Also, make sure you do not have any rejected ads. When launching a new ad account especially, choose safe content that is unlikely to violate Meta’s Advertising Standards in any way.
Setting up columns
For eCommerce campaigns, when setting up his columns under the Ads tab, Jonathan likes to have the Ad, Campaign name, and Ad Set Name columns first so that when he navigates, he can easily see which campaign and ad set name it is.
After that, he likes to have the Date created, Purchase conversion value, and Purchase ROAS columns, followed by Delivery, Budget, and Amount spent. (There is a fairly new column that Meta integrated called Actions, but Jonathan usually ignores it.)
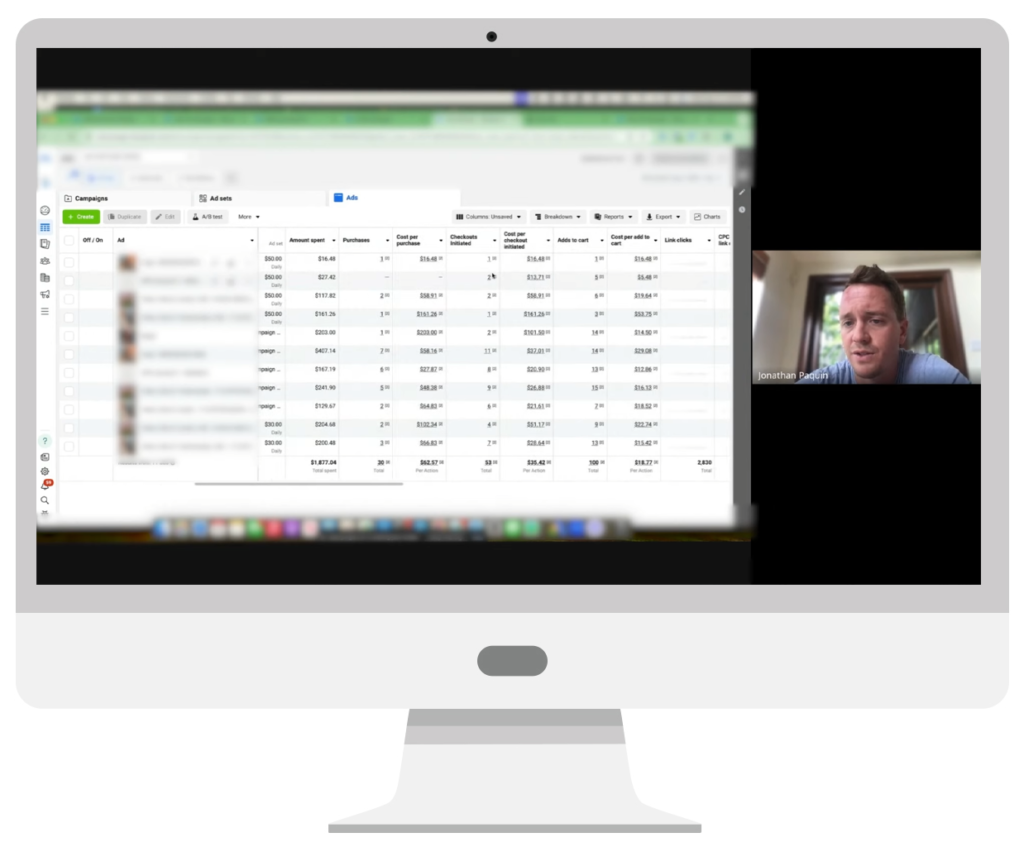
The next several columns will essentially be your funnel, including Purchases, Cost per click (CPC), Cost per purchase, Adds to cart, and so on.
Quick tip: If you are noticing high CPMs, getting more people to engage with your ads (e.g. comment, like, share) will typically lower your cost per impression.
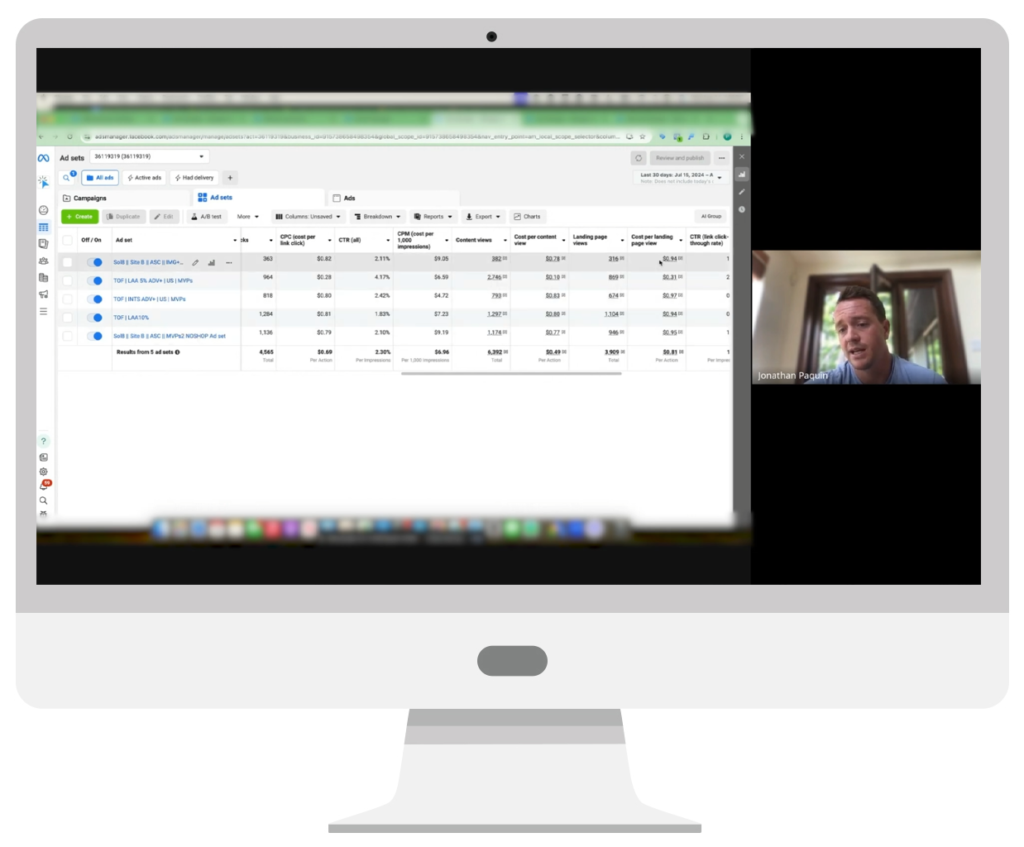
For lead gen campaigns, which have a much shorter funnel, he recommends setting up the columns in a similar fashion, but after Amount spent Jonathan likes to see Results, Cost per result, Link clicks, Cost per link click, CTR (link click-through rate), and CPM.
Audience creation
If it is an existing business that has a Pixel already, Jonathan recommends creating all of the following:
- All website visitors 180 days
- Facebook engagers 365 days
- Instagram engagers 365 days
- Facebook followers
- Instagram followers
- Email list/customer list (Klayvio integration)
- Video viewers (different % options) – often separated for remarketing purposes
Finally, enter the Engaged audience/Existing customer in the Ad account setting section to see if you get new customers or not.
At this point in the Part 2 video, Jonathan provides an example of what this would look like.
Step 6: Ads
When choosing the business objective (also called the ad objective or advertising objective) for your campaigns, it should be aligned to the type of campaign(s) you are running: eCommerce or lead generation.
The current six ad objective options are:
- Awareness
- Traffic
- Engagement
- Leads
- App promotion
- Sales
Typically, for eComm campaigns the objective will be sales, and for lead gen campaigns, it would be leads. Then, at the Ad set level, Jonathan recommends optimizing for the (conversion) event you want (for example, Adds to cart or Video views for an eComm campaign).
In addition to aligning your business objective with the appropriate Meta ad objective options and desired conversion events, you should also review Meta’s Advertising Standards to avoid using prohibited content or misleading claims that may result in your ad being rejected and negatively affect the performance of your campaigns.
Step 7: Ad types
For eCommerce campaigns, Jonathan recommends using Advantage+ catalog ads (formerly dynamic ads) to automatically showcase relevant products from your catalog based on users’ interests or past interactions, for example best sellers.
Options include single image, video (relatively new), and carousel ads; best practices include using attention-grabbing visuals and clear calls to action (CTAs), as well as testing different formats to see what resonates most with the target audience.
Being clear and straightforward is the best way to go, says Jonathan, and then you can test different angles with your ads—for example to solve a specific pain point, focus on the benefits, or advertise competitive pricing. In other words, try to come up with different angles, and then support those angels with your ad copy and creatives.
Step 8: Go live
Once you launch your campaigns, be sure to monitor key metrics to make sure your ads are performing optimally.
After your campaigns are live, continue to optimize them to improve performance and adapt your budget allocation based on the performance data collected.
“If a campaign is not working for five days or so, chances are it’s not going to get better,” explains Jonathan. “You want to make sure to adapt based on the results quite quickly, because Meta is usually consistent.”
Finally, test different creatives and audiences to ensure you are hitting your performance goals. Pay attention to which creatives are getting the majority of the budget; typically, only two or three will get most of the budget, so you may want to remove those that are not performing well.
Author
Pamela is the Senior Content Writer at Solutions 8. When she's not writing, you can find her hiking in the woods with her dogs. She is currently on a quest to visit every national park in the United States.
 Pamela Sapio