 Patience Hurlburt-Lawton
Are you looking to track conversions and measure the effectiveness of your Google Ads campaigns on your Shopify store?
Setting up a purchase conversion action using Google Tag Manager is a great way to do this.
In this blog, we’ll walk you through the step-by-step process of setting up a purchase conversion action for your Shopify store using Google Tag Manager. Let’s dive into it!
1. First, let’s link your Shopify store to your GTM account. Log in to your Google Tag Manager (GTM) account, then click your GTM ID on the top right corner of the GTM menu.
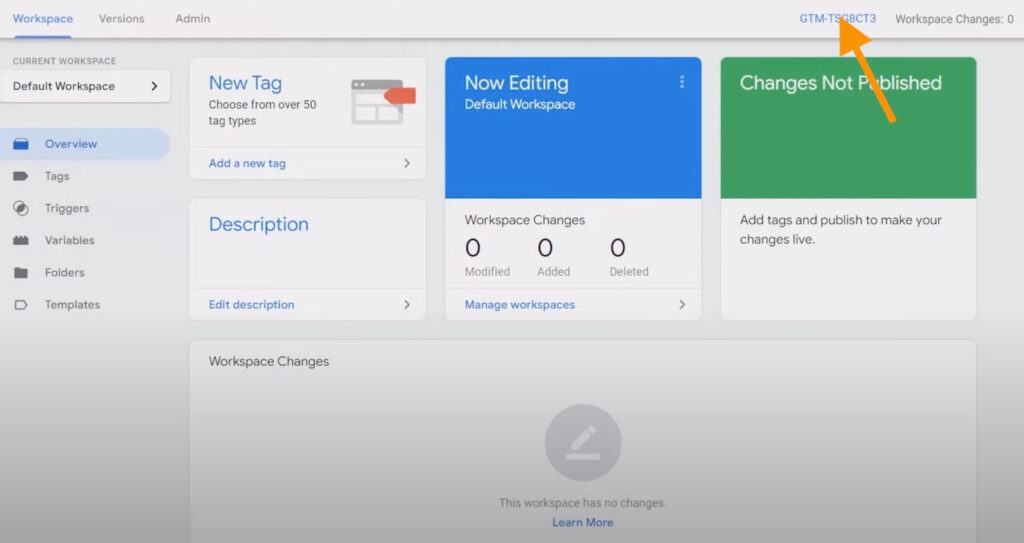
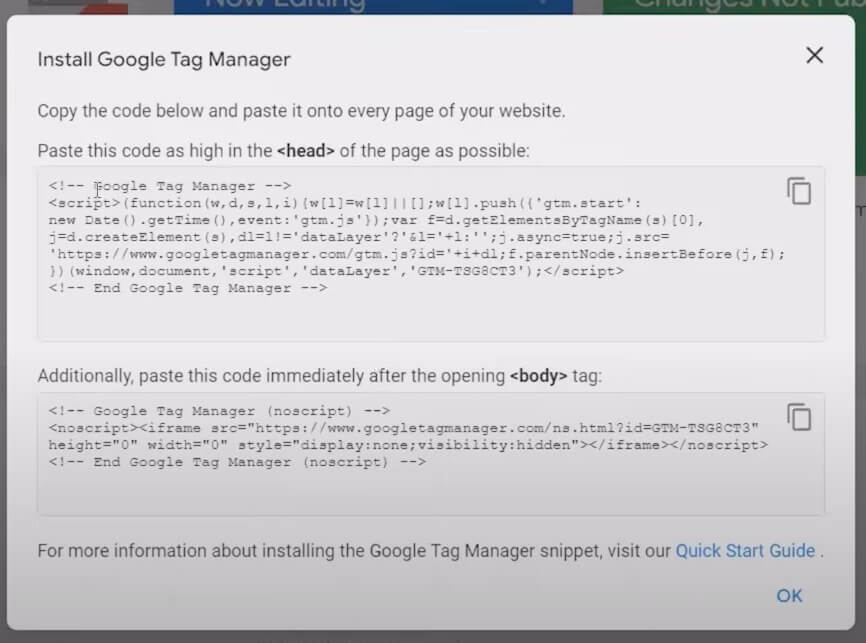
2. A pop-up with the codes will appear. Copy the code for the “<head>” first.
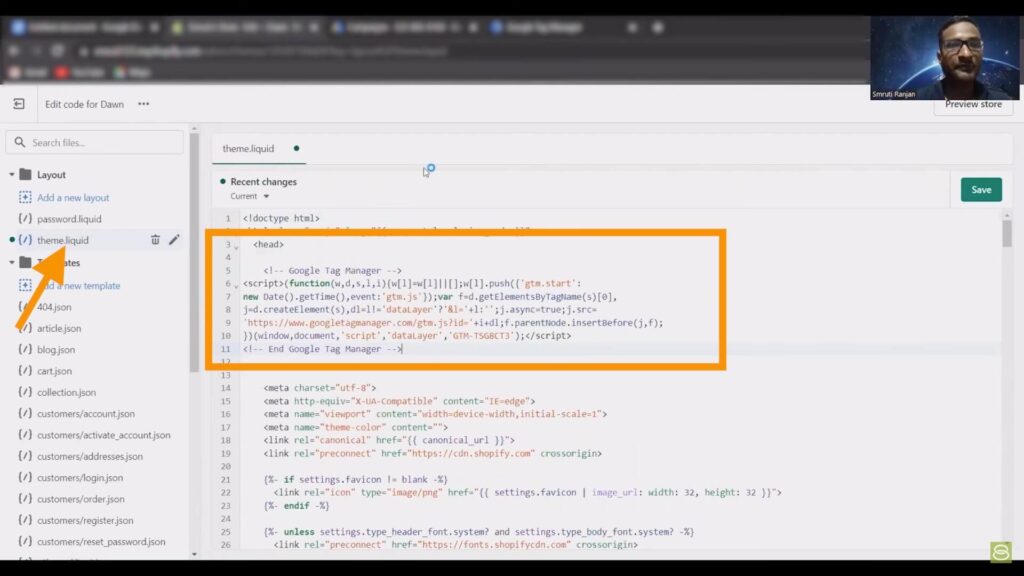
3. Go to your Shopify store, and click on Online store from the left navigation.
4. Under your Themes, click on the Actions button and select Edit code.

5. On the left navigation, click on {/} theme.liquid.
6. Under the third line, where you see “<head>”, paste the code you copied from your GTM account.
7. Now, go back to your GTM account and copy the code for the “<body>” and then paste it to your Shopify store.
If you can’t easily locate where to paste it, you can use Ctrl+F and enter body.
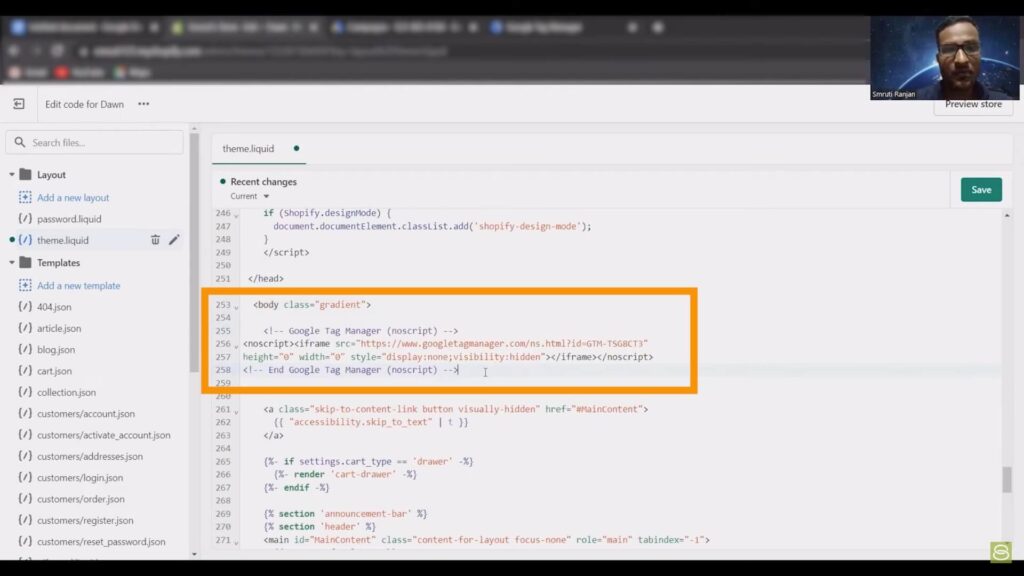
8. Then, click the Save button.
9. Now, you have to click on the Exit button in the top left corner so we can proceed to link your GTM account and your Checkout page to track conversions.
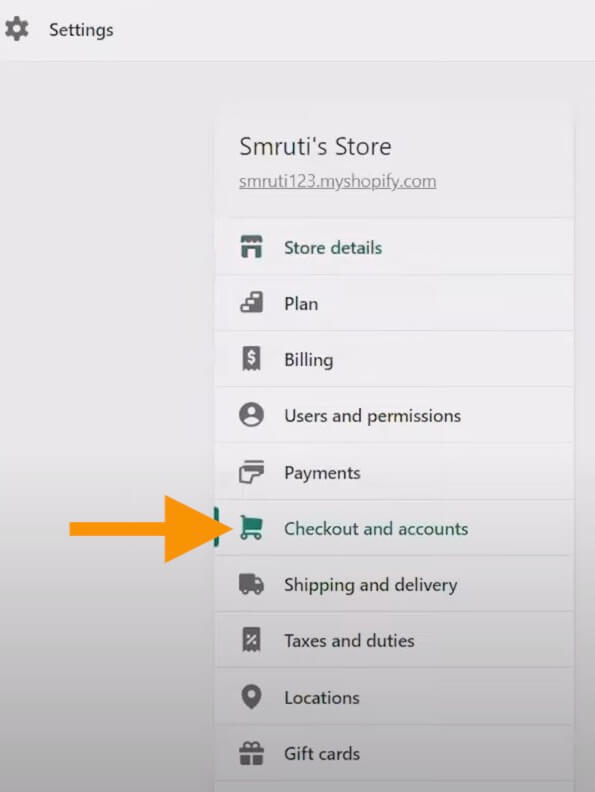
10. Click on Settings found in the bottom left corner.
11. Select Checkout and accounts.
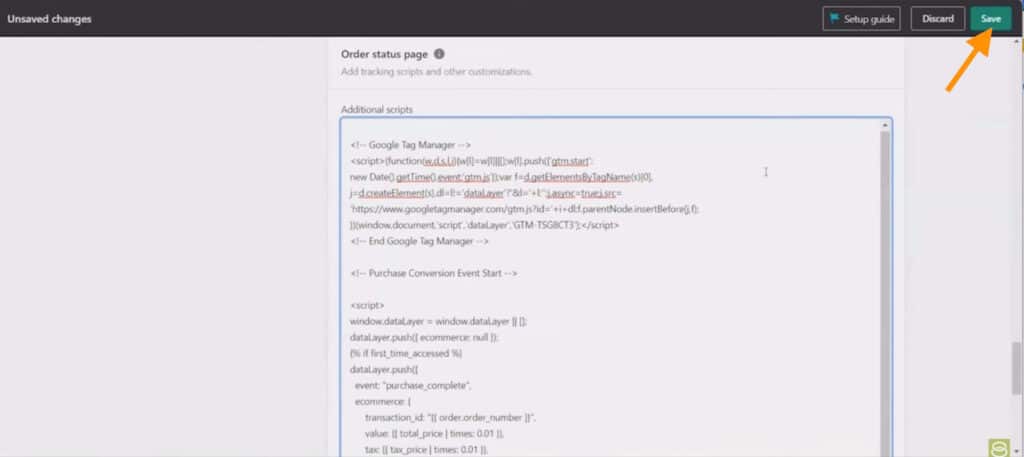
12. Scroll down to find the Additional scripts section paste the following:
- <head> code you copied from GTM earlier
- Purchase Event & Data Layer For Shopify tag which you can find on this document
Then Save.
13. Save the code and go back to Google Tag Manager.
14. Create a new preview window and enter your website URL to connect it to GTM.
15. Make a test purchase on your Shopify store to check that the purchase event is firing correctly in GTM.
If you’re unfamiliar with checking if it’s firing correctly, you can follow our Junior Google Ads Specialist’s instructions here.
Go to your Google Ads dashboard and click on Tools and Settings, then Conversions.
16. Click on New Action and select Website. Paste your domain and click Scan.
17. Scroll down and click on Add a conversion action manually.
18. For the Goal and action optimization, select Purchase as the category. Then choose your Conversions action optimization.
19. Name your conversion action.
20. Choose the conversion Value as Use different values for each conversion. Input your other settings accordingly.
21. Review your inputs and click the Done button when everything is set.
22. Click the Save and Continue button.
23. Select the Use Google Tag Manager tab. Leave this tab open as you’ll ned the details in the next steps.
24. Now, let’s set up a conversion tracking tag in Google Tag Manager . Go back to your GTM account and click on Tags. Then click on the New button to create a tag.
25. Name your tag.
26. Click on the Tag Configuration section.
27. Choose Google Ads Conversion Tracking as the tag type.
29. Set up the Conversion Linker tag by clicking on Create. Just input your settings accordingly, then hit Save.
30. Copy your Conversion details from the Use Google Tag Manager tab according to your Google Ads Conversion Tag.
If you’re unfamiliar with setting up your Conversion Value, Transaction ID, or other needed details, watch Smruti’s guide here.
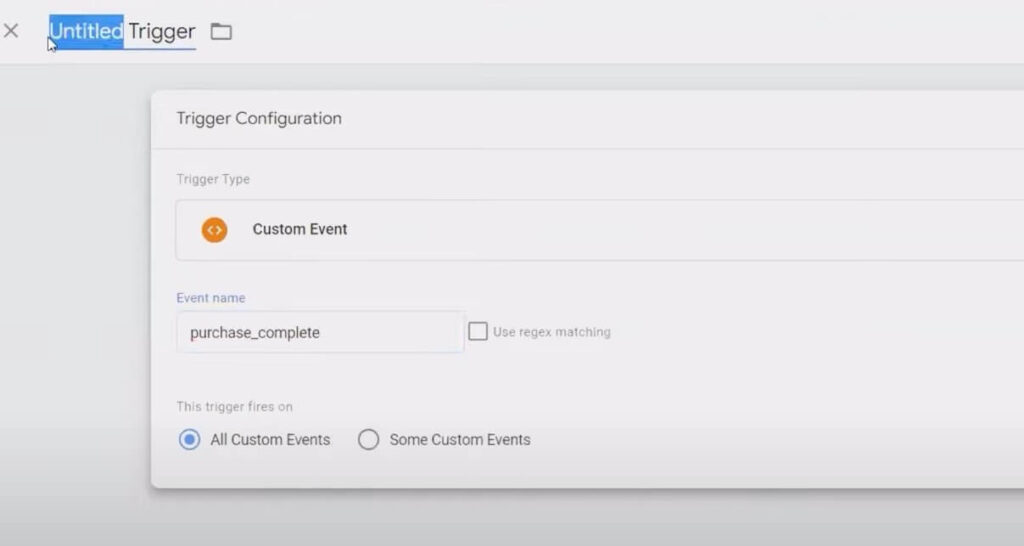
31. Now, set up Triggering, click the “+” button.
32. For the Trigger Configuration, choose Custom Event under Other.
33. Input purchase_complete on the Event name. Rename your trigger as preferred. Then click the Save button when you’re done.
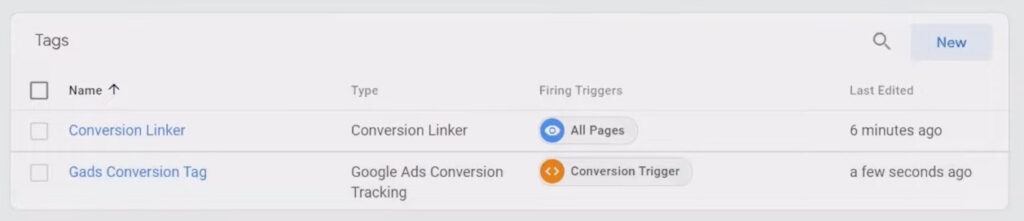
34. Once you’re routed back to the Tag setup page, click Save.
Now, your GTM account should have your Conversion Linker and Google Ads Conversion Tracking.
35. To make sure your tags are firing correctly, follow Smruti’s guide here.
36. Once you’re sure everything is firing correctly, click the Submit button, Publish the changes, and you should be set!
That’s it! You’ve successfully set up a purchase conversion action for your Shopify store using Google Tag Manager.
Tracking conversions is a crucial part of any digital marketing strategy, especially when it comes to Google Ads.
By setting up a purchase conversion action using Google Tag Manager, you’ll see exactly how well your Google Ads campaigns drive sales on your Shopify store.
This knowledge can give you valuable insights that can help you to make informed decisions about your marketing efforts. Eventually, helping you optimize your strategy and improve the return on investment of your Google Ads spend.
Author
Patience is the former director of marketing and communications for Solutions 8. A phenomenal content writer, copywriter, editor, and marketer, she has played a prominent role in helping Solutions 8 become an authority in the Google Ads space. Patience is also the co-author of The Ultimate Guide to Choosing the Best Google Ads Agency and You vs Google.