 Patience Hurlburt-Lawton
eCommerce businesses everywhere rely on Google Ads to bring in virtual foot traffic.
And while Google Ads is an incredibly effective method of digital marketing, it’s not exactly intuitive.
This guide will walk you through the essentials of Google Ads for eCommerce, from making sure your business is Google Ads-ready to setting up your campaigns.
PART ONE: Learning
PART TWO: Prerequisites (Before Building a Campaign)
PART THREE: Setting Up The Foundation
PART FOUR: Technical and Legal Requirements
PART FIVE: Connecting Your Tech Stack
PART SIX: Shopping Campaigns
PART SEVEN: Search Campaigns
PART EIGHT: Expansion Campaigns
PART NINE: Optimization
Useful resources for this guide:
- Purchasing UPC codes: Instantupccodes.com or gs1.org
- Google Ads: Ads.Google.com
- Google Tag Manager: Tagmanager.googgle.com
- Google Merchant Center: Merchants.google.com
- Google Analytics: Analytics.google.com
- Shopify: Shopify.com
Want a Permanent Copy of This Guide?
Download yours for free!
PART ONE
Learning: Google Ads for eCommerce
Why PPC for eCommerce?
Why Google Ads for eCommerce?
What Is Google Ads?
Is Google Ads Right for Your Business?
How Google Ads Works: The Google Network
Different Types of Campaigns
Standard Shopping vs. Performance Max
Why Performance Max Is The Most Powerful eCommerce Advertising Tool on the Planet
Dynamic Prospecting vs Remarketing
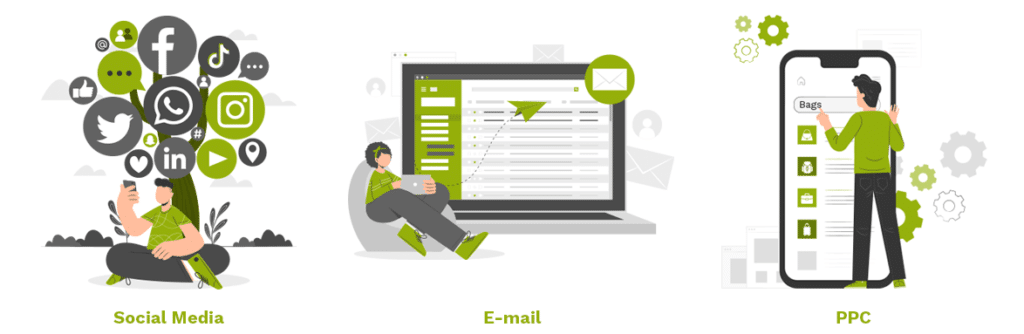
When it comes to digital marketing for eCommerce businesses, there are a whole lot of channels to choose from:
Social media can boost brand awareness and make connections.
Email marketing can keep your community active.
…And PPC (specifically Google Ads) can enable steady growth and sales.
Why PPC for eCommerce?
PPC (pay per click) advertising is a favorite among eCommerce marketers—and for good reason.
Reminder:
PPC Advertising = Ads that appear on search engine result pages, videos, apps, websites, and social media.
These ads appear everywhere, so they get a whole lot of views (like a billboard on the side of the highway). But the business owner doesn’t pay for views, they only pay when a user clicks.
The best part? PPC advertising is about finding customers who are ready to buy through search history, audience type, and a whole lot of data.

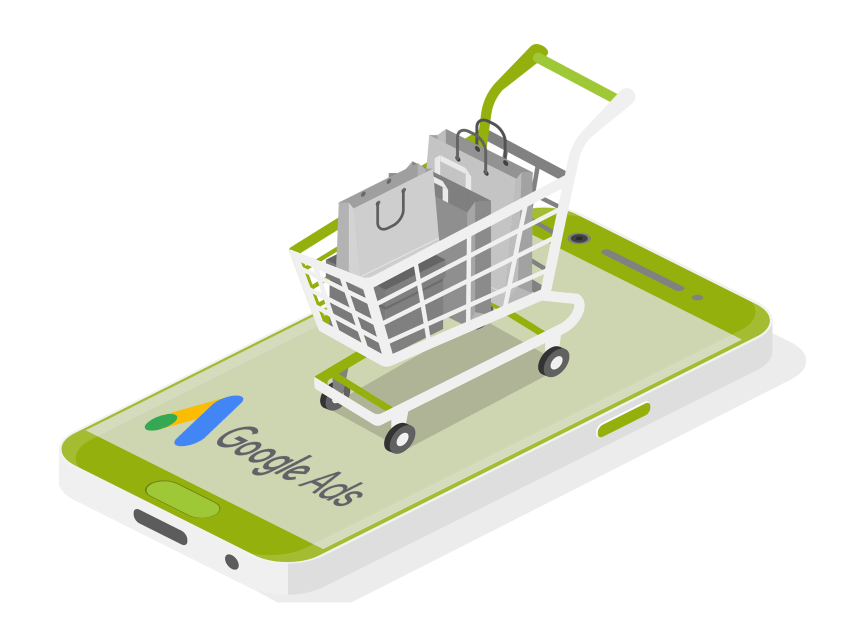
Why Google Ads for eCommerce?
Google Ads for ecommerce is the most effective form of PPC (pay per click) advertising on the planet.
Think about it:
The term “Google” has become synonymous with “answer.”
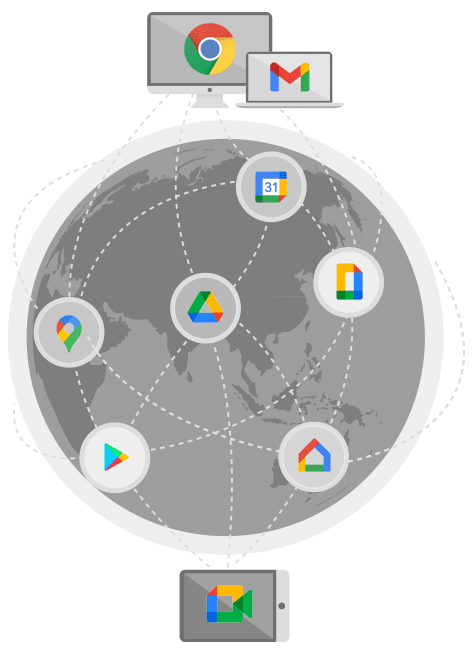
We’ve been trained to turn to Google with every question we have. And Google is so much more than a search engine, it is also YouTube, email, apps (like Google Calendar), Google Maps, and Android.
…And, Google collects information about us all, and can therefore predict intent—which means Google can put somebody who’s willing to buy your product in front of your ad (sometimes before the user even knows they want to buy)
Need a Refresher on the Basics of Google Ads?
Download Our Ultimate Guide to Google Ads Here.
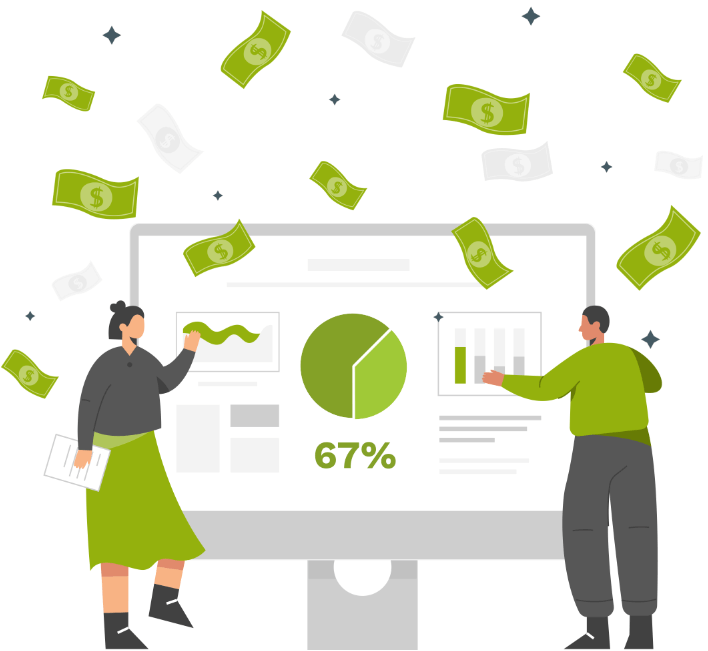
In fact, 67% of all high commercial intent keyphrases go to a paid ad.
We’ll reiterate:
When someone wants to buy, two out of three(!) of those Google searches result in clicking on an ad.
That tells us that when people are in the learning phase of the buying process, they go for organic search results.
But when they are ready to buy—customers click the ads.
What Is Google Ads?
Want to know a bit more about Google Ads and how it works before committing to building your own campaign?
For all those foundational questions (like how a Google Ad appears or how the Google Ads auction works) you can learn all the basics first here.
Or:
Download Our Ultimate Guide to Google Ads Here.
Is Google Ads Right for Your eCommerce Business?
One more thing before we go any further:
It’s imperative to determine if Google Ads is right for your business.
For most businesses, the answer is yes. But there’s a catch. It takes time to build, launch, and optimize campaigns—and ultimately, see results.
That means you need to have realistic expectations. Here are seven quick questions to consider first:
1. Are you ready to commit? It typically takes about 90 days to determine if there’s potential for a predictable, scalable growth schedule.
2. Can you afford the cost to get the ball rolling? You’ll want to spend at least $1,000-$1,500 per month at the bare minimum; but we recommend starting at a $2000 minimum.
3. What are your business goals? Ask yourself:
- Do I know my close rates?
- Do I know how many leads I need to make a sale?
- Do I know how many leads each month I need to make a profit?
By establishing your specific goals, you can determine if you can successfully run a Google Ads campaign in the long-term.
4. How is the quality and speed of your website? We recommend your website is:
- Fast
- Mobile responsive
- Informative
- Easy to use
5. Can you handle an influx of traffic?
- Are you going to answer your phone when customers call?
- Will people call you directly, or will you have a sales team that’s trained and ready to take calls?
- Are you fully stocked and ready to ship?
- Can you accurately forecast how much product you need?
6. What is your audience size and location? If you’re local and rural—with only a handful of people nearby—your audience size might be too small. In this case, Google Ads probably doesn’t make sense for your business.
7. Are you ready to be competitive? “Make sure your ad spend [is] competitive enough to make sure you get enough clicks,” explains John. Otherwise, Google Ads won’t work in your favor.
There’s no way to guarantee Google Ads will work.
But, you can use our Estimates and Projections Calculator to predict the success of your business’s campaign.
How Google Ads Works: The Google Network
We tend to think of Google as the search engine, right?
But the Google ecosystem is massive and includes:
- YouTube
- Gmail
- Apps (think Google Calendar)
- Google Maps
- Android
- The Google Display Network
And for every piece of “real estate” owned by Google (email, search engines, YouTube, apps) there is a way to advertise (i.e. a campaign type).
Different Types of Campaigns
Let’s briefly cover the different types of Google Ads campaigns:
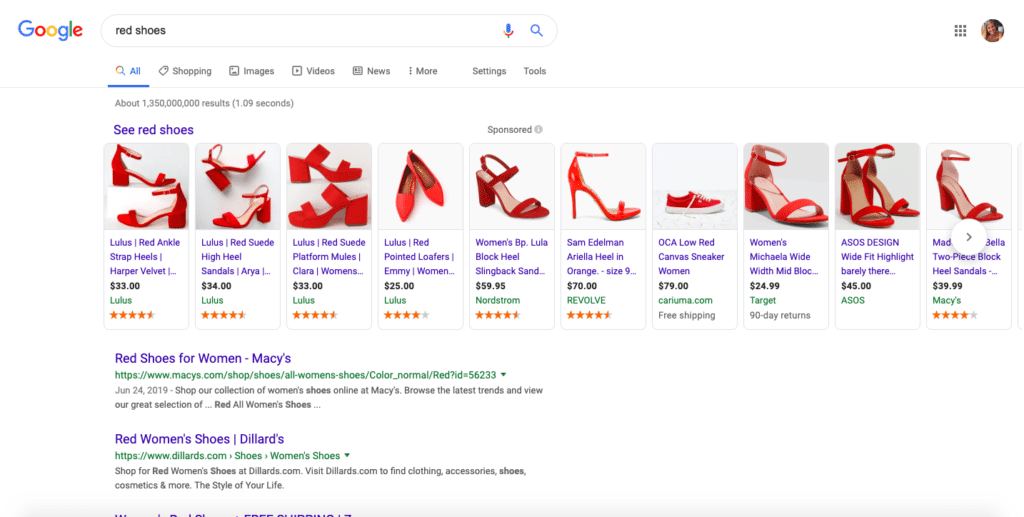
Google Search Campaigns
This is the campaign we generally refer to when we talk about Google Ads.
Again, you’ll recognize these ads as the first results that pop up on the top of a Google search results page:
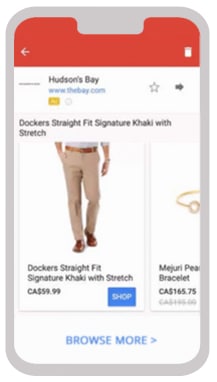
Google Shopping Campaigns
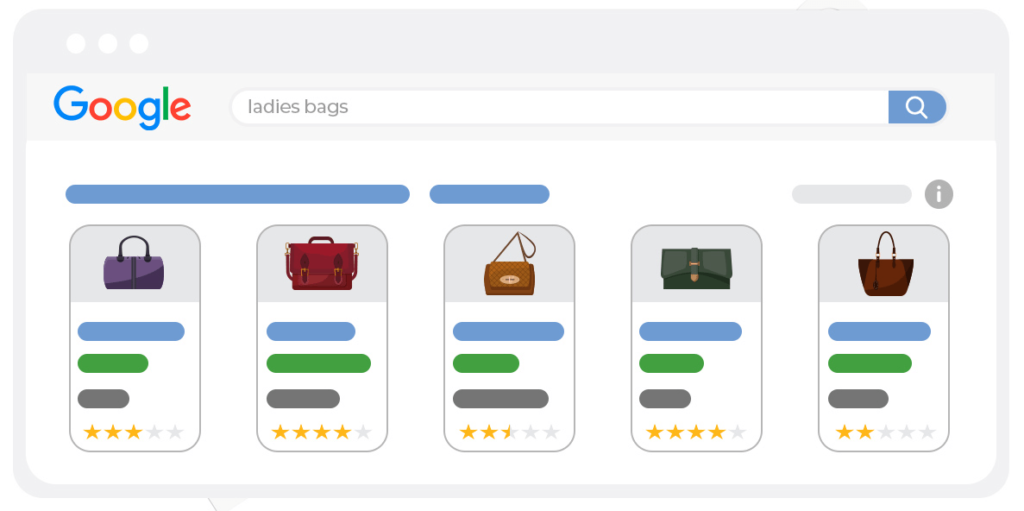
This campaign type exists inside Google’s shopping ecosystem but can also be expanded to other types of responsive display ads.
Google Display Campaigns
Websites that allow advertisements to take up space on their pages. The ads are usually an image (see: “display”).
Video Campaigns

Video ads that pop up before, after, or in the middle of a YouTube video.
These video ads can also appear at the top of a YouTube search:

But! Video campaigns are not just for YouTube. These types of ads can appear through Google display network (see above) and other areas of Google’s ecosystem.
App Campaigns
Promote your app across Google’s networks, including Google Search, Display, YouTube, and Google Play (the app, game, ebook, and general entertainment store for Android devices).
Performance Max Campaigns
Algorithmically controlled automated ads on Google and across the web.
Google Discovery Campaigns
These ads are pushed across the entire Google ecosystem.
Believe it or not, there’s more.
But for the sake of this guide, our sanity, and your business, we’re going to do our best to simplify the campaign structure in a way that’ll apply to the majority of businesses. Please be aware: there are many exceptions and it is difficult to offer “golden rules” because of how unique every business is.
Standard Shopping vs. Performance Max
You might be wondering what the difference is between Standard Shopping campaigns and Performance Max campaigns inside Google Ads.
Here’s a quick overview of how Standard Shopping campaigns work:
- You (the business owner) send your product feed (the listing of all the products on your website) to Google using a Merchant Center account.
- You set your budget.
- Google uses your feed to create “placement shopping ads” that appear on relevant search results pages.
These ads include a photo of the product and its correlating information—a step above standard text ads.
These ads ensure the user sees all the important “must-know” details about your product before clicking—therefore, each click is (in theory) made by a more qualified lead.
However, Performance Max campaigns take standard Shopping campaigns a giant step further.
With Performance Max, you still:
- Send your product feed to Google via a Merchant Center Account.
- Create a campaign and set your budget.
- …And Google still pulls your product information to create placement ads that appear when a shopper searches for a relevant product.
But, that’s just where it begins.
Read the Ultimate Guide to Performance Max Here
Why Performance Max (Previously Smart Shopping) Is The Most Powerful eCommerce Advertising Tool on the Planet
Unlike Standard Shopping, Performance Max uses algorithmic targeting to show ads to very specific users.
How specific? We’re talking about users who have shown high intent and interest in a product based on their past search activity.
Performance Max uses all of Google’s channels to advertise: Search, display, youtube, gsp, shopping, etc.
And with such powerful algorithm targeting, you no longer have to do the heavy lifting of pushing prospects strategically from the top of the funnel to the bottom.
Instead, PMax goes through their massive user database and matches your ad with the best user who’s ready to buy from you right now.
How? Dynamic Prospecting.
Dynamic Prospecting Vs Remarketing
Dynamic Prospecting uses information about your current users and your products to find new prospective customers.
On the other hand, Dynamic Remarketing shows ads to those who previously visited your website or engaged in your ads.
Dynamic remarketing, while a bit controversial, does have its place in Google Ads campaigns for eCommerce businesses. However, it needs to be set up appropriately—which is something we’ll go over in Part Six.
Are we moving too fast already?
Take it back to basics with our Ultimate Guide to Google Ads!
Part Two
Before Building a Campaign: Prerequisites
eCommerce Business Planning: Must-Haves
eCommerce Business Planning: Nice-to-Haves
Offer Design
Optimize Your Existing Products
Ascension Models and Value Optimization
Choosing a Product / Niche
If you made it this far, Google Ads must be in the cards for your eCommerce store.
But hold on! Before we can get started, we need to make sure your eCommerce business is set up and ready to scale.
eCommerce Business Planning:
Must-Haves Before Building a Google Ads Campaign
You are hereby (lovingly) forbidden from building a Google Ads campaign until you have the following six items:
- Reasonable monthly spend
- Appropriate time expectations
- Quality website
- Enough margins to support a traffic campaign
- Unique selling proposition
- No one-off products
- Completed customer avatars and assets
- Robust data feed
- Average order values that support paid traffic
Let’s explain:
1. Reasonable monthly spend
Think of your monthly budget early on as an investment.
You are buying data you need to understand what works in your campaign, what doesn’t, and where to make changes—in a reasonable amount of time.
With that investment, Google will start to build an audience specifically for you that you will capitalize on later. And it will be worth it! You *must* have enough monthly ad spend to accumulate enough accurate data for testing and optimizing down the road.
For context, here at Solutions 8, we won’t take a client whose budget is under $1500/month (and even then, we strongly recommend a minimum of $2000).
Budget under $1500 per month? Maybe you want to hold off until it’s more feasible.
Google is a learning algorithm. The first three months are going to be the most “painful” part of your campaigns. Which brings us to our next requirement:
2. Appropriate time expectations
It bears repeating that Google is a learning machine. And learning takes time.
In fact, we’re asking Google to do some pretty spectacular behavioral analysis.
In the past, our rule of thumb was that it took 90 days for a campaign to be fully optimized and ready to see some results.
This meant after 90 days, we would have enough data to determine whether or not the campaign would work long term.
But with the introduction of Performance Max, the 90-day guideline no longer applies. Instead, it takes roughly 45 days just to see what you’ve built and how it’s going to work.
Essentially, Day 46 is now Day 0.
Once Google has gathered and analyzed all the available data, then you can start to see how the foundation you put into place will perform over time.
Put simply, it takes time to successfully optimize a campaign and position it to scale. But more often than not, being patient during that initial learning period pays off in the long run.
3. Quality website
This one may sound obvious, but here goes:
Your ads will send prospective customers to your site. Therefore, you need an appealing, easy-to-navigate website.
See, we live in the age of the educated consumer. Long gone are the days of the ol’ click-to-convert model.
Site visitors want value.
They want to learn.
They want to feel connected and understood.
Your website should be full of quilty content that showcases your products, learning materials, readily available answers to common questions—all in a website that is fast and easy to navigate.
And with Performance Max in the mix, a campaign-type with more reach and a greater ability to learn from your site, SEO and quality content has never been more important.
This is why you need more than a single page website. You need to help them get to know your product and who you are.
Oh, when it comes to eCommerce platforms, particularly ones that integrate beautifully with Google Ads, Shopify is our fave and will be the platform we use in this guide.
4. Enough margins to support a traffic campaign
Running ads takes money. Can your profit margins support these campaigns?
See, you can have a 100% profit margin—but if you’re selling $2 items, your campaigns still might not be profitable.
Unless you have a higher cart value than the original price.
In other words, your products need to be priced highly enough (with the profit margin to support it); otherwise, you’ll rely on customers adding more to their cart than the single advertised product alone (i.e. more bang for your advertising buck).
Quick Tip!
Do you have slim margins but think customers will buy more than one product to make up for it?
There is a way to keep track of your average cart value once you set up your Google Ads campaign. Here’s how:
- Sign into your Google Ads account >
- Campaigns >
- Inside columns >
- Modify columns >
- Custom columns >
- Click on the ‘+’ symbol >
- Name: (you can call it “Avg. Cart Value”) >
Formula: Conv. Value (by conv. time) / Conversions (by conv. time)
*If you don’t use the “by time,” the last possible 30 days may not be all there
5. Unique selling proposition
What’s your unique selling proposition? What makes your company/product different from everyone else?
The more heavily saturated your market, the harder it’s going to be to turn a profit from Google Ads. So, what makes you different?
And *ahem* being the cheapest option isn’t the answer.
Think about your favorite products: what makes them your favorite? Is it the company’s dependable return policy? The quality of the product? The materials used?
Your unique selling proposition is key for the success of your campaigns—specifically longevity and return traffic. After all, it’s six times less expensive to sell to an existing customer than a new one.
6. No one-off products
If you have customizable products (think products that are personalized with engravings, birthstone colors, or photos), this isn’t directed at you.
But when it comes to one-offs, Google Ads will not work.
To reiterate, one-offs are products that you can only sell once (like a unique, one-of-a-kind painting).
And therein lies the problem:
When you make a sale through Google Ads, it is Google’s job to try to recreate that cycle. It’s a learning machine!
But because single products can only sell once, Google has no way to recreate that process.
So, Google uses GTINs to identify and categorize products. But when you sell a one-off product (a single GTIN), that code disappears forever (bye, bye, valuable data).
Do you produce handmade products?
Consider creating multiples of the same product-type (ceramic bowls, for example) and simply acknowledge that they might vary slightly in design due to the nature of handmade products.
Your first sale is always your most expensive in Google Ads. You don’t want every sale to be your first.
7. Completed customer avatars and assets
You need to know the people you sell to on a very deep level: who are they? Where do they live? What do they read? What are their goals? What are their pain points? We do this by creating customer profiles (avatars).
Now, a lot of business owners think in terms of demographics—not avatars.

Here’s the difference:
A demographic is a generalized description of your population of customers (physicians, for example).
An avatar is the sub-type of customer that comes from your larger demographic.
So, using our physician example, this demographic could easily be split into two very different avatars:
Dr. Mike: An older physician in his late fifties to sixties, looking at retirement, with a successful practice and anti-technology.
Dr. Sally: A young physician fresh out of medical school, in debt but looking to get started with her own practice and a solid understanding of technology.
Here, we can see how vastly different these two avatars are within the same demographic.
All this is to say, get specific with your customer profiles.
Once you have your avatars clearly defined, you’ll need assets (photos, videos, and copy) specifically catered to these audiences once you start building your Performance Max campaigns.
Best to start churning out those assets now!
8. Robust, up-to-date data feed
For eCommerce businesses, your product feed will make or break your campaign.
Items sell out.
Prices change.
New styles are introduced.
And keeping your products up-to-date directly impacts how well your campaign performs.
This includes:
- Product names
- ID
- Prices
- Images
- Descriptions
- Attributes
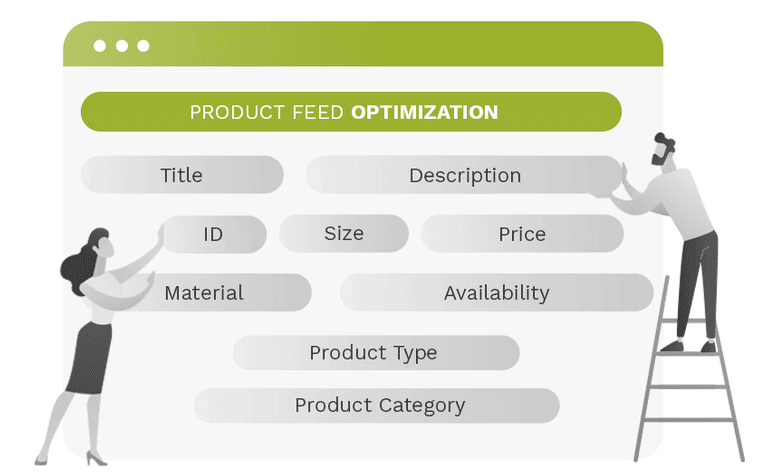
Here at Solutions 8, we use Data Feed Watch (DFW) to optimize client product feeds. It allows us to customize product feed attributes before they are sent to Google Merchant Center (the tool that uploads product listings into Google Shopping, Google Product Ads, and Google Commerce Search).
Whenever there are stock issues, page issues, or 404 issues, DFW stops the ads automatically.
Meanwhile, if you use a static spreadsheet version of your product feed, and a product encounters an issue, Google will still send traffic to those pages (that you can’t commoditize).
This means paying for clicks even though people can’t purchase the product.
In this case, you would see conversion values drop and need to stop the campaigns to investigate manually what was causing the campaign to spend without getting any conversion value.
But it gets worse:
If there is a product issue that GMC catches before you do, it gets “disapproved.”
And if this continues to happen, it can ultimately lead to a GMC suspension which stops all ads.
In other words, a robust, up-to-date data feed saves a lot of time and money down the road.
9. Average order values that support paid traffic
CPCs (cost per click) are always on the rise.
If you’re selling a $20 product, and your average CPC is a dollar, you’ll need a crazy-high conversion rate (over 10%) to break even.
(If you get 15 clicks, you’ve already spent the price of the product!)
A higher average order value (closer to $50-60) gives your campaign some wiggle room for more clicks or conversions, while allowing you to make some money—without necessitating insanely high conversion rates of 10-20%.
eCommerce Business Planning: Nice-to-Haves
Now, assuming you have all six must-haves in order, here are five important—but not imperative—items to consider:
- Multiple SKUs
- Product financing
- Strong lifetime value
- Lifestyle Imagery
- Existing purchase traffic
Let’s explain:
1. Multiple SKUs
Multiple SKUs for “like” products are ideal.
Here’s what we mean:
If a customer says, I need Product A.
And you not only have Product A—but you have 10,000 versions of it (different colors or designs), your customer is much more likely to purchase more than one; thus your average cart value will increase.
2. Product financing
New product financing payment options, like Affirm and QuadPay, have made it so customers can make smaller payments over several weeks as opposed to one large payment up front.
These options have led to a big jump in purchases and cart value, particularly among higher-priced product sellers. The best part? You get paid the full amount upfront!
Add product financing options to your site if you can.
3. Strong lifetime value
Knowing what your real-time value is per customer and how many purchases they make within a year on average allows you to set lower targets for your ROAS goal and higher targets for your CPAs. This means you can scale quickly and grow your business faster.
For example, if you have an average cart value of $100 but customers generally purchase three times over 12 months, your average cart value becomes $300.
4. Lifestyle Imagery
We’ll touch on this more soon, but lifestyle imagery (i.e. images of your product “in action” and being used by real-life people) allows your customers to really visualize themselves using your product. This is especially important with Performance Max.
5. Existing purchase traffic
If you have existing traffic (from social media or email lists, for example), Google uses this information to identify what those people look like and find matches in their own ecosystem/user base.
In other words, instead of starting from scratch, existing traffic gives Google some notes to get going.
eCommerce Business Planning: Offer Design
Who’s your customer? Can you describe your product to a stranger?
…Did I lose you for a minute there?
Look, this is the part where we make you backtrack a little bit (in order to launch full speed ahead).
And it’s easy for most businesses to skip this “offer design” section because they assume this box has been done and dusted for a long time.
But before spending precious dollars on advertising online, let’s make sure you can define:
- Your target audience
- How your product makes customers feel
- And what makes your unique brand stand out amongst the competition
Here’s how:
✔️ Define Your Customer Avatar
Use this worksheet to identify your customer avatar (and who is NOT your customer avatar). The questions in the worksheet help you get in the mind of the customer.
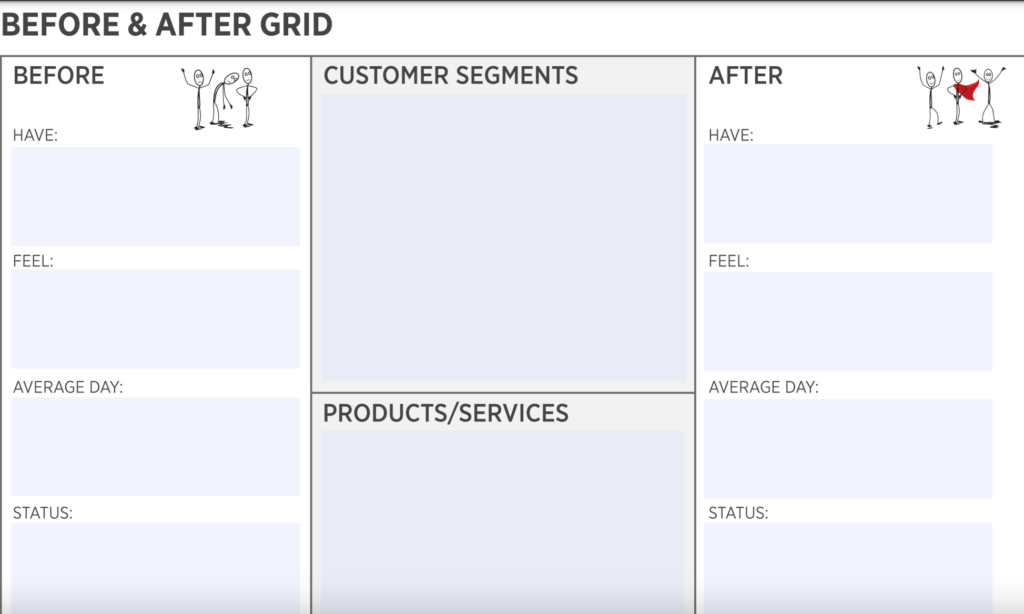
✔️ DigitalMarketer’s “Before and After Grid”
Once you’ve defined your customer avatar(s), it’s time to consider the transformation they make when purchasing your product. After all, customers don’t buy products—they buy feelings, results, and solutions.
DigitalMarketer has a phenomenal “before and after” worksheet that you can download here.
Make a copy and fill it out with your customers in mind, including:
- What your customer has (or doesn’t have) before buying your product—and what they gain once they do.
- How they feel before your product—and how they feel after
- What an average day looks like before your product—and an average day after
Next, consider your Customer Value Journey.
✔️ Brand Development
How does your organization/company make people feel?
Rate it 1-10 (1=lowest, 10=highest). If it’s not yet a 10, what can you do to make it a 10?
If marketing is what makes people buy, brand is what makes people stay–even if there are other products available.
And if you do all the things above, you’ll have the perfect foundation for a strong brand.
Next, Optimize Your Existing Products
Let’s make sure your products and offers are as value-driven as possible. There are three ways to achieve this:
1. Increase actual value
We’re not talking about raising the price of your products here.
Instead, we’re talking about how you can get customers to buy more from you. There are several ways to achieve this:
Bundles! If you have two products that usually go together, offer a bundle for a discounted price. You increase the value the customer receives but you also increase your profitability.
Sure, the price is “discounted,” but you’re saving money on shipping and fulfillment while increasing your cart value.
Tip: You can use the Shopify app Frequently bought together.
Subscriptions! For consumable products (or any other products that can be purchased consistently) consider offering a subscription-based model, which ensures recurring purchases.
We have seen first-hand that some subscription models have the same cost-per-acquisition as a one-off purchase.
One-click upsell!
When a customer is checking out, offer products that can be easily added to their cart with one click.
2. Increase perceived value
Don’t underestimate the power of descriptions and images.
Here’s the thing: online shoppers are at a disadvantage because they can’t tangibly see and feel products like they would in a physical store. However, this can be a big opportunity for you to stand out.
Give your viewer a full virtual experience of your product: describe the benefits of your products, not just the features. Show your product in action with lifestyle imagery, so users can visualize themselves using it. Explanation of the product in a clear, easy to understand way.
Perceived value is more valuable than the actual value.
The perceived value is the reason they buy.
3. Fringe benefits
Similarly, consider any additional creative ways you can add value (and perceived value) to your products. This can be in the form of additional content (think product demos, how-to videos, and tutorials), building a community around your product via social media and forum, or early access.
Ascension Models and Value Optimization
Once you start pulling in more customers and sales, here are a few ways to optimize your growth:
✔️ Never stop selling
It has been proven (with science!) that humans are in a different state of mind when they make a purchase than when they evaluate whether they want to purchase.
Customers are likely to buy another product immediately after purchasing something else because they are in a “buying” state.
Take advantage of that buying window!
Give customers multiple opportunities to ascend and add products based off of their initial purchase.
✔️ Order bumps
This is along the same vein, but it bears repeating:
Order bumps are options to add additional products to your cart and they work.
A great way to do this is through the Frequently Bought Together app on Shopify
✔️ Build your email list/email marketing
When it comes to eCommerce, email has the potential to bring in more money than any other marketing channel.
Truthfully, you don’t want to spend a lot on paid traffic forever (a la Google Ads)! And email marketing is one of the most affordable marketing channels available.
Need to pull in more email addresses from your audience?
Capture contact details using value-driven content that is applicable to your offer (e.g. how-tos, guides, checklists).
Check out Digital Marketer’s Guide to Email Marketing (for eCommerce)
✔️ Repeat and/or recurring customers
It is more expensive to acquire new customers than to sell to current customers. Capitalize on this.
✔️ Build social proof
Customers buy from brands they trust. Social proof has the power to bring in new customers—so be sure to continue building social proof and showcase it on your site.
Don’t be afraid to ask your customers for testimonials and reviews.
Finally: Choosing a Product / Niche
As a precursor, we want to make this clear: be true to your brand. Protect your brand. Don’t change lanes simply because of a flimsy trend.
That said, you can make some pretty savvy and informed decisions by doing some research on the recent market trends—and when possible, use this information to optimize the products you offer to meet these trending needs.
Here’s how:
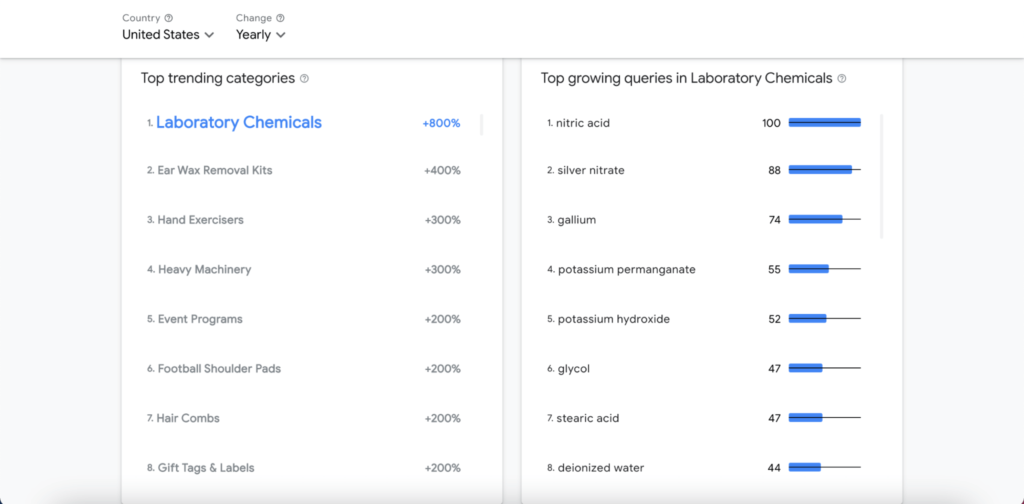
✔️ Rising Retail Categories
Think with Google’s Rising Retail Categories is one of the industry’s best kept secrets. You can use this interactive tool to “understand fast-rising retail categories in Google Search, the locations where they’re growing, and the queries associated with them.”
✔️ Google Trends
Make use of Google Trends; this is a great way to identify trends from a volume/search perspective.
(Watch our Tutorial on how to do E-Commerce Product Research here!).
PART THREE
Setting Up The Foundation
Website CRO Best Practices
Product Preparation
Media (Images and Video)
Lifestyle Images
Robust Titles and Descriptions
Live Chat
Whew!
We just did a lot of work on your brand identity. At this point, you not only know the intimate details of your brand, product, and audience—you know how to best communicate those details.
We discussed absolute must-haves (and nice-to-haves) before launching a campaign; now, it’s time to tie it all together on your website.
First Up: Website CRO (Conversion Rate Optimization) Best Practices
Building an eCommerce store isn’t that hard.
Building an eCommerce store that converts? Now, that’s a different story.
Here are some CRO best practices to ensure your site is ready to make sales:
The Big Three:
✔️ 1. Website Issues and Errors
You can’t drive traffic to a broken website. So, it’s crucial to ensure you catch any website issues or errors.
- Frequently (at least once a month) check your site and make sure everything is working properly and there are no high-risk issues and errors.
- Schedule a website audit at least once a month.
✔️ 2. Website Speed
Website speed has a massive impact on your quality score; in fact, it is considered slightly more important than content(!) according to Google. A few things to consider:
- Mobile users are going to be less tolerant of slower websites due to the smaller size of the device and often slower connection.
- The biggest contributing factor for slow sites are large image sizes.
✔️ 3. Mobile Engagement
- 60-65% of website visits are done on mobile devices. So ensure your site is mobile-friendly!
- Look at your conversion path: although many purchases happen on desktop computers, research is often done on mobile devices. In other words, consider each step of your buyer’s journey so you can make it as effortless as possible.
Conversion Rate Optimization Checklist
☐ Everything works properly
☐ Website is fast (under 2-3 seconds load time)
- (use PageSpeed Insights to measure this)
☐ Your email/phone number is in the header or footer
- Customers need to know they can trust you (i.e. get in touch with you)
☐ Website design is appealing to your audience
- Make sure the design is centered around your product and isn’t a distraction
☐ High-quality images
☐ Products are described clearly with all features displayed
☐ CTAs are in a contrast color (bold!) and easy to find
- Check out BOOM by Cindy Joseph for inspiration
☐ There are reviews on product pages
☐ Verification badges (secure payment, BBB, SSL, guarantees, free returns, etc.)
- This helps improve the trustworthiness of your site and brand
- Turn anything you offer to a badge (free shipping? Make it a badge! Free returns? Badge! Much more exciting than text)
Website Speed Optimization Checklist
☐ Choose a “light” theme
- A good developer can improve your site speed a lot—but make sure you don’t rely too heavily on customization
☐ Scale your images properly
- Try PicResize
☐ Decrease the weight of your images without losing quality
- Try TinyPNG
☐ Limit the amount of plugins/apps
☐ Limit the amount of displayed products on category pages
☐ Check in on your page speed
- Try PageSpeed Insights
- Don’t aim for a 100/100 score—just aim for good user experience
Quality Assurance (QA) Checklist:
Include quality assurance checkups in your monthly standard operating procedures to make sure your site is in tip-top shape. You can do this through internal QA and external QA:
Internal QA: Pretend to be your own customer
☐ Try to break the site
☐ Navigate through your site the way a customer would
☐ Gauge how easy it is for a distracted customer to use your site.
☐ Ask yourself, “If I weren’t paying full attention, could I still do this?”
☐ Make an actual purchase
☐ *You can hire someone to go through your site on fiverr.
External QA: Have someone else pretend to be a customer
☐ Just tell them where you want them to go—but not how to get there
Analyze Top Competitors:
☐ What is different between their website and yours?
Pro-Tip! Diagnosing Issues: Screen Recording Software
You can install screen recording software on your site that tracks users’ navigation via heat mapping (note: it will likely slow the speed of your site). This works on desktop and mobile—so for eCommerce sites that aren’t converting, you can use this software to figure out what’s going wrong along the way.
Here are a few notable options:
Keep in mind: You don’t need to use these apps forever. Diagnostic tools are a great way to assess the state of your website and determine any site optimizations or product additions.
We’ll walk you through the installation process later.
Product Page Preparation
Your product pages are the most important pages on your website. In most cases, it’s the landing page for your traffic: your very first impression.
Many businesses put tons of energy into optimizing their homepage, yet neglect the product pages customers land on. So let’s make sure your product pages are ready to shine:
Product Page Checklist
☐ Product title and subtitle
- Make sure the product title is clear, descriptive, and honest enough for Google to identify the product and send relevant traffic your way (Look at Amazon for inspiration)
- But avoid “keyword” stuffing! Honesty and simplicity are key
☐ Product description
☐ Product descriptions are supplementary to your title
- Use this opportunity to elaborate on the specifics of your product: any particular materials, special features, ingredients that are worth highlighting but would be too long for your title
☐ Product media (images and videos)
- We purchase with our eyes first
- Custom imagery is always going to be better than stock photos, particularly lifestyle images that help customers picture themselves using your product
☐ Nested navigation
- Make sure navigation is clear, easy, and accessible—we don’t want people to get lost
- Use breadcrumbs so users can always find their way back
☐ Social proof (i.e. reviews)
- Customers buy from businesses they trust—Enter: reviews
- Aggregating enough reviews takes time, so ask your customers for a review after 30 days of purchasing and give them an incentive or reward for completion
- The 30-day rule gives you at least a few days/weeks to resolve any issues—and get a good review for it
- Once you have enough five-star reviews, you can add them to your site.
☐ Clear call-to-action (CTA)
- If you don’t tell people what you want them to do they won’t do it
- A clear, bold CTA nudges your customer to the next step
- Isolate the action you want them to take: make the CTA a BIG button (not just a hyperlink)
☐ Clear customization options
- If you offer customized products, make sure the options are clear and don’t overwhelm your customers to avoid cart abandonment
Product Media
When it comes to adding images on your website, here’s the thing:
You don’t need to be a professional photographer. In fact, all you need to create high quality images is:
✔️ A smartphone (new iPhones or Samsung do a really good job)
✔️ A plain white background
✔️ Natural lighting
Don’t zoom in.
Don’t use flash.
And edit your photos if you can (check Fiverr or pixc for outsourcing options).
That’s all it takes!
Remember, your photos should give context and further showcase details of the product. If your product has a unique feature, it’s best to explain what that feature is in the descriptions and show it in your images.
Overwhelmed by how many products you need to capture? Start with your bestsellers. Make sure each of them has a decent product photo and (if possible) short video. 5-7 images per product should be enough.
We are visual creatures. High quality product media will close the sale.
Product Media Part Two: Lifestyle Images
Speaking of product media, lifestyle images are critical for customers to visualize your product in action.
*Remember: Lifestyle imagery is a photo or video of products being used*
Here are some tips:
✔️ Give context
- Hey, your product doesn’t have to be the “main subject” in the photo. In fact, it could be in the background—like this poor Nespresso machine, competing with George Clooney’s eternal handsomeness:

We’d buy it.
✔️ You can use photos from your Instagram or Pinterest
- Speaking of Instagram, you can send your product to influencers (for free) in exchange for promotional content on their page
- Check out imagency.com to find influencers
✔️ Shoot a YouTube overview of the product and paste it on your product page
Robust Titles and Descriptions
✔️ Use the product description to sell the transformation
- The description sells the TRANSFORMATION, not the product
- Use the language that your avatar uses but make sure you also include in the right keywords that Google understands
✔️ Include specifications
- Size, material, weight, features
✔️ Use the product titles and descriptions to communicate with Google
- Google relies on product titles and descriptions to identify products and send relevant traffic—so, make sure they are “machine friendly” (clear and easy to understand)
✔️ Good descriptions can be repurposed
- Save some time and energy! Quality descriptions can be loosely reused for other product pages as well as for ad copy
Live Chat
We strongly recommend live chat on your website. Here’s why:
✔️ Diagnose errors
- Live chat allows you to compile visitor questions and create content that answers those questions for future customers
- Add helpful information to your product pages and place them near the top of your page
*Try tawk.to*
*Check out Shopify’s app integration here https://apps.shopify.com/tawk-to*
✔️ Identify objections
- Live chat can give you insight into what holds customers back from making a purchase—what questions do they ask before abandoning their cart? What concerns do they bring up in the chat?
✔️ Improve conversion rates
- Sometimes, all it takes is a little supportive nudge for customers to make a purchase
- By “being there” through their virtual journey, you have a higher likelihood of making a conversion
Case Studies
Let’s show some examples of sites that have their rock solid foundation in place:
Example #1: MVMT Watches
A dropshipping brand now worth over $100M
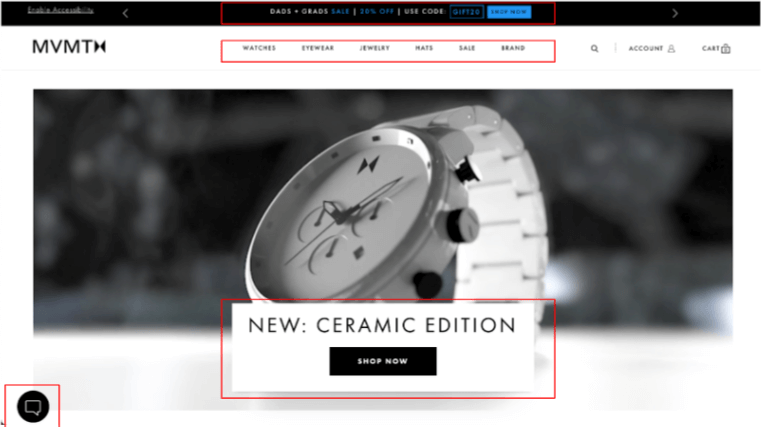
- Easy navigation by categories
- Slider with values (free shipping, sales, contactless delivery, etc)
- High quality images with displayed products
- One highly visible CTA
- Chat
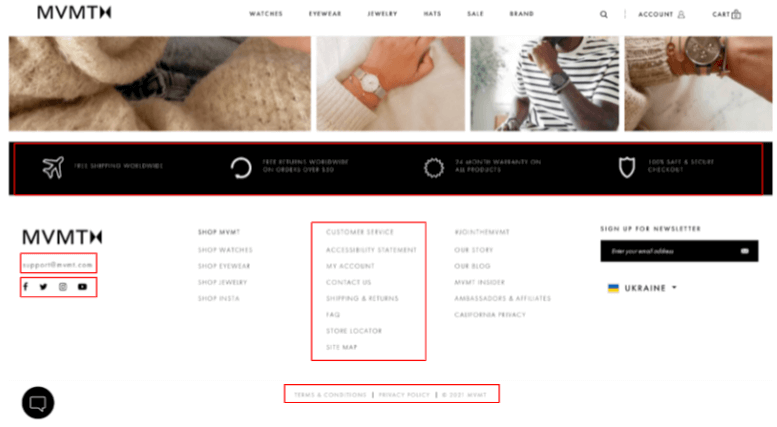
- Well structured “Customer Service” links
- Values as badges (Free shipping, Free Returns, Warranty, Secure checkout)
- Social media centric
- Contact information
- Policies/Terms
- Reviews
- Contrast color CTA
- Upsell that gives VALUE
- Description
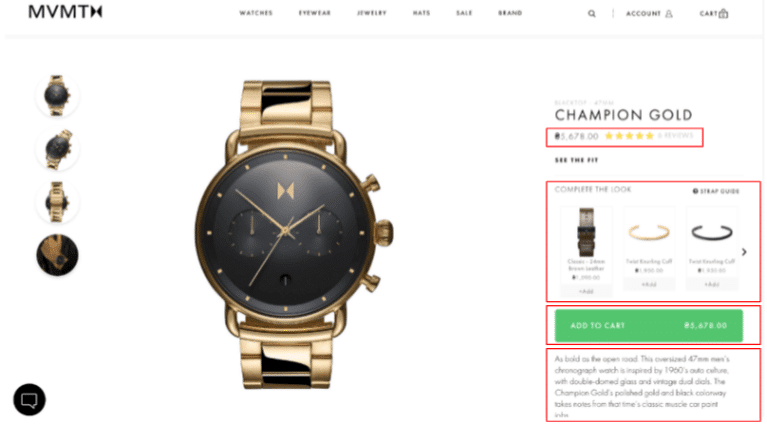
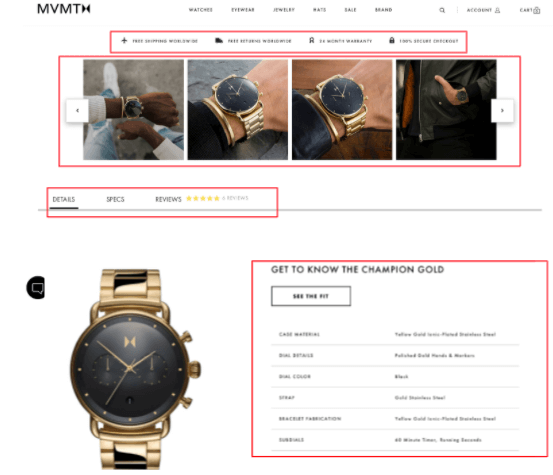
- Badges with values (again!)
- Lifestyle images
- Details
- Product specifications
Example #2: Gymshark
Fitness brand created by a teenager with a $1.4B valuation in 9 years.
- Easy navigation (Womens/Mens)
- Slider with values (Free shipping, sales, contactless delivery etc)
- High quality images with displayed productsOne, highly visible CTA
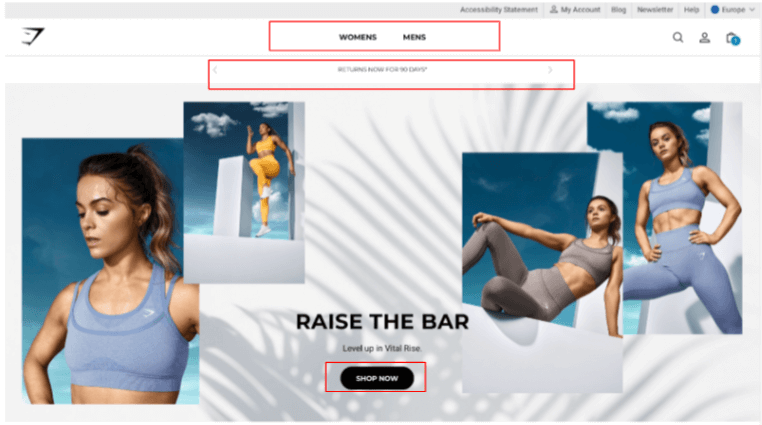
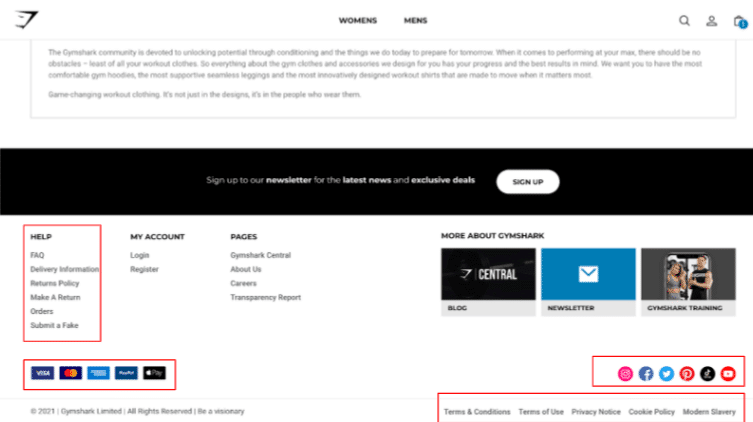
- Well structured “HELP” links
- Payment options
- Social media
- Policies and terms
- Contrast color CTA
- Description
- Delivery and returns information
- Photos of real people
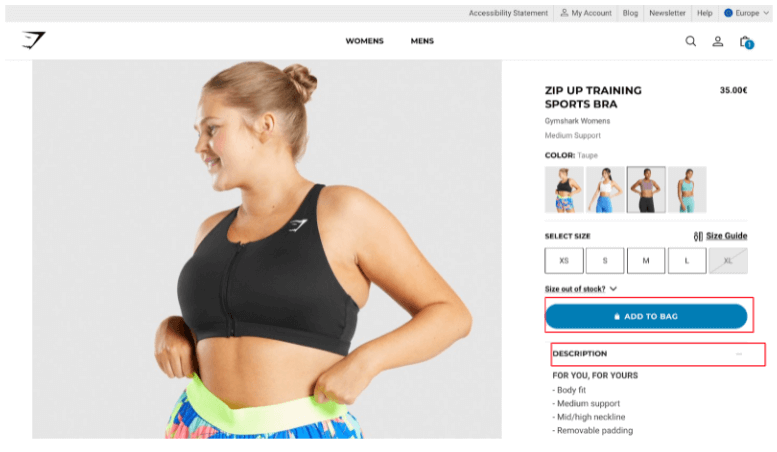
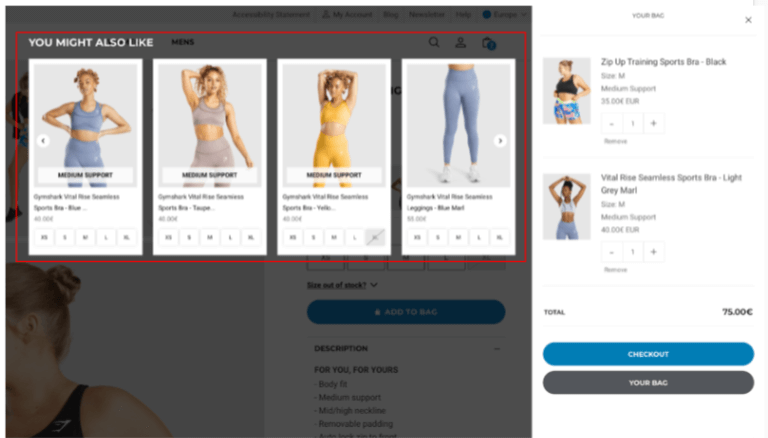
- Creative upsell
- No redirection to cart
Part Four
Technical and Legal Requirements
Welcome to Part Four! By this point, we should know your brand, audience, and products on a deeper level. Your website’s aesthetics and navigation are on lock.
Now, let’s get technical.
GTIN
Ahh, GTIN codes.
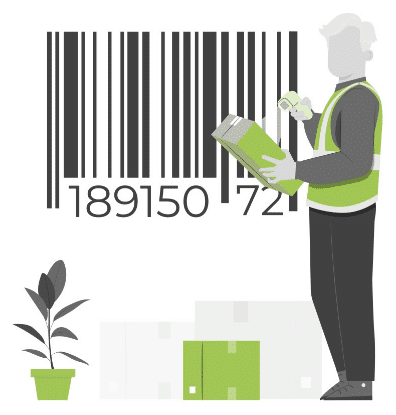
Look familiar?
GTINs are the 16-digit codes you see below product barcodes–and it stands for Global Trade Item Number.
GTINs help Google classify and display your product across all of their e-commerce and marketing campaigns.
Think of it as your product’s social security number. It identifies what your product is, but also stores information about your virtual audience, such as:
- Websites they visit
- Products they view
- Content they consume
- Keywords they use to search
By using a GTIN, you’re taking advantage of crowdsourced data for similar products that are already in the market.
There are a lot of reasons why you should have a GTIN for every product in your eCommerce catalog:
- It allows you to leverage data from similar products in the market that will optimize your Performance Max campaign to scale.
- It allows you to optimize your product without losing data.
- It keeps your audience the same while you figure out the best converting titles and descriptions for your products.
Put simply, GTINs directly impact your Google Ads campaigns in many ways; which is why running into GTIN-related problems inside of Google Ads can be such a colossal headache.
Here are some common GTIN-related issues in Google Ads (and what to do about it):
1. Invalid Value [GTIN]
If you’ve run Google Ads before, you might be familiar with the dreaded Google Merchant Center (GMC) suspension.
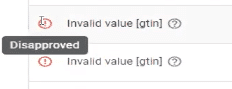
One of the main reasons why GMC disapproves products is because of an invalid GTIN.
This error means you don’t have a globally valid UPC.
When this happens, chances are you got your GTIN from your manufacturer. If so, contact them to fix this issue.
2. Unsupported value (restricted) [gtin] (yellow warning sign)
Unlike invalid GTINs, products with an “unsupported value” error may still be able to run.
Essentially, Google is letting you know that while this particular GTIN isn’t valid, you can still give it a shot. It’ll be up to Google’s discretion on whether to allow it to run or not.
Compliance Issues
✔️ Google Merchant Center: Business Information
Let’s talk about the biggest reason for non-compliance issues.
- You must have at least two of the three pieces of information available:
- Physical business address
- Phone number
- Email address
Here’s the thing: Google is a bot. It scans sites as efficiently as possible to ensure compliance. If your business’s contact information is included inside, say, your privacy policy—Google may miss it. So make sure to include this information on a dedicated contact page. Otherwise, Google could flag your site as non-compliant—even if your business information is available elsewhere.
- Similarly, phone numbers must be highlightable—not stuck in an image.
- If you are uncomfortable sharing contact information, temporarily place them on your contact us page until you are verified by Google. You can remove them later once you’re up and running.
*For brick and mortar businesses*
You can link your Google My Business to Google Ads!
Website Settings (Part One)
✔️ Tracking phone calls
How does Google know when paid traffic calls you after seeing an ad?
What if they make a purchase over the phone?
How do these conversions get tracked?
Ahh, this is where a call tracking platform like CallTrackingMetrics comes in.
This service, which you can sync with Google Ads, gives you a unique tracking phone number (that appears on your website in place of your current phone number) that dynamically changes, depending on the campaign or channel your customer visited, so you always know the exact source of the call. But it can only do this if your phone number is highlightable (i.e. not embedded in an image).
After your lead sees your ad and makes a call, that recording is pulled into an activity log, where you can manually score the quality of that call.
And here’s why this is so important:
Simply counting each phone call to your unique tracking number as a conversion can be wildly inaccurate. It’s important to rank the quality of the call so Google knows whether or not the ad (which led to a phone call) can be attributed to a sale, an inquiry, a concern or complaint—or perhaps a completely irrelevant call altogether.
Suspension Risks
To avoid suspension risks, here are some must-haves:
✔️ Include the four legal policies in your sitemap
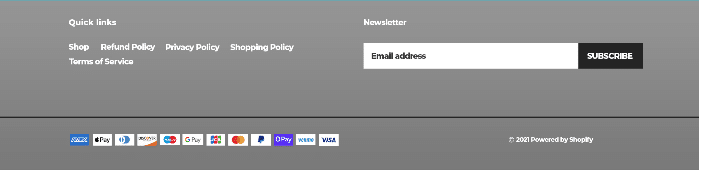
- You should have clickable and working links to your Refund Policy, Privacy Policy, Shipping Policy, Terms and Conditions (or Terms of Services). Make sure they are visible in your sitemap (in your footer).
- To make sure your legal policies will be picked up by Google’s site scan, go to: (yourdomain).com/sitemap.xml to ensure those pages appear.
✔️ Payment options
- Your available payment options must be visible on your checkout pages—do not include any payment options you don’t accept! To be safe, also put them in the footer.
✔️ Beware of restricted keywords in titles, descriptions, reviews, or anywhere in your website
- Avoid using your words/keywords that are restricted by Google. You can find restricted content and features here.
- Understand that Google is a machine and can take any word out of context. If you think it might be a dangerous word-choice—it probably is!
✔️ Multiple disapprovals
- Be careful how many times you test Google. Multiple disapprovals lead to suspension.
✔️ Shipping issues
- If the shipping fee on your feed is $0.01 lower than the website, you’ll get disapproved.
✔️ Starting off with massive sales on all products (misrepresentation)
- If you have a product with a GTIN and you mark the price up higher than the usual MSRP (Manufacturer’s Suggested Retail Price) then discount it back down to MSRP, that will be considered misrepresentation.
✔️ Taxes
- If your website and your feed have different tax rates, you’ll get disapproved. You can have a higher tax (and shipping) on your feed than on your website but not the other way around.
Helpful resources:
- Google Ads show you what was clicked. Analytics shows you what was sold.
- Google attributes the sale of anything on your website back to the original ad (not product) that brought the user to the site.
Part Five
Connecting Your Tech Stack
Website Settings (Continued)
Google Suite (Ads, Analytics, GTM, Merchant Center)
Google Ads App (for Shopify)
Screen Recording
Data Feed Watch
We’re about to get into the nitty gritty.
As we go through the steps to set up your Google Ads account, please keep in mind that we will be using Shopify as our eCommerce platform.
Let’s go!
Website Settings (Continued)
✔️Make sure all products have UPC codes
- Google uses UPC codes to optimize products and catalog performance. These codes help ensure that if you run out of a product, which gets restocked a month later, Google’s algorithm will pick up where it left off—instead of relearning the performance and optimizations of that product.
- We recommended Instant UPC Codes if you manufacture your own products or don’t have UPC codes.
✔️Set up your legal pages in Shopify
- Refund Policy
- Privacy Policy
- Terms of Service
- Shipping Policy
- Your Refund Policy, Privacy Policy, Terms of Service can all use a generic template
- Your Shipping Policy needs to be customized after you download a template from Google (how to return, return exceptions and restocking fee and exchanges)
- These legal pages must be set up before you link your Shopify store to Google Ads and Google Merchant Center
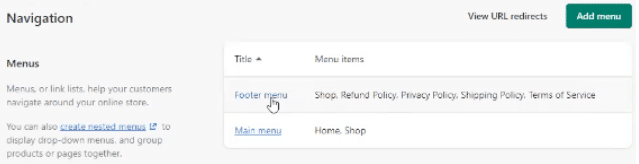
Here’s how to ensure your legal pages appear in your sitemap:
- Go to your Shopify Dashboard
- Settings
- Legal
- Go over your policies and make sure you have Refund, Privacy, Terms of Service, Shipping
- Add them to your pages or footer
Google Suite
✔️Creating your Google Ads Account
Your Google Ads account will be “homebase” for your business’s online ads, settings, and personal information.
- Go to ads.google.com/home
- Sign in using your Gmail Account
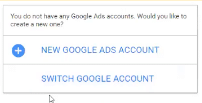
…or create a New Google Ads Account
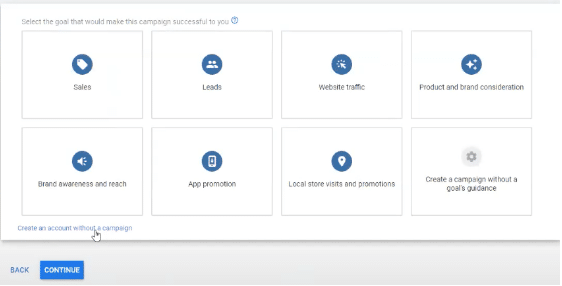
3. Choose Switch to Expert Mode
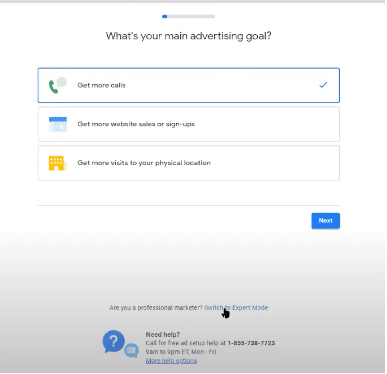
4. New Campaign page > Choose Create an account without a campaign
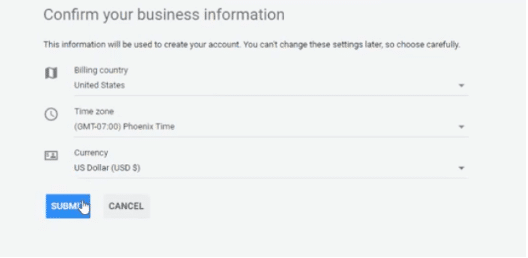
5. Confirm your business information
6. Explore your account
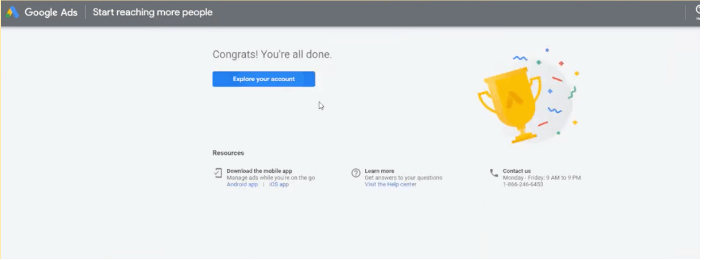
Your Google Ads Account is all set up!
✔️Creating Your Google Tag Manager Account
Google tag manager allows you to install tracking on your website to evaluate the success of your campaigns.
- Go to marketingplatform.google.com/about/tag-manager
- Start For Free
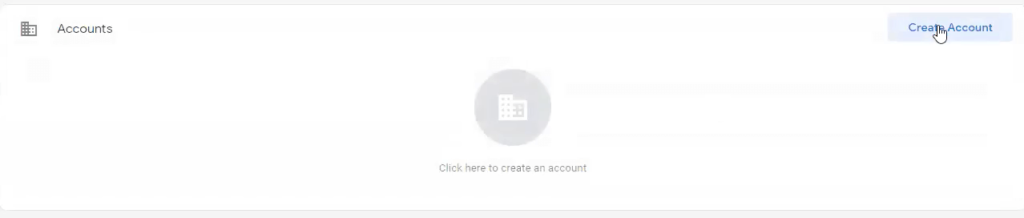
- Create Account
4. Complete your account details
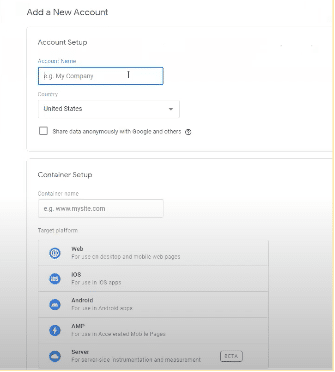
5. Click Create
6. Leave this tab open and open a new tab to create your Google Analytics account.
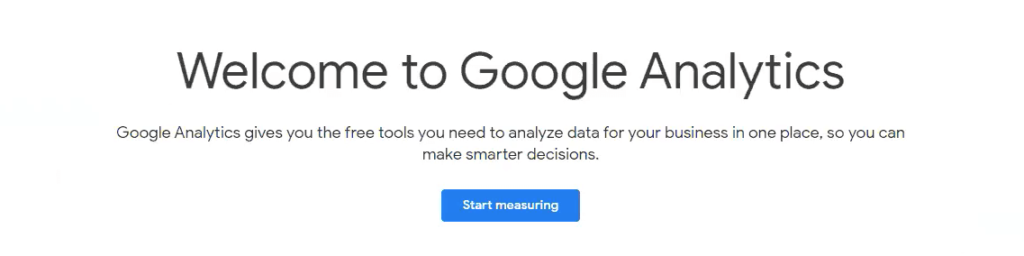
✔️ Creating Your Google Analytics Account
Google Analytics allows you to track, report, and analyze your website traffic.
- Go to analytics.google.com
- Sign in using your Gmail Account
- Start measuring
4. Complete your account details
Shopify doesn’t integrate directly with GA4 yet.
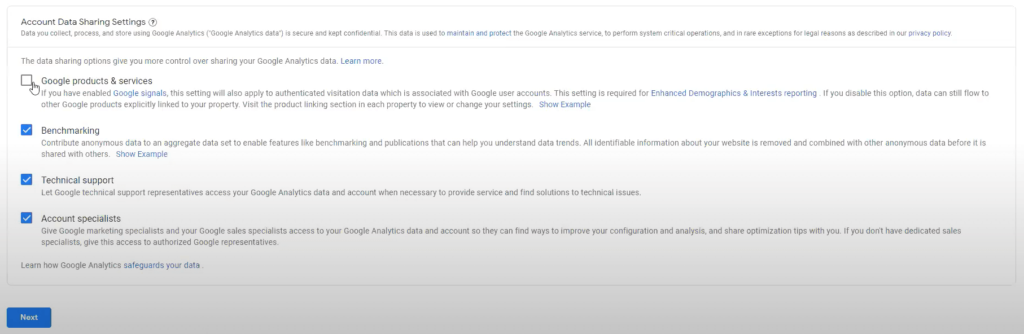
Account Setup:
Account name: https://yourdomain.com
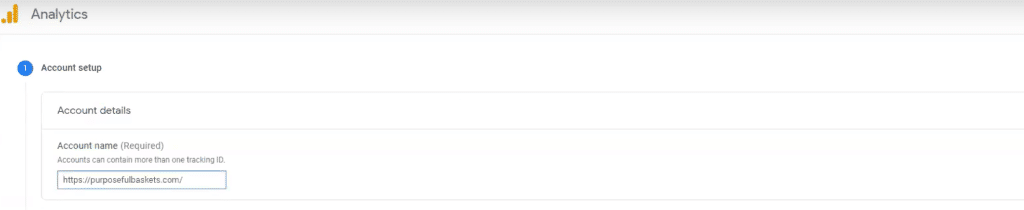
Tick all the boxes
Property Setup:
Property Name: yourdomain.com
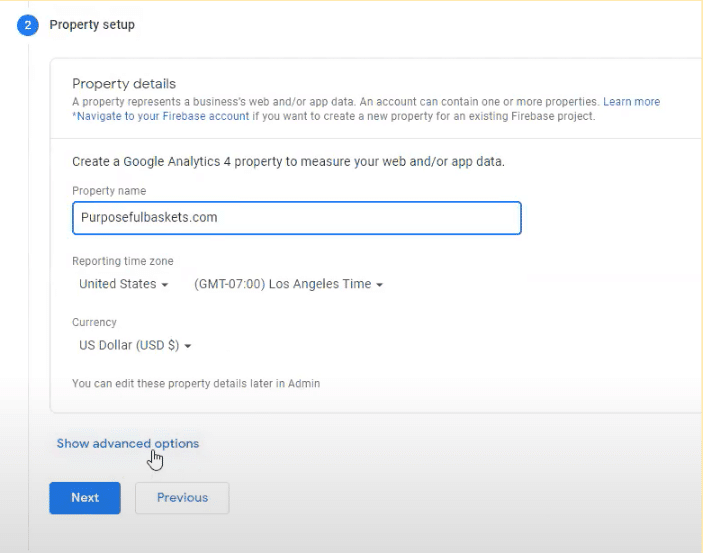
Show advanced options > Turn on “Create a Universal Analytics property”

Website URL: https:// > yourdomain.com

Choose Create a Universal Analytics property only > Next
- About your business
- Choose an industry category
- Choose your business size
- Tick “Other” > Create
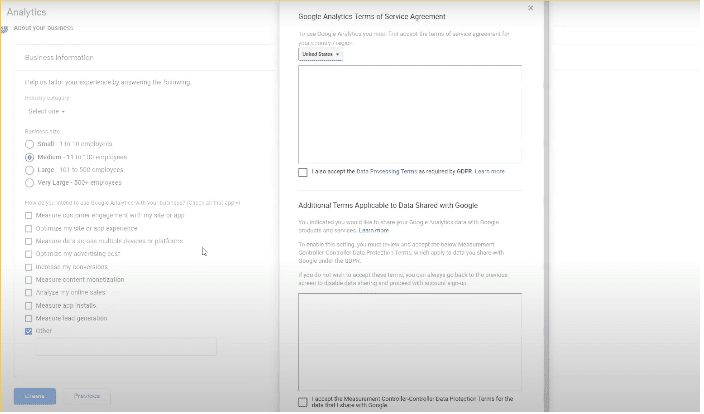
Read and Agree to GA Terms of Service Agreement
My email communications > uncheck all boxes > save
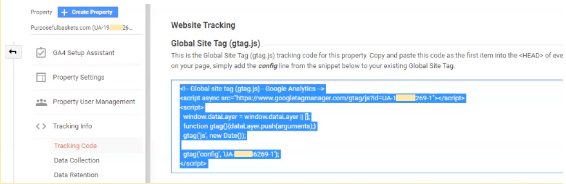
Copy your Global Site Tag.
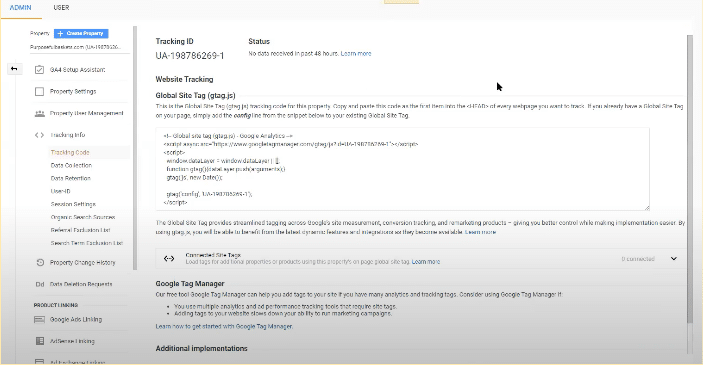
If you aren’t in the website tracking page yet:
Go to Admin > Account > Property > Click <> Tracking Info > Tracking Code > Copy the Global Site Tag Code
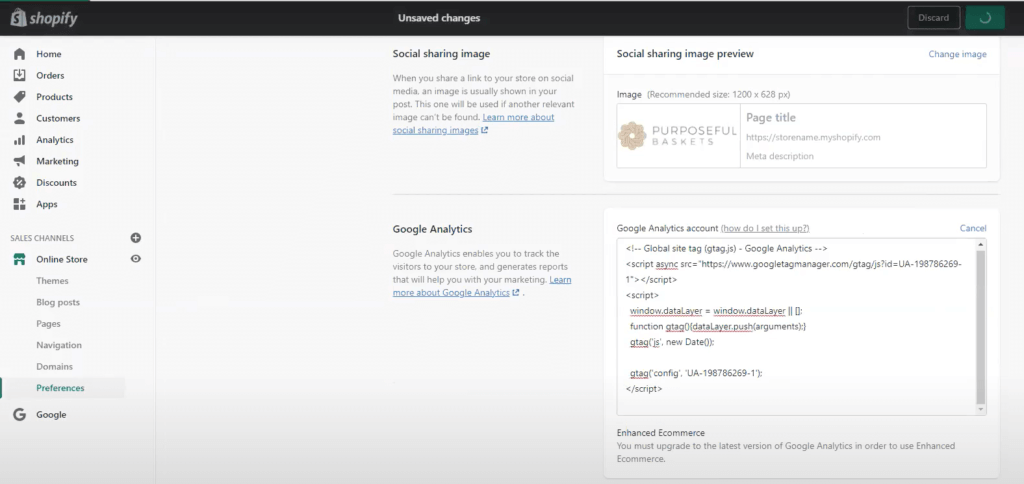
Paste your Global Site Tag in Shopify
Go to your Shopify Dashboard:
- Shopify
- Preferences
- Google Analytics
- Paste your Global Site Tag Code here:
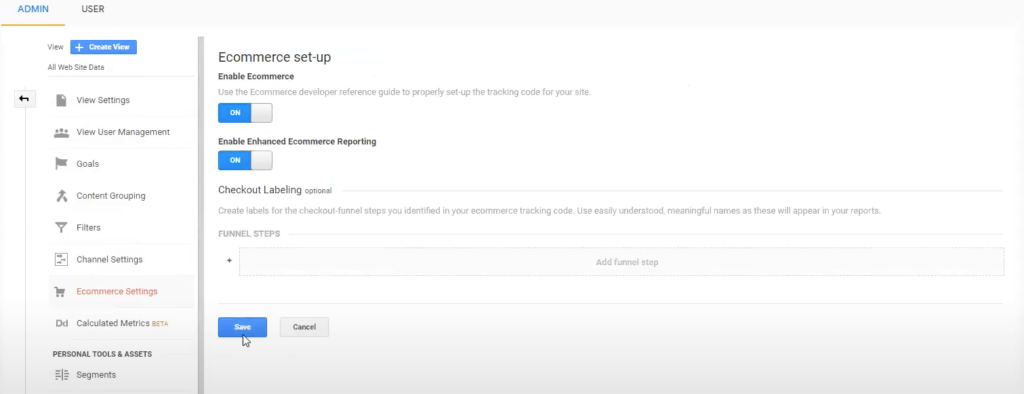
✔️Google Analytics eCommerce Setup
Go to your Google Analytics Dashboard:
- Admin
- Property Settings
- Ecommerce Settings
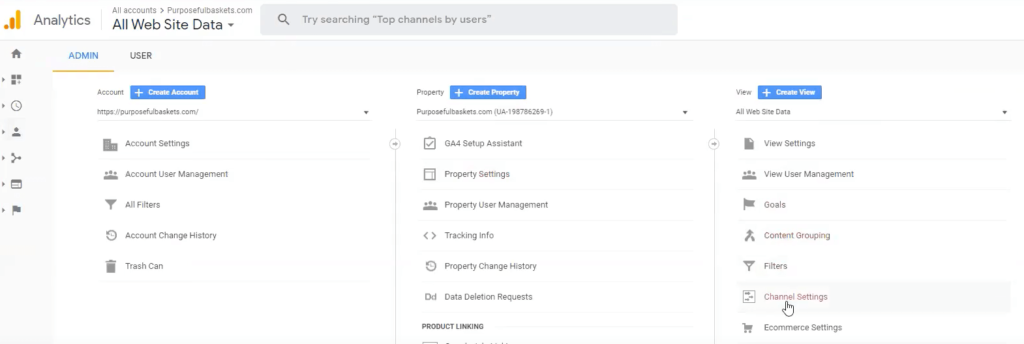
4. Turn on Enable Ecommerce
5. Turn on Enable Enhanced Ecommerce Reporting
6. Save
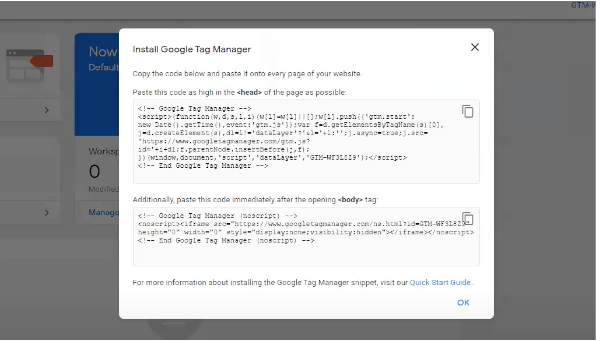
✔️ Connecting Your Google Tag Manager to Shopify
Go to your Google Tag Manager account and open a container:
In the top right corner, you’ll see a text that starts with GTM- and then contains some letters/numbers. That’s your Google Tag Manager ID.

Click your GTM ID > Copy the Google Tag Manager Code
➔Go to your Shopify Dashboard > Themes > Actions > Edit Code > look for “<head>”, paste it under.
✔️Google Merchant Center Setup
Go to google.com/retail/solutions/merchant-center/
- Sign In
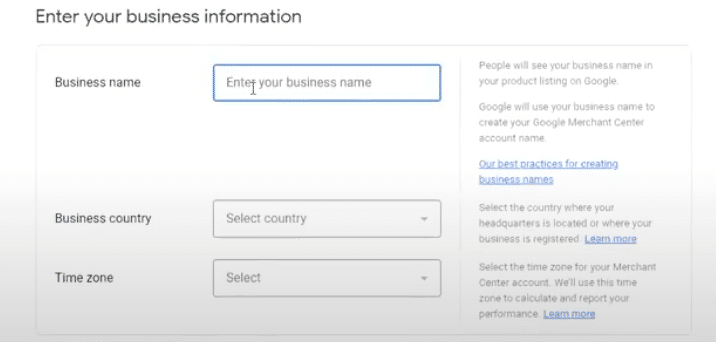
2. Enter your business information
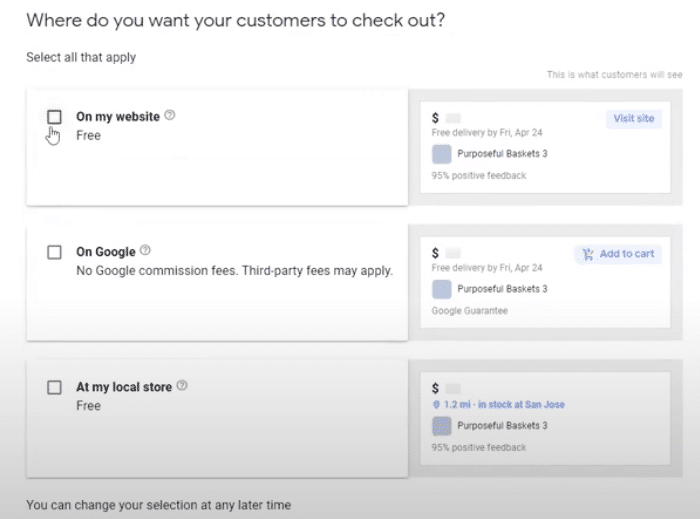
3. “Where do you want your customers to check out?” > Choose which answer applies to you
4. “What other tools do you use?” > For this guide, we’ll choose Shopify
5. “Would you like to sign up for emails about Google Merchant Center?” > Select which answer applies
6. Agree to Google Merchant Center Terms of Service

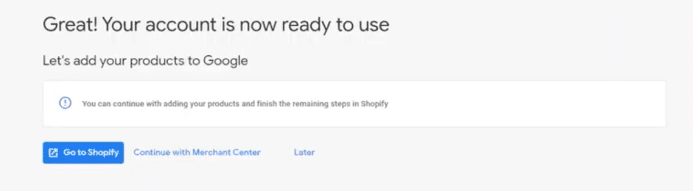
7. Create account
✔️Setup Google Ads Tag
From your Google Ads Dashboard:
- Tools

2. Audience Manager
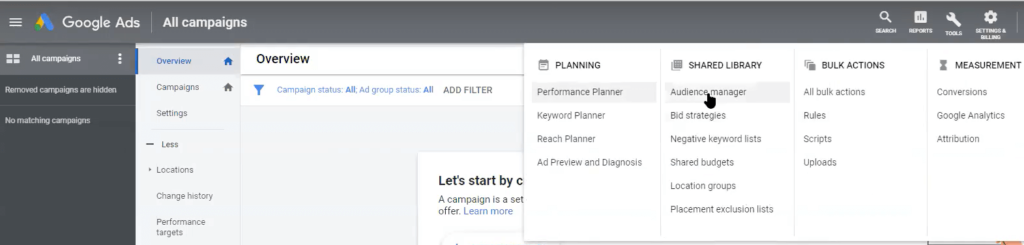
3. Audience Sources
4. Google Ads tag
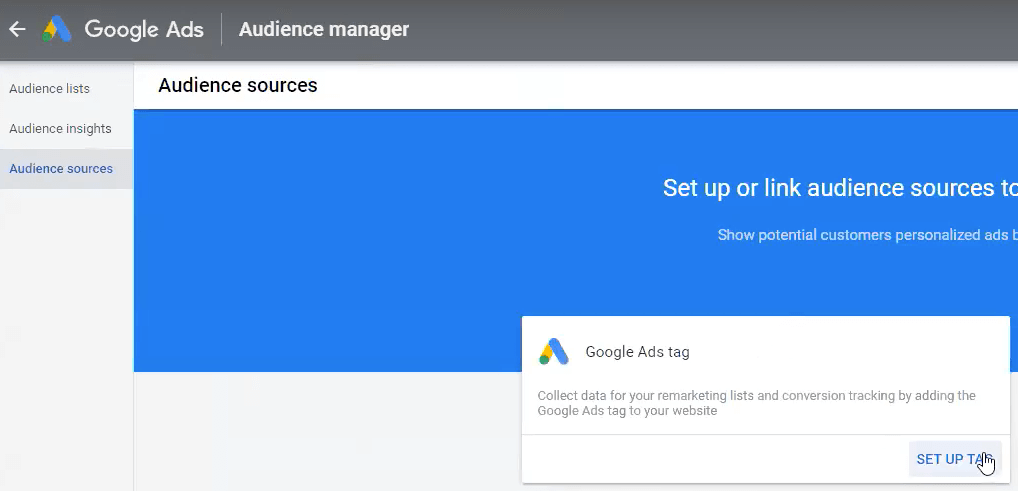
5. Set Up Tag
Create the Google Ads Tag Data Source

1. Remarketing: Choose “Collect data on specific actions people performed on your website to show personalized ads.”
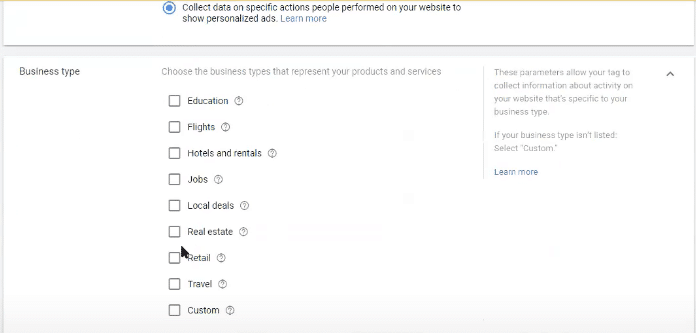
2. Business type: Retail
3. Restricted data processing: Exclude California users from remarketing lists
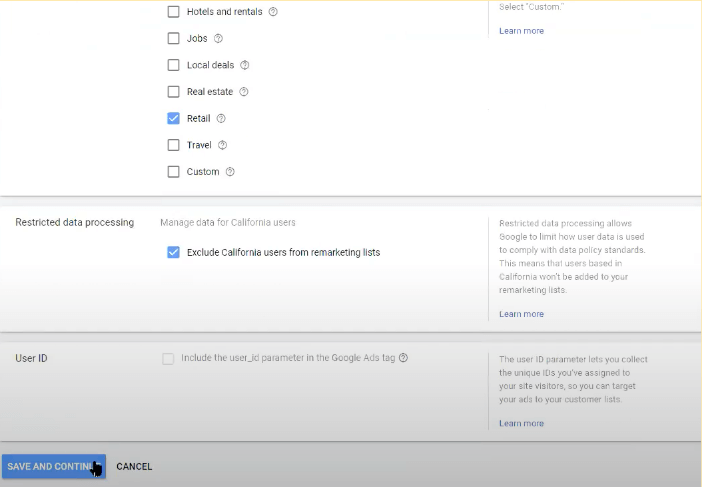
4. Save and continue
Install the Tag on Your Website
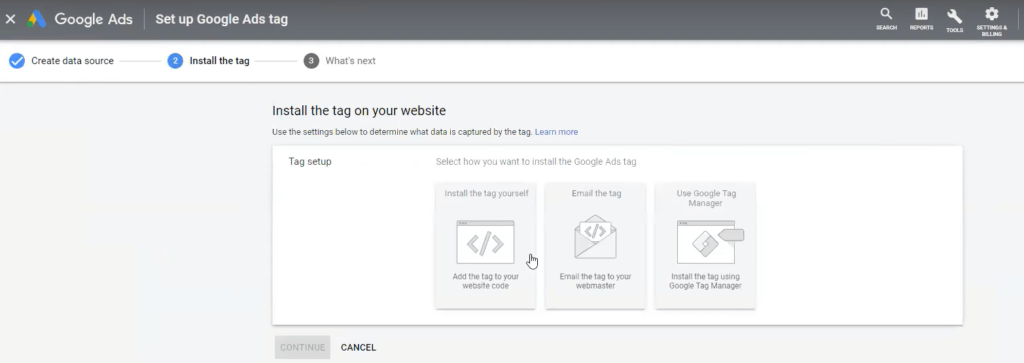
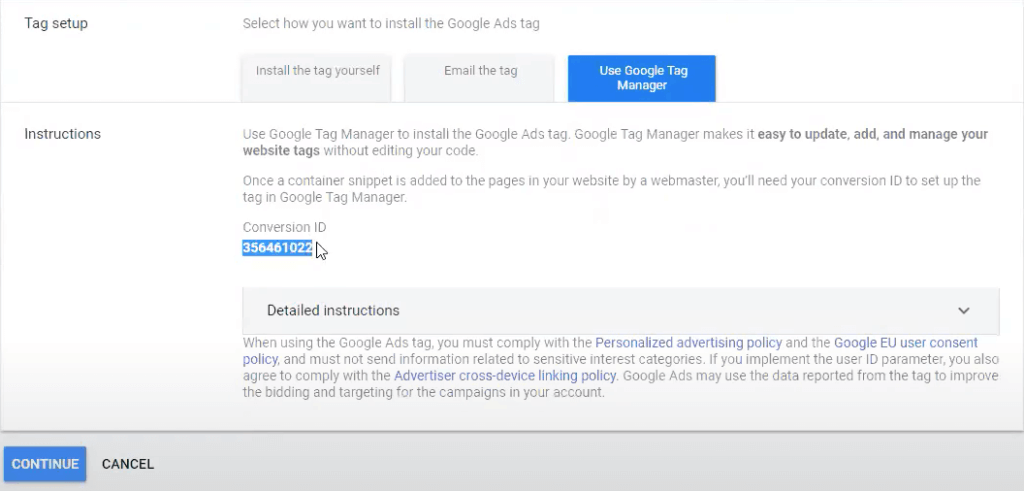
- Tag Setup > Use Google Tag Manager
- Install the tag using Google Tag Manager
- Copy Conversion ID
Go back to Google Tag Manager Dashboard
- Tags
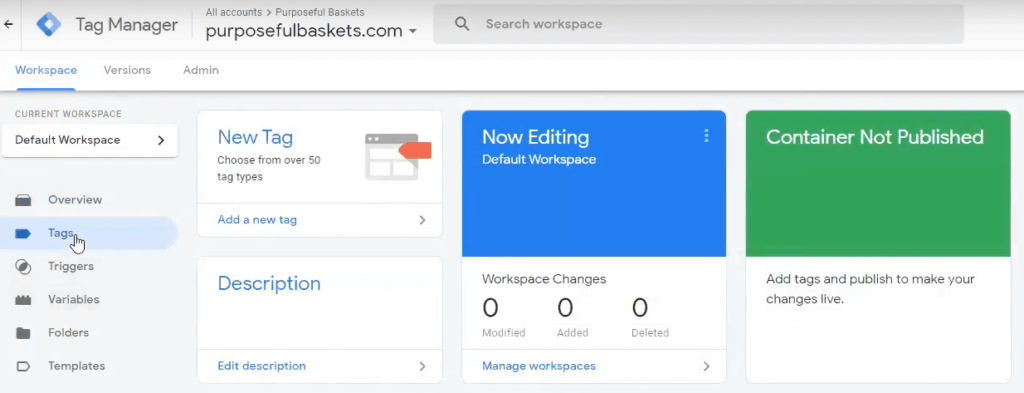
2. New
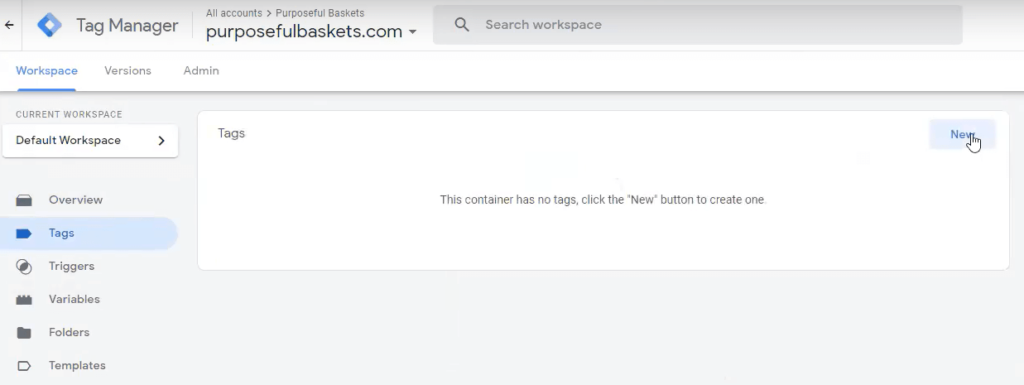
3. Name Tag “Remarketing Tag”
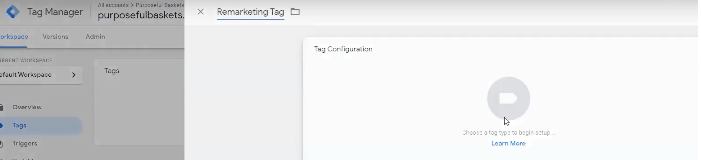
4. Tag Configuration
5. Google Ads Remarketing
6. Paste your Conversion ID
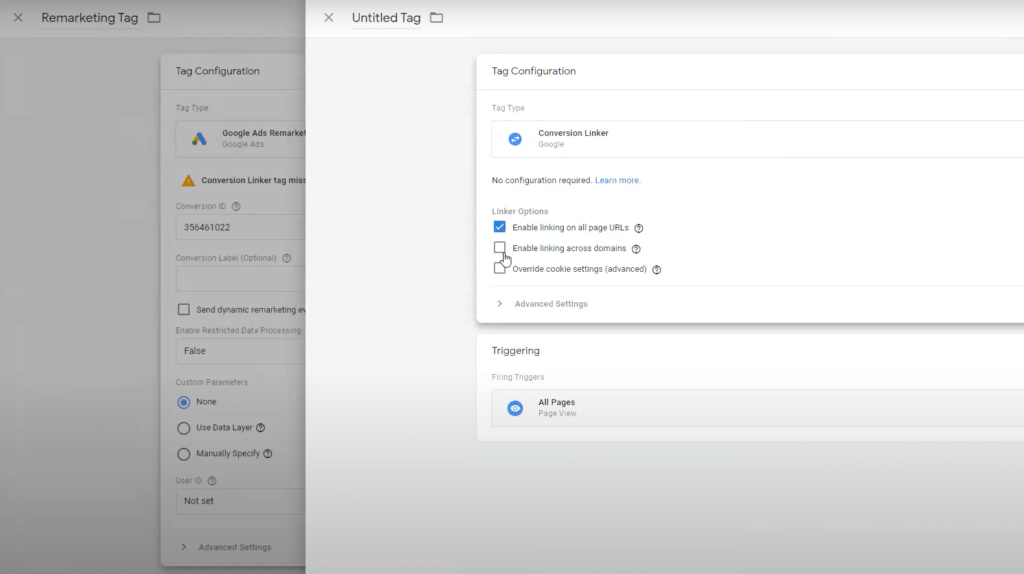
7. Name Tag “Conversion Linker”
8. Tag Configuration > Tag Type
9. “Conversion Linker” Linker Options
10. Tick Enable linking on all page URLS
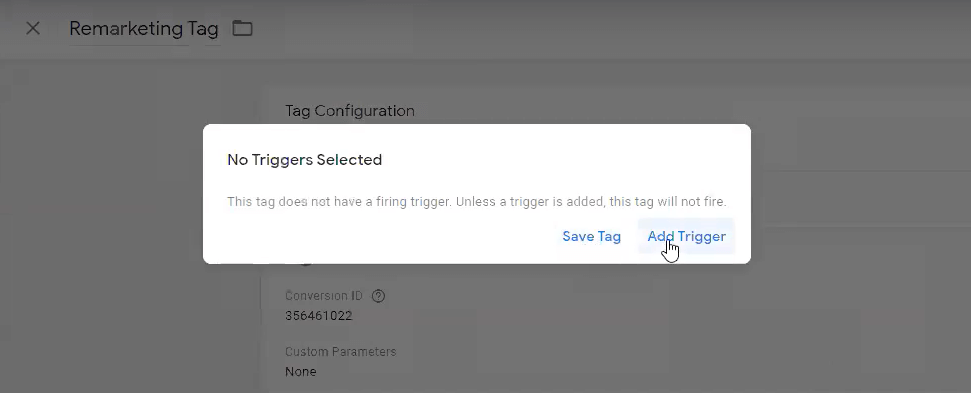
11. Add Trigger
12. Publish
Check if your tags are firing properly
Download Google Tag Assistant plugin and install it.
1. Go to your website
2. Click the Google Tag Assistant (you may have to reload your website after clicking it)
3. Make sure you see all tags (Global site, Google Ads Conversion, etc.) and no errors
Installing Google Ads App for Shopify
✔️Setting Up Conversion Tracking (Shopify)
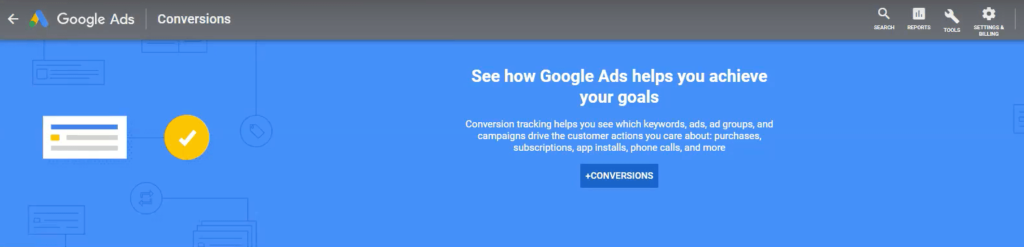
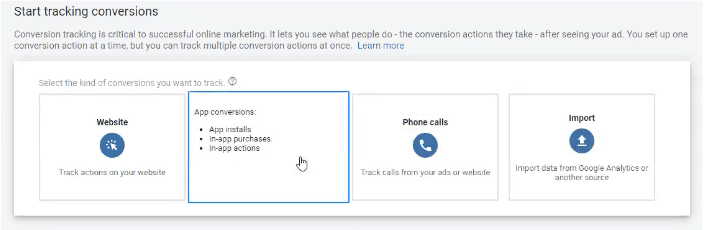
Go to your Google Ads Dashboard > Tools > Conversions > New (+) Conversions > Website
Create a conversion action for your website
1. Category: Purchase
2. Conversion name: Purchase
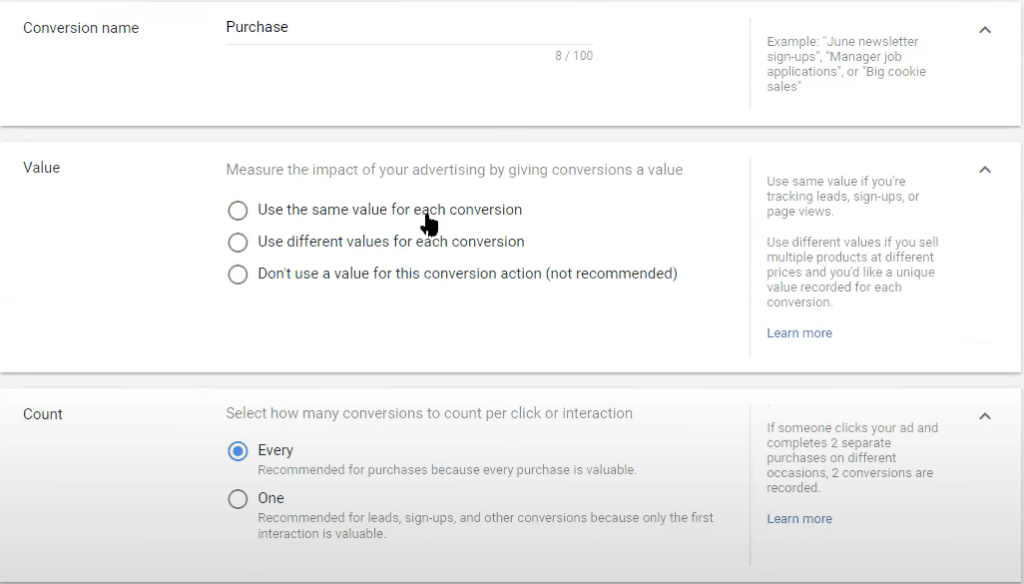
3. Value:
- Use the same value for each conversion—this would only be applicable if you have one single product on your site
- Use different values for each conversion (we’ll use this one) > Enter a default value “1” (we’ll add dynamic values to your tracking code later)
4. Count: Every
5. Click-through Conversion Window: 90 Days
6. View-through Conversion Window: 30 Days
7. Include in “Conversions”: Yes
8. Attribution Model: Default is last click but we now use “Data Driven” for eCommerce businesses running Performance Max, otherwise, we opt for “First Click” > Create and continue
Set up the tag

1. Choose “Install the tag yourself”
2. See code for: HTML (if using standard implementation—if using AMP, select AMP)
3. Global site tag: The global site tag isn’t installed on all your HTML pages (use this if you haven’t installed your global site tag yet)
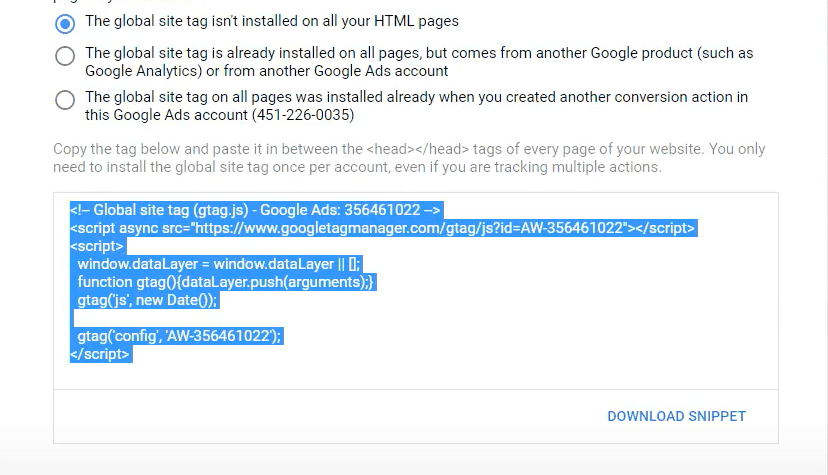
4. Copy Global Site Tag code (this is going to go in your header—no matter which type of website platform you use)
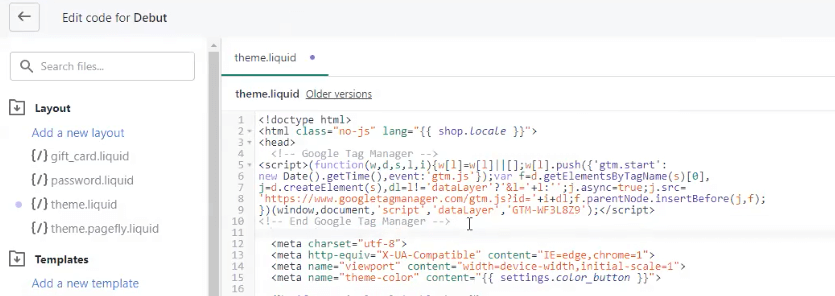
For Shopify users:
Go back to your Shopify account and go to themes:
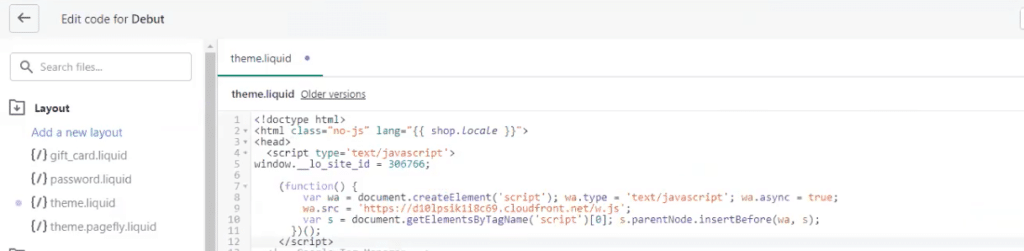
“theme.liquid” > paste the code under <head>
Now, head back to Google Ads
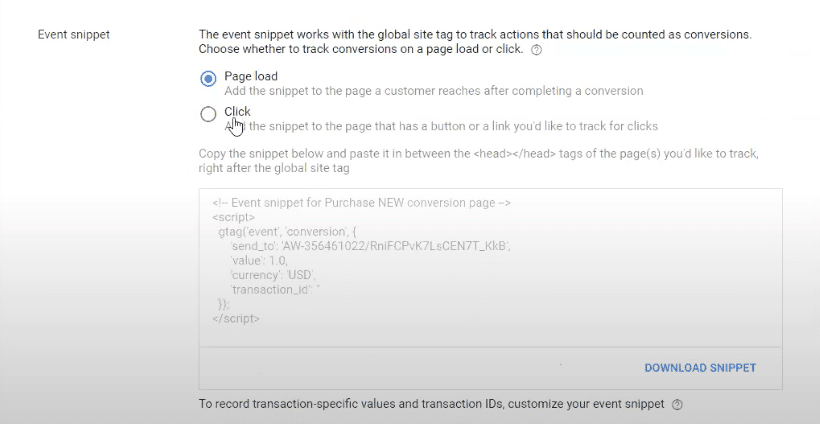
1. Event snippet
2. Select Page Load > copy the snippet
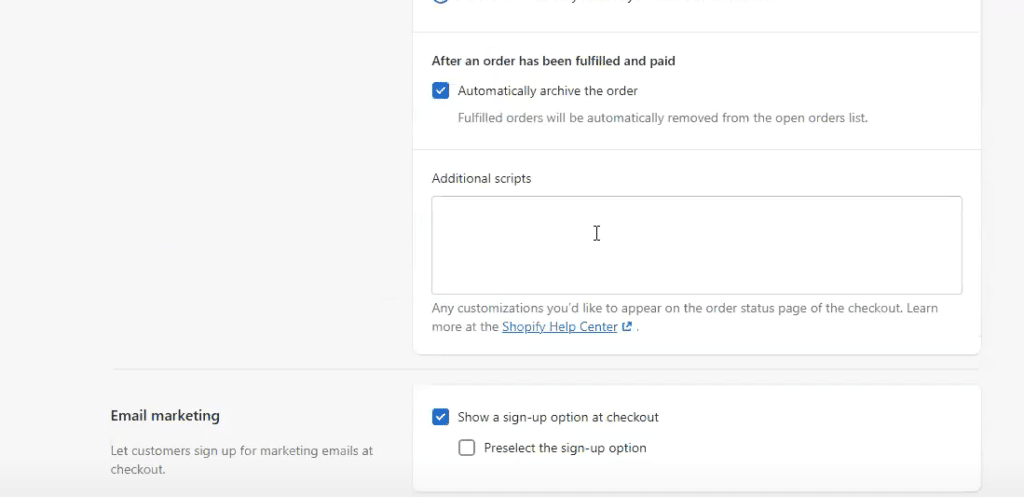
3. Go to back to the Shopify Dashboard
4. Settings
5. Checkout
6. Order Processing
7. Additional Scripts
8. Paste the snippet here
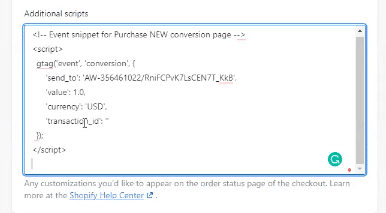
However, now we need to customize the code a bit. At this point, all values are currently marked as “1.0,” i.e. $1.
This is what it looks like before you replace the values:
So, we need to customize this code to ensure the appropriate value is given to each purchase. Here’s how:
- ‘Value’: {{ checkout.total_price | money_without_currency }},
- ‘Currency’: ‘{{ shop.currency }}’,
- ‘Transaction id’: {{ order_number }}”
This is what it should look like after changing the values:
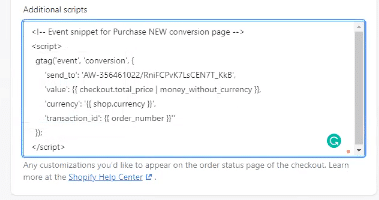
Shopify custom codes:
{{ checkout.total_price | money_without_currency }}
{{ shop.currency }}
{{ order_number }}
Tip:
Reach out to Google Tag Implementation Team if you need support.
✔️ How to import data (Goals and events) from GA Analytics
Head to your Google Ads Dashboard:
1. Conversions
2. Conversion Actions
3. Click the (+) plus symbol
4. Choose “Import”
5. Choose Google Analytics (UA)
6. Continue
7. Make sure your account is linked
Installing Screen Recording Software (Lucky Orange)
Okay, next up let’s install a screen recording software. For the sake of this guide, we’ll use Lucky Orange, but there are several other platforms to choose from.
Let’s go!
✔️ Signing Up
Go to luckyorange.com/
1. Start My Free Trial
2. Sign Up
3. Add a new site
4. Enter your site’s name
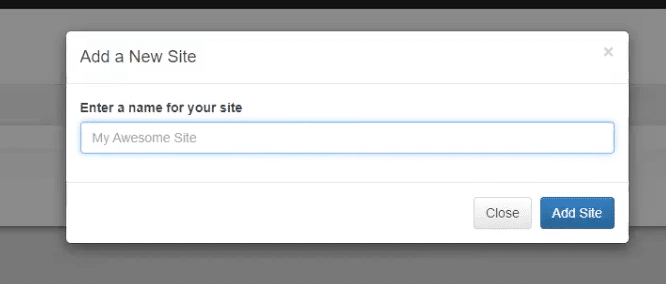
5. Add Site
6. The tracking code will pop-up, copy it
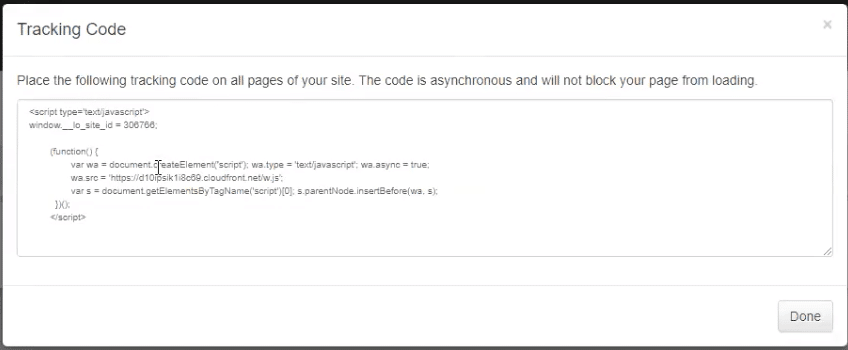
Next, go back to your Shopify Dashboard:
1. Themes
2. Actions
3. Edit Code
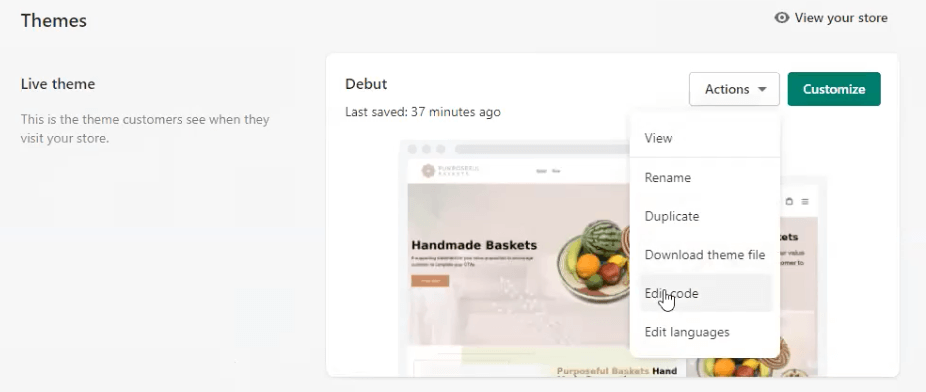
4. theme.liquid
5. Paste the code under the “<head>”
6. Save
✔️ Dashboard Menus
Now what? Here’s what you can do once Lucky Orange (or your screen recording software of choice) is installed:
Live Visitors – click to see who’s visiting your site right now click “LIVE view”
Ask to Chat – click to initiate a chat with your visitor
Recordings – click to view all the recordings on mobile and desktop
✔️ Setting up realtime alerts
If you want to know when a user is, say, on your checkout page (or any other URL of your site)—you can set up triggers to notify you in real time. Here’s how.
Go to Lucky Orange Dashboard:
1. Settings
2. Behavior Tagging
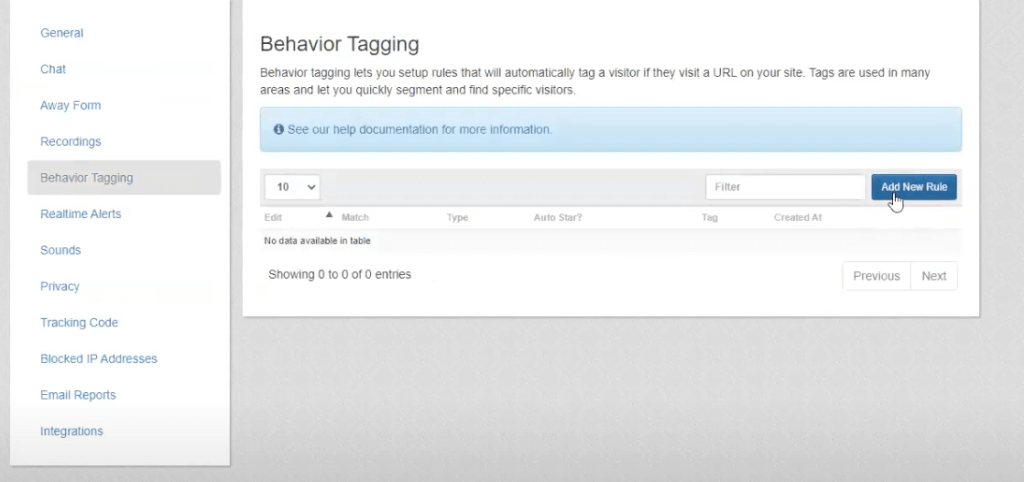
3. Add New Rule
4. Choose “Match URL that contain this text” (URLs for checkout pages typically vary from user to user, that’s why we’re using this option)
5. Select the piece of the URL that remains the same (for example, an alert when someone is on the checkout page might be: “/checkouts/” or “/cart/” — whatever “chunk” appears in your URL)
6. Tag recording with: add a name (e.g. “People on the checkout page”)
7. Add Rule
Finally, go to Realtime Alerts:
- If the visitor is tagged with “(your tag here)”
- Select notification type (sounds and alert box you’d like)
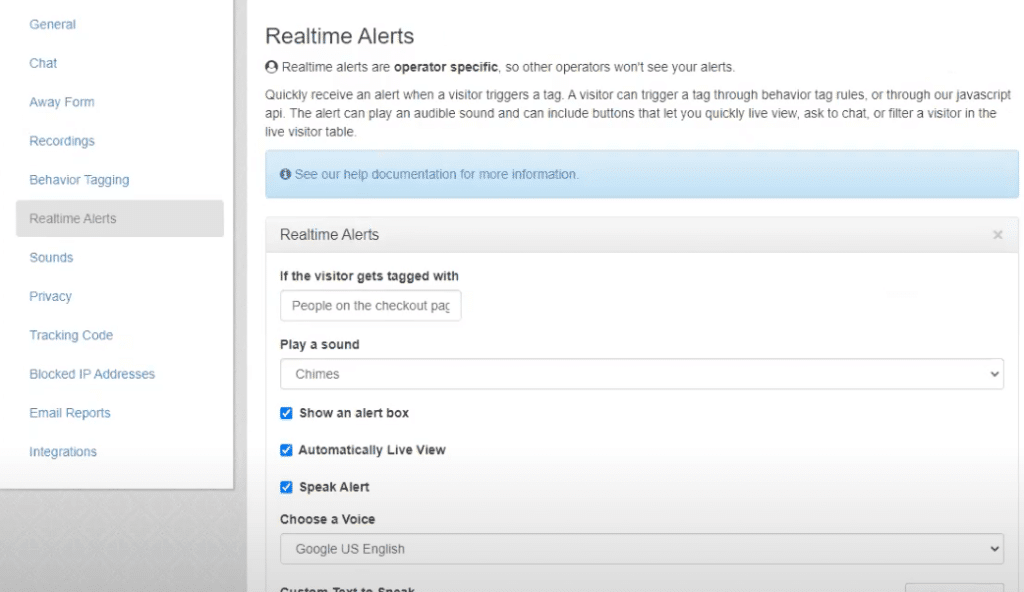
3. Click Add Rule
How to Install DataFeedWatch in Shopify
Now, as an eCommerce business, you use a platform (like Shopify) to distribute your products online. And while these platforms include a basic data feed solution, you simply cannot rely on these onboard feed solutions to optimize your feed.
Why choose DataFeedWatch?
Data feed optimization is their thing—and it shows:
- Clear instructions for every CMS.
- Allows you to make very specific updates in your feed at scale.
- Allows you to make changes without doing anything on your website.
- You can do A/B tests.
✔️ Adding your Shop to DFW
Go to your Data Feed Watch Dashboard > add shop:
- Input feed: Enter Your shop’s name
- Choose your main input feed: Click any that apply (e.g. Shopify)
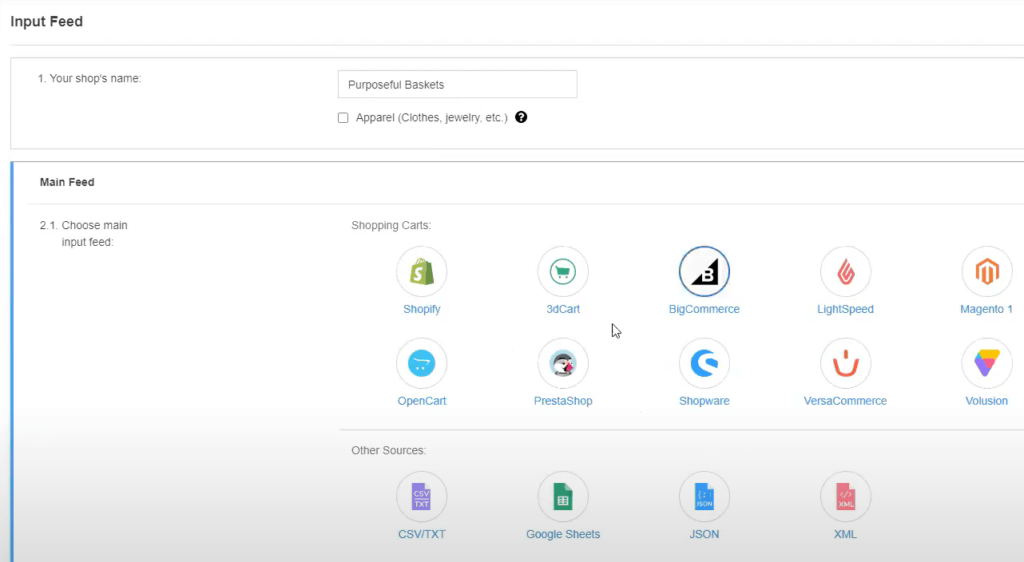
3. Source location: https://yourshopifydomain.com
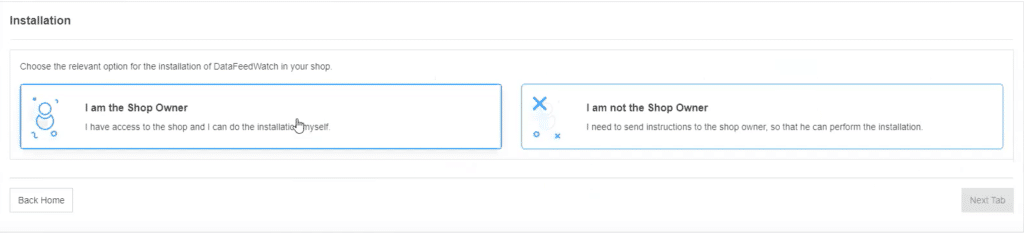
✔️ Installation
Choose “I am the Shop Owner” > Click Next Tab
✔️ Updates Schedule
Choose update timezone: choose your timezone
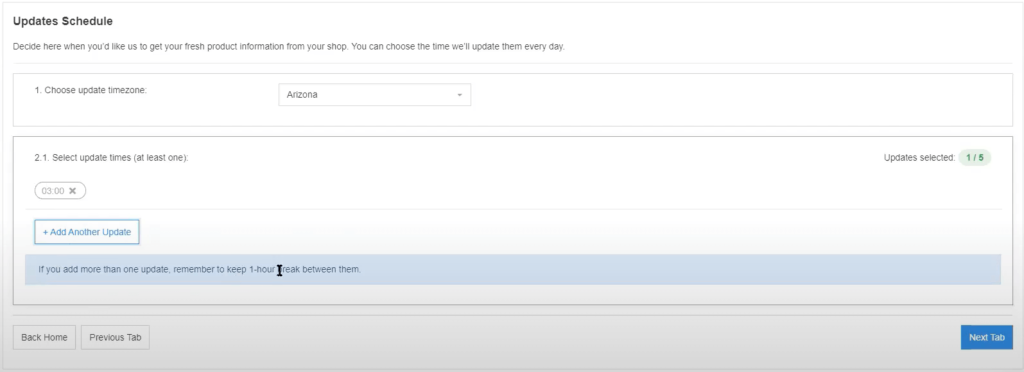
Select update times: choose the time when you want to trigger updates > Click Next Tab
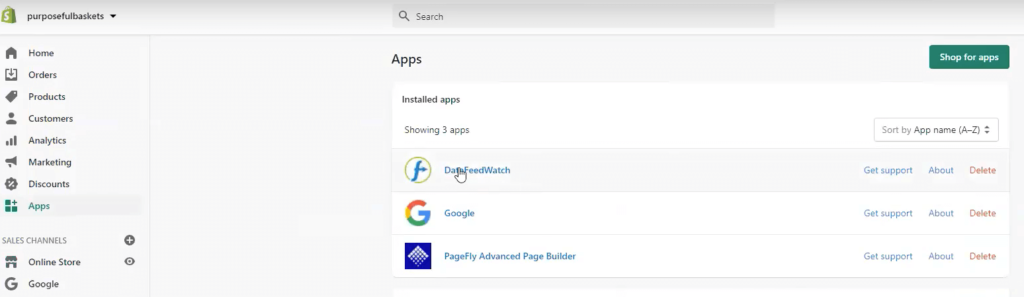
✔️ Download DataFeedWatch’s app inside Shopify
Go to your Shopify Dashboard:
- Apps >
- Search for DataFeedWatch app and connect
✔️ DataFeedWatch Caveats:
- Don’t remove anything–changing titles from Title A to Title B is a landing page discrepancy. Google Merchant will disapprove or suspend you.
- Don’t change the price–the price (i.e. price on the website is higher than the feed). It’s a landing page discrepancy.
- Don’t remove descriptions. You can add but not “remove” because Google will say that what’s on your feed is not your product. This could lead to a misrepresentation.
Part Six
Shopping Campaigns
After all that prerequisite work, it’s finally time to hop into Google Ads!
Because this is an Ultimate Guide to Google Ads for eCommerce, we of course need to begin with shopping campaigns.
Standard Shopping
The most important thing to know inside of Google Ads is what buttons NOT to press. Google will always lead you toward “recommended settings” to get clicks.
Remember, Google gets paid per click. Agencies should give you the most amount of conversion with the least amount of clicks.
Now at Solutions 8, we are big fans of Performance Max campaigns. They generally perform leaps and bounds better than Standard Shopping campaigns.
But, we still run Standard Shopping campaigns. Here’s why:
- Standard Shopping gives us search terms—this is valuable data that tells us what people are searching when they see your shopping ad. The search terms tell you what Google is matching your products with.
Here’s where things get interesting.
If you just run a Performance Max campaign, Google creates ads for your products that live in all ofGoogle Ads’ “locations:”
- Google Shopping
- Google Search
- Google Display
- YouTube
- GSP
Google is a learning machine and will begin to learn from your Performance Max campaign over time. However, Standard Shopping campaigns gather more data faster. And while the success of these campaigns are generally lower—the data is valuable for Google to apply to your “PMax” campaigns (i.e. no starting from scratch!).
Let’s Build a Campaign!
Standard Shopping Setup
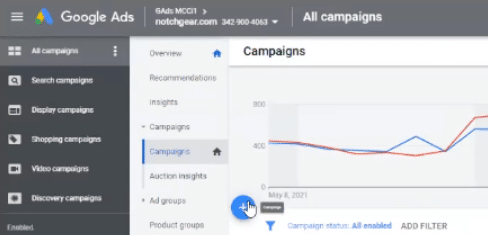
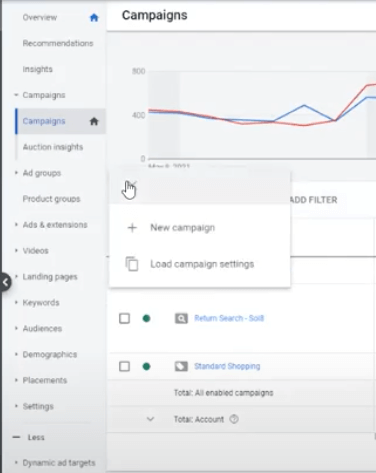
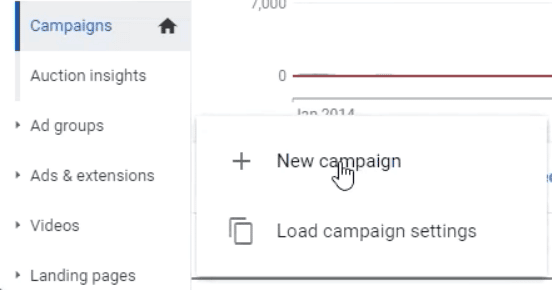
Go to your Google Ads Campaigns section:
- Campaigns
- Click “+” Symbol
- New Campaign
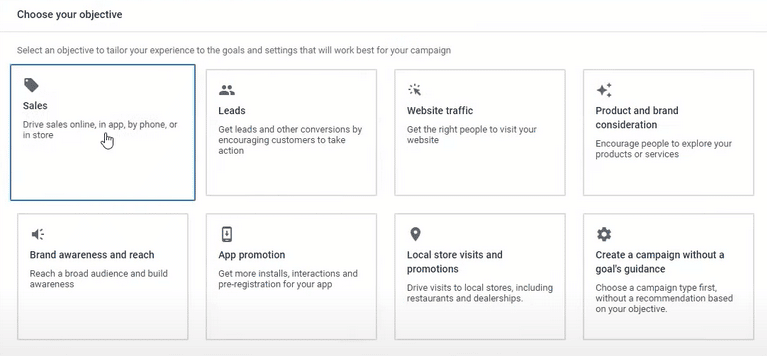
4. Choose Sales
5. Shopping
5. Select a Merchant Center (you should only have one)
6. Select the country where your feed is opted in for
7. Select Standard Shopping campaign
8. Click continue
✔️ General Settings
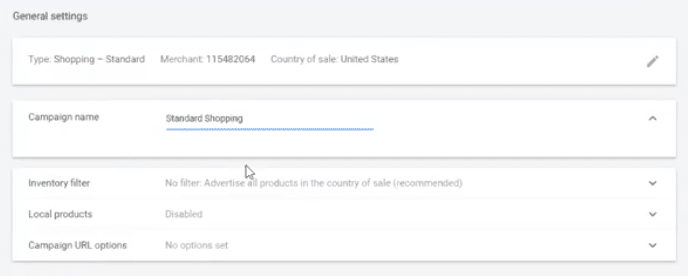
- Campaign name: Standard Shopping
- Inventory filter: You can choose to filter products but we will run all products first. So, leave it to “Filter: Advertise only products that match all of your requirements”
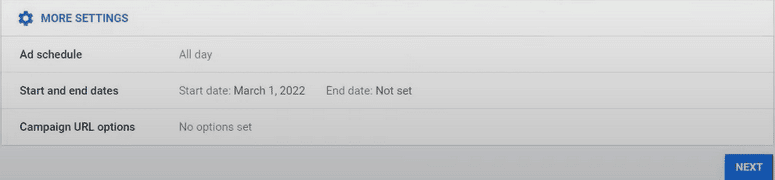
- Local products: Disabled
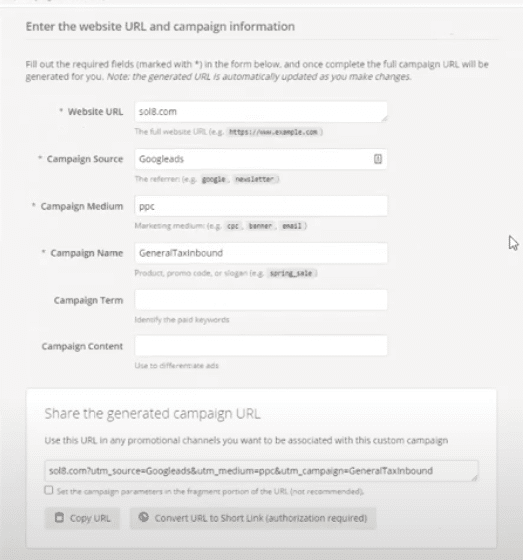
- Campaign URL options: No options set (This is a good way to track whether Standard Shopping or Performance Max is bringing in new conversions. You can set it up at the account level or campaign level.)
- Link to campaign URL Builder
✔️ Bidding and Budget
1. Bidding: Manual CPC
*Here’s why: We like to set our starting point knowing that Performance Max will perform better
2. Uncheck “Help increase-conversions with Enhanced CPC”
*Here’s why: We like to start our bid low in Standard Shopping, determine which products are most successful, and begin to increase our budget where there will be the most impact
3. Budget: Choose a budget that’s appropriate for you
*If you’re just starting out, your daily budget for Performance Max must be $100 per day at a minimum—and even that might not be enough if you’re in a competitive industry. For that reason, you shouldn’t run PMax if you can’t meet that budget requirement. Meanwhile, Search Campaigns should be at least $20 per day, and Standard Shopping should be at least $10*
4. Limit the amount of spend that your Standard Shopping campaign can run
5. Campaign priority: Low (default)
6. You can set it to “high” if you’re running Standard Shopping and Performance Max, the PMax campaign will eventually take over on its own
✔️ Targeting

- Network: Check both “Search Network” and “Youtube, Gmail and Discover”
- Location: United States
- Target: Only use “Presence: People in or regularly in your targeted locations”
- Start and end date: Not set
✔️ Create your ad group
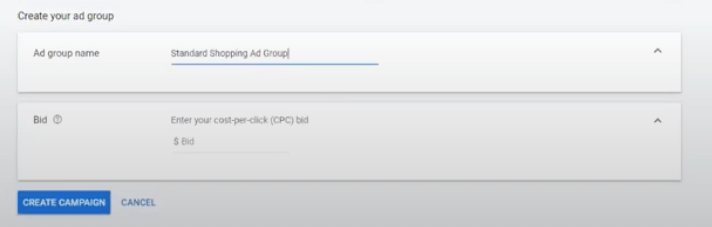
- Ad group name: Standard Shopping Ad Group
- Bid: $1
Go to Standard Shopping Category/Campaign:
- Product Groups
- Hover over the “+” symbol to Add Subdivision
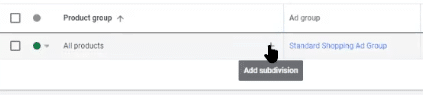
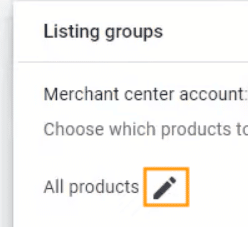
3. Click “All Products” drop down
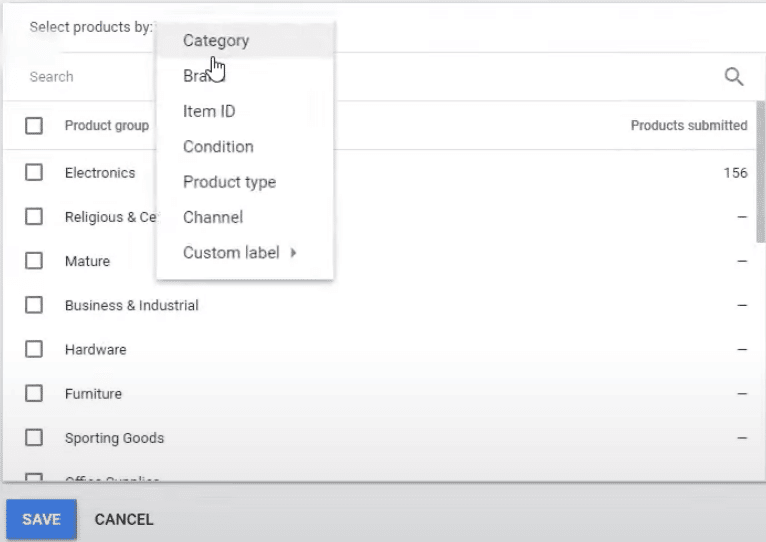
4. Choose “Item ID”
5. Select everything
6. Continue to edit bids
This is where you can change your bids.
You can also set your CPCs by the specific product here.
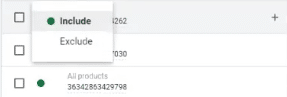
To exclude a product, go to your product group > choose a product > exclude.
To increase CPC, in Max CPC Column > choose the column of the product you want to adjust:
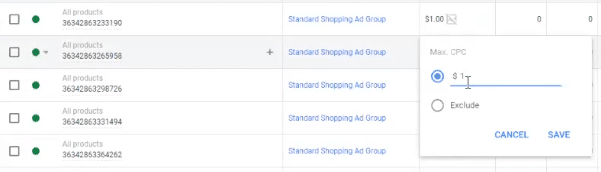
- For each individual product group, you can set individual bids
Dynamic and YouTube Remarketing Setup
Performance Max on its own won’t have the remarketing reach Smart Shopping had—or even traditional display remarketing.
So, we recommend running YouTube remarketing campaigns at 20% of your budget.
But, we have also seen some success with dynamic remarketing campaigns. If you’d like to try dynamic remarketing as well, keep in mind that your overall remarketing budget should be 20%.
Here’s how:
✔️ Start a new campaign
Go to Campaigns:
- Click the “+” symbol
- New campaign
- Sales
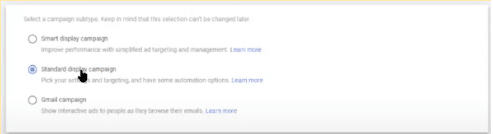
- Display
- Standard display campaign
✔️ Create your campaign
Campaign name: Dynamic Remarketing
Locations: United States
Target: “Presence: People in or regularly in your targeted locations”
Exclude: “Presence: People in your excluded locations (recommended)”
Languages: Make sure you choose English (or the native language).
Best practice is to run one campaign with one native language setting
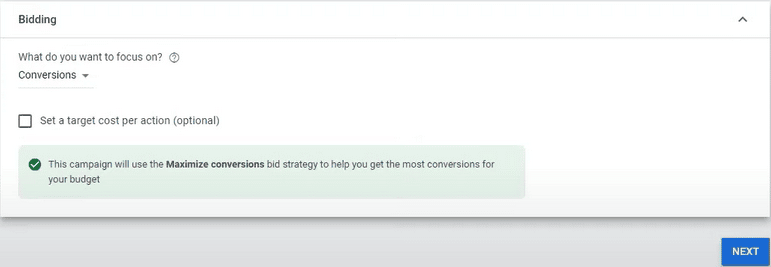
✔️ Bidding
- What do you want to focus on? Conversions
- How do you want to get conversions? Automatically maximize conversions
- Uncheck “Set a target cost per action”
✔️ Budget
- Enter the average you want to spend each day
- Ad rotation: Leave the default
- Ad schedule: All day
- Start and end date: not set
- Devices: Show on all devices
- Dynamic Ads: Click “Use dynamic ads feed for personalized ads”
- (This turns your standard display ad into a dynamic ad.)
- Data Feed: add your feed
- Product filter: Choose “No filter: Advertise all products in the country of sale”
- Conversions: Use the account-level “include in Conversions” settings
- Content Exclusions: Optional, we normally leave this in its default settings
✔️ Create your ad group
- Ad group name: Dynamic Remarketing Ad Group
- Audiences: Click Browse
- “How they have interacted with your business
- Website visitors
- Select All visitors (Google Ads)
- Click Done
- Demographics: Include everyone (check all boxes)
✔️ Content
Target Expansion > Turn Off
✔️ Dynamic ads with data feed
- Final URL: https://yourdomain.com
- Image and logos: Put your lifestyle images here
- If you have only 1 product, just use a standard remarketing (instead of dynamic)
- Videos: Put your videos here
- They’re always played on mute and on repeat
✔️ Headlines
- Make sure your headlines are relevant
- Use your brand name since not all headlines are shown
- Long headline: You can get more descriptive here
✔️ Descriptions
- Make sure each description can stand alone
- Find different ways to say the same thing in each description, if possible
Business name: Add your business name here
Additional formatting options:
- Check “Use asset enhancements” and “Use auto-generated video” (this allows Google to turn the ad to videos)
- Check “Use native formats”
- If you want to have more customizations, “add more options”
- Once finished, click “Add to ad group” > Create Campaign > Continue to campaign
✔️ How to stop showing ads to everyone and bots
Inside your dynamic marketing campaign:
- Go to Audiences
- Exclusion
- Add an exclusion by clicking the “+” symbol
- Exclude audiences
- Browse
- Click “How they have interacted with your business”
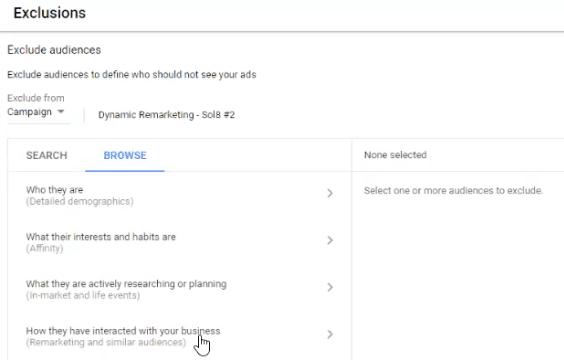
7. Under Website Visitors > Check “All converters”
8. Save
Excluding all converters means we’re not dynamically remarketing to people who:
- Went to your website
- Bought something
Performance Max
Important:
We strongly recommend reading through The Ultimate Guide to Performance Max before setting up your PMax campaign!
☐ Inside your Google Ads Campaigns dashboard, click “+ New campaign”
☐ Choose your objective: Sales
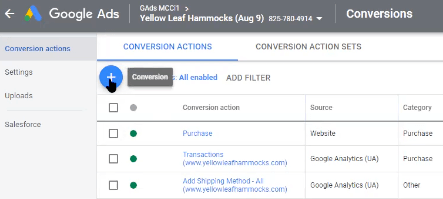
Conversion Actions
☐ Choose “Purchases (account default)” as your conversion goal, then click Continue
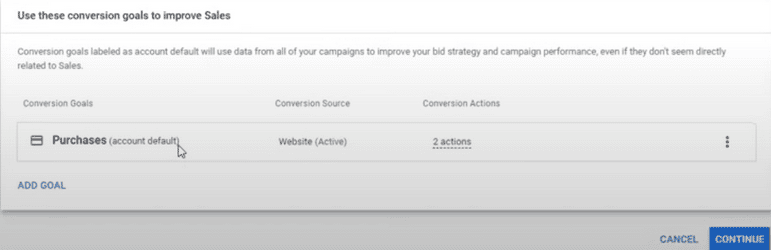
⚠️ Important: Primary and Secondary Conversion Goals ⚠️
Inside the Purchases conversion goal, there are two conversion actions.
The primary conversion action is Google Shopping App Purchase (which is from the Shopify app).
The secondary goal is Transactions (All Website Data).
Secondary goals aren’t counted as conversions.
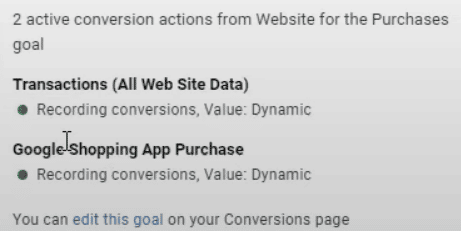
But when you look at your listing groups later, it will report all conversion value data.
So, you need to pause your secondary conversion actions if you want to only track true conversions.
However, secondary conversions can be useful to track the path to purchase (and make note of when prospects “drop off” in the pipeline), without asking Google to chase after those conversion goals. Which leads us to our:
💡 Pro Tip💡
Instead of pausing those secondary conversion actions entirely, you can remove the conversion value. For example, your “viewed product page” might still be a conversion action worth tracking, but if you remove its conversion value, it won’t be counted as a true conversion.
Doing this will help you monitor important activity in your campaign (like the add-to-carts, for example) but only count the value of those true conversions inside your listing groups for quick cash in, cash out reporting.
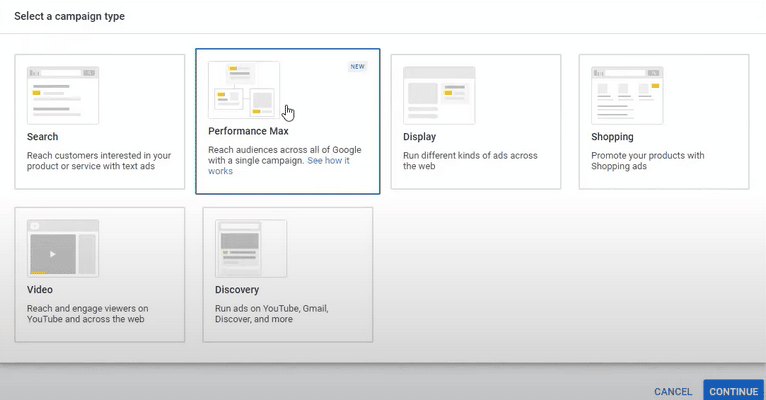
☐ Select a campaign type. Choose Performance Max
☐ Connect your Google Merchant Center account

(Learn how to set up and link your Google Merchant Center account here)
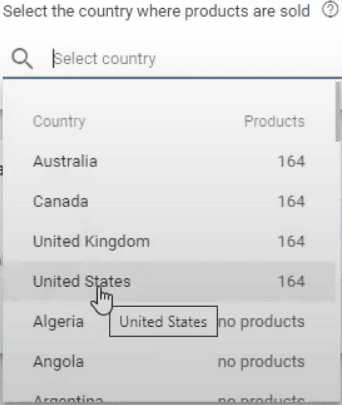
Select the country where your products are sold
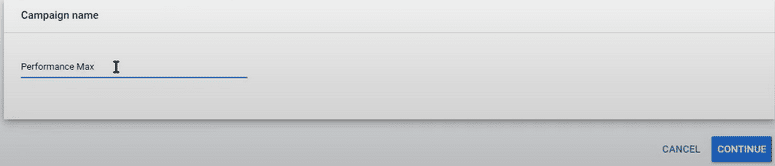
☐ Name your campaign, then click Continue
Budget and Bidding
☐ Add a budget

⚠️ Important: Budget ⚠️
We recommend running Performance Max at 80% of your Smart Shopping budget.
Then run the other 20% with a YouTube Remarketing and/or Dynamic Remarketing Display campaign.
☐ Bidding: Select Conversions
⚠️ Important: Bidding ⚠️
We tested conversion value, conversions, tCPA, tROAS, and had good experience with all of them.
But using maximize conversion value or maximize conversions has given us better results during the initial launch.
Select Maximize Conversions if:
- You have an order value that fluctuates
- You are asking Google to make a big sale
Select Maximize Conversions Value if:
- You have a very consistent order value
Campaign Settings
☐ Select the locations you want to target

☐ Select English
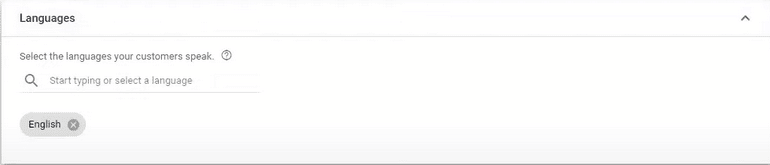
⚠️ Important: Languages ⚠️
Typically, we use “All languages” when we run Search campaigns because we bid on keywords.
However, for Performance Max, it’s important to use English because you’re running it everywhere—YouTube, Display, Search, etc.
Be sure to use whatever language settings are applicable to you (English, most likely).
☐ Select “Send traffic to the most relevant URLs on your site”
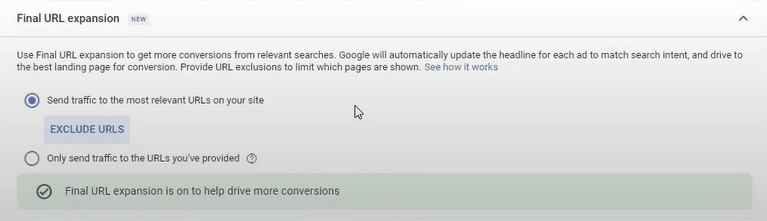
⚠️ Important: Final URL Expansion ⚠️
If Google believes that a certain page on your site is more relevant than the site you want your audience to go to, it will display that page. Let me illustrate.
Let’s say you’re selling shampoo and in your ads (except your product feeds), your Final URL expansion goes to the page you designated them to go.
If Google thinks that people who click your ads usually buy certain products on a different page, then it will use that page instead. This decision is all based on historical conversions and the user conversion patterns that Google sees.
If you want to be more specific, you can add exclusions to have better control over where to send your traffic to.
☐ Add the URLs you want to exclude (if applicable)
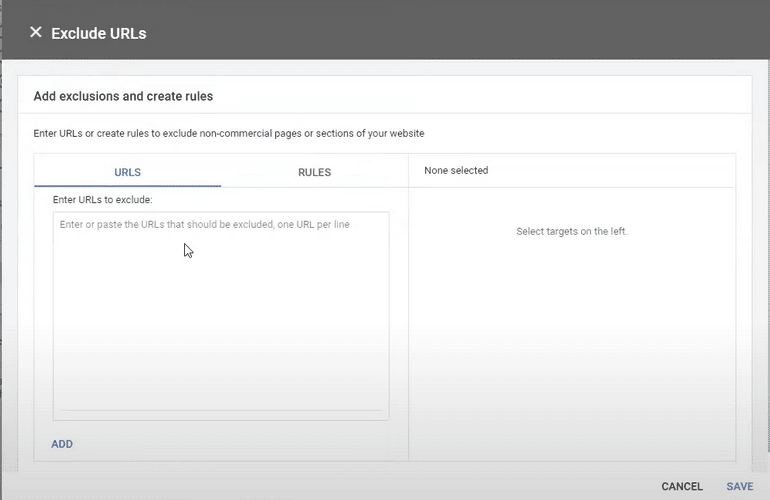
⚠️ Important: Google’s been so good at figuring customer pathways. You can exclude specific pages (e.g., your blogs) but if that content is converting well, then it might not be a great idea to exclude it. Be careful with your exclusions.
☐ Leave everything in “more settings” as is.
How to Build Your Asset Groups
It’s time to build your asset groups: which is all the creative material needed to create any type of ad across Google’s network, including:
- Photos
- Logos
- Videos
- Headlines
- Descriptions
In this tutorial, we’ll show you how to create and duplicate asset groups.
First:
☐ Name your asset group

⚠️ Important: Asset Groups ⚠️
The assets should be customized by the intended audience.
And remember (like ad groups!), every audience gets its own asset group.
☐ Select “all products” or;

☐ Choose only specific products you want to show in your ads. Here’s how to do that:
☐ Click the pencil icon
☐ Select “Use a selection of products”

☐ Find your products and select them. When you’re done, click Save.
☐ Add a final URL

☐ Add images

You can either upload images or get Google to scan your website. If you choose to scan your website, Google will pull up images from your site and social media.
☐ Add logos

You can either upload or scan your site for logos. If you choose to scan your site, Google will get your favicon and use it as your logo.
☐ Add videos

You can either upload videos from your computer or from YouTube. Just add the URL and Google will pull up those videos.
⚠️ Important: Videos ⚠️
Google will create videos for you if you don’t upload your own videos. (But you can remove them). Our recommendation is to always create your videos.
💡 Pro Tip 💡
You can use your or someone else’s YouTube videos. You don’t need permission (Google will approve those videos.) However, just be cautious and make sure that you aren’t violating any of your clients’ agreements and policies.
☐ Add headlines
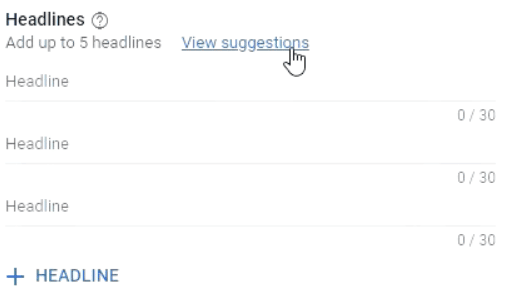
The way “suggestions” work is Google will create headlines based on your site.
Whether you’re using suggestions or not, make sure that your headlines are really good and can capture your users’ interest.
☐ Add long headlines

☐ Add descriptions
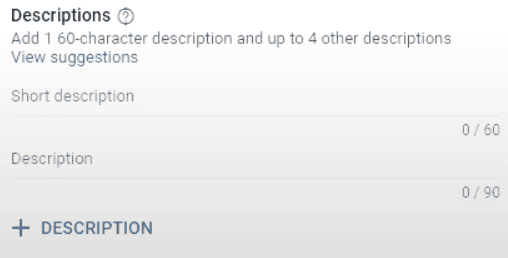
☐ Add a call to action
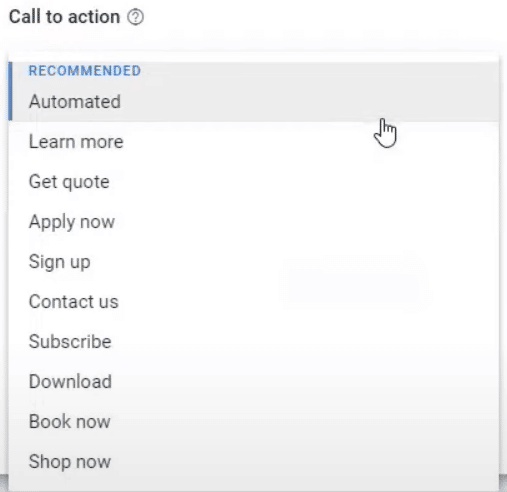
We highly recommend choosing automated as your call to action. Because we’re in a machine-learning world, it would be best to stick with Google’s choices at least for this section.
How to Build Your Audience Signal
Generally, we always create one asset group per audience signal category like “Interests & detailed demographics,” “Your data,” and “Custom segments.”
In this tutorial, we’ll run through “Interests & Detailed Demographics.”

⚠️ Important: Duplicate Asset Groups ⚠️
To create asset groups faster, you can easily duplicate an existing asset group and simply change the audience signal.
Just remember to reselect all the products to avoid messing up the entire campaign. We’ll cover this in the “Duplicating an Asset Group” section.
☐ Name your audience
☐ Skip to Interests & Detailed demographics

☐ Type your product (or relevant keywords for your product) to search for segments that might be applicable to your audience’s interests, life events, or demographics. For example, if you’re selling wallets, type “wallets.”
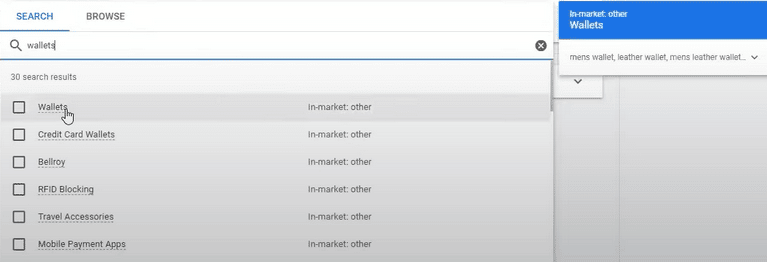
You should now see the list of in-market segments, life events, or detailed demographics you added.
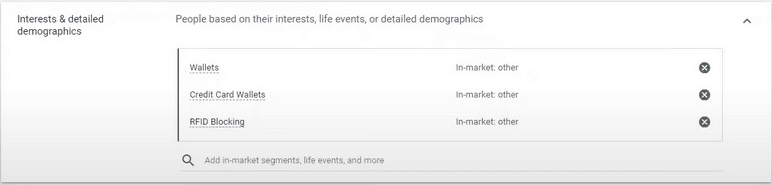
☐ Once you’re done, click Save to go back to the previous dashboard.
How to Add Sitelink Extensions
Just like adding extensions when creating search, you can add extensions in Performance Max to show pieces of information about your business that you can tack onto your ad, including your address, phone number, direct page links, coupons, or even additional websites.
☐ Fill out your Sitelink 1 text (i.e. the header for this sitelink extension)
☐ For example, “About Us,” “Read About the Team,” “Who We Are,” or “Read Our Epic Story”
☐ Fill out “Description line 1”
Elaborate: Where will this click lead the reader?
☐ Fill out “Description line 2”
Elaborate: Why should the reader click?
☐ Fill out “Final URL.” Paste the URL of the page extension
☐ Repeat these steps for however many additional sitelinks, callout extensions, and other extensions you’d like to include without repeating yourself.
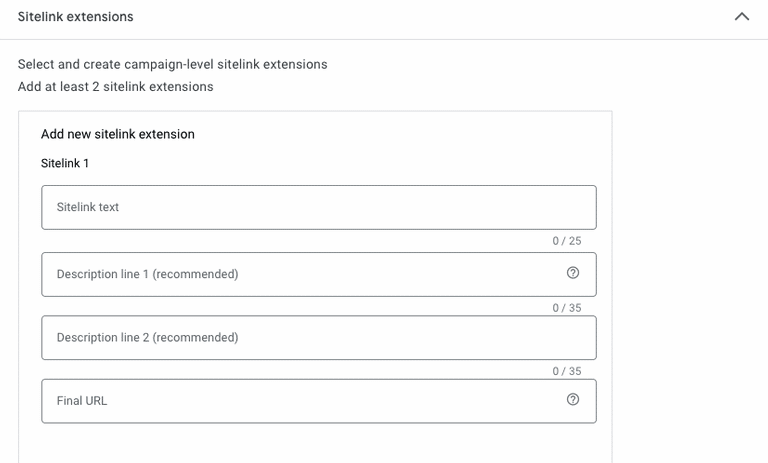
Remember, each additional sitelink should be an offer of some sort—even if the offer is just for the reader to learn more!
And now, you’re ready to duplicate this asset group.
How to Duplicate an Asset Group
☐ You’ll find all your asset groups in the Asset groups section
☐ Look for the asset group you want to duplicate, then click the three dots found in the upper right corner as shown in the image below
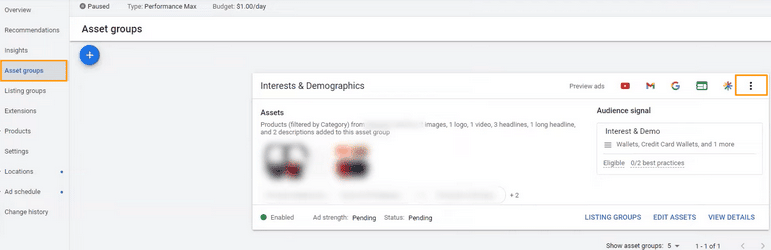
☐ Click “Duplicate this asset group”
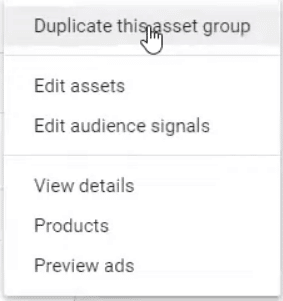
☐ Name your asset group
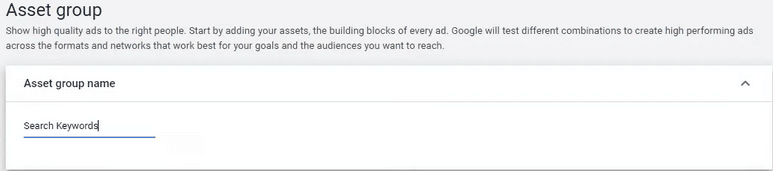
⚠️ Important⚠️
When we created our first asset group, we called it “Interest & Demo” because the audience signal category is for “Interests & detailed demographics.”
This time, we’ll create an asset group we can use for the audience signal category “Custom segments” based on their search activity.
☐ Just follow the same steps we took in creating an asset group. Don’t forget to reselect your products in the listing groups.
☐ In the Audience signal section, click the pencil icon to edit this audience.
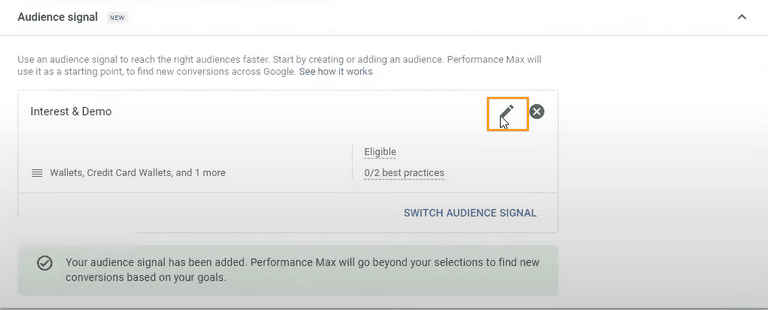
☐ Remove the current audience name.

☐ Add a new audience name.
☐ In Custom segments, click “+ New custom segment”
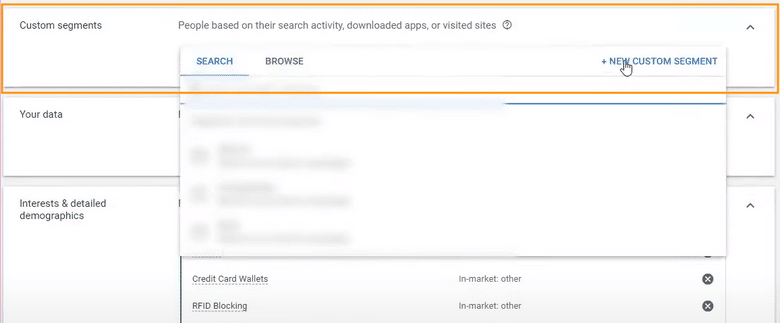
☐ Name this segment
☐ Select “People who searched for any of these terms on Google” and add your product keywords.
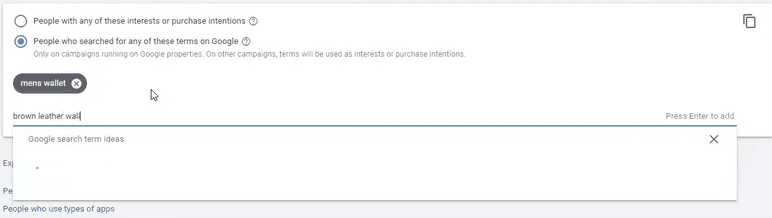
⚠️ Important: “People who searched for any of these terms on Google” is heavily targeted toward people who searched for those terms/keywords in the last 14 days.
💡 Pro tip: If you know your high-performing keywords, add them here. Then, select Google’s suggested keywords that are relevant to your product.
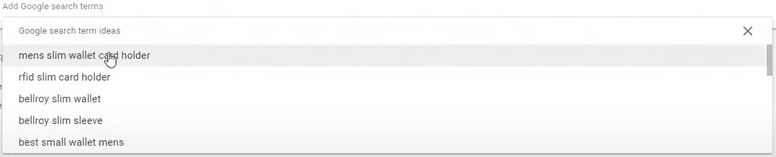
☐ Click Save to exit.
☐ In the “edit audience” page, click Save. Then a pop-up message will appear:
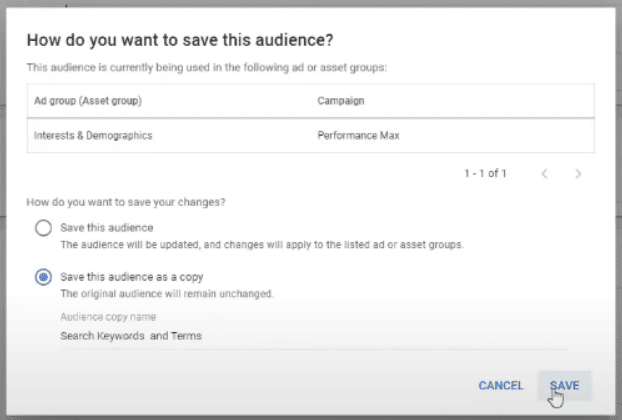
☐ Select “Save this audience as a copy.” Make sure you remove the “-copy” in the Audience copy name.
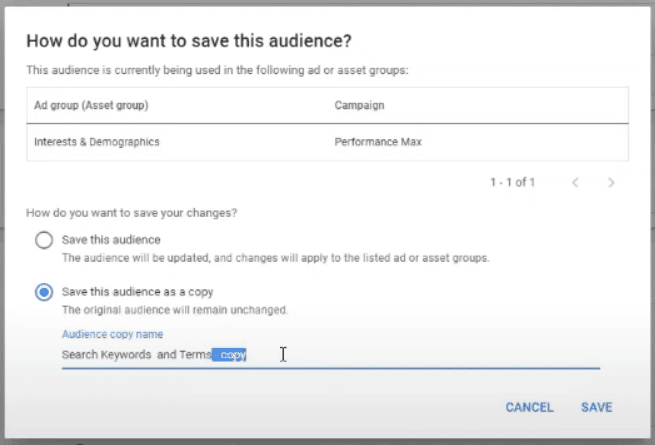
☐ Once you’re back in the asset group page, click Save again.
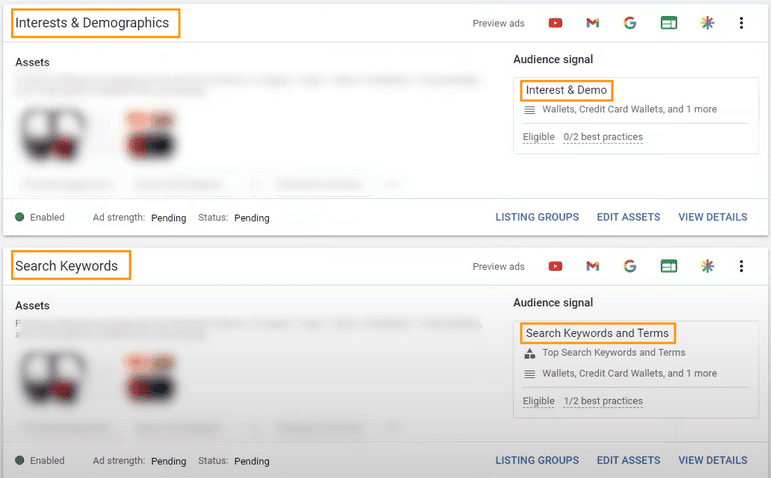
You now have two asset groups with their respective audience signals.
Listing Groups
The top two rows display your parent asset groups. Then, the others are subdivided into their own listing groups.
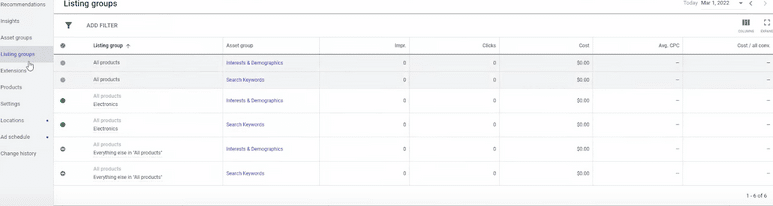
⚠️ Important: You don’t get listing groups for lead generation. This is the only way to identify how the asset groups are individually working.
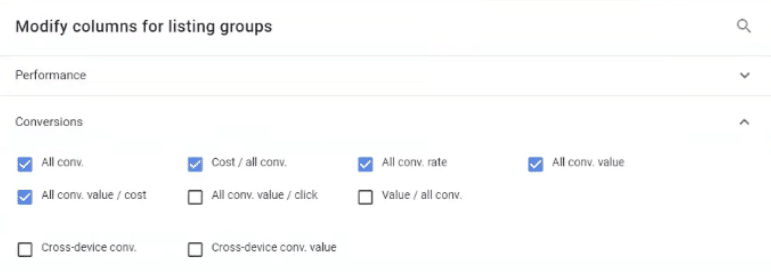
⚠️ Important: In the beginning of this tutorial, we suggested that you take your conversion actions and turn off any inactive conversion actions or remove the conversion values so you can get your real conversions.
To view those conversions, make sure you modify your columns.
☐ Click the “Columns” icon found on the upper right corner of the listing group page (below the date)

☐ Click “Conversions.” Then select the following:
- All conv.
- Cost / all conv.
- All conv. rate
- All conv. value
- All conv. value / cost
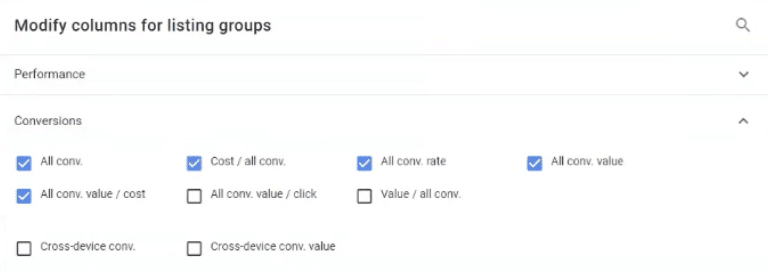
☐ Click Apply!
Read the Ultimate Guide to Performance Max Here!
Competitor Campaign
Let’s build a competitor campaign, next.
Inside Google Ads, go to Campaigns:
- Click the “+” symbol
- New Campaign
- Create a campaign without a goal’s guidance
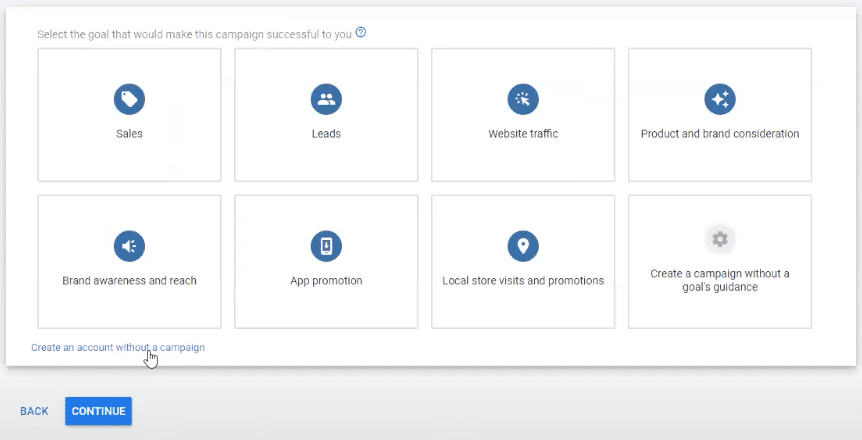
4. Select campaign type
5. Search
6. Leave the “Select the results you want to get from this campaign” for now
7. Continue
✔️ General Settings
Campaign Name: Competitor Campaign
Network: Search Network
Only choose “Search Network” and select “Include Google Search Partners”
Start date: When you want it to start
End date: Not set
Campaign URL Options: No options set
Dynamic Search Ads Setting: Don’t enter a domain
Ad Schedule: All day
✔️ Locations
Location: United States
Target: “Presence: People in or regularly in your targeted locations”
Exclude: “Presence: People in your excluded locations (recommended)”
✔️ Languages
Choose All languages
As long as your audience is searching in English, this is okay.
✔️ Audiences
Don’t touch it for now, we’ll do it later.
✔️ Budget and bidding
Budget: $10
This is one of your least amount of ad spends. Start low.
This will be your least amount of ad spend.
Bidding
Select your bid strategy:
- Choose “Select a bid strategy directly (not recommended)”
- Manual CPC
- Uncheck “Help increase conversions with Enhanced CPC
We use Manual CPC in the beginning because for this campaign:
- You’ll have a bad quality score
- Your landing page experience will be low
- You have to increase bids aggressively to steal traffic away from your competitor
Conversions: Account-level conversion setting
Ad rotation: Optimize: Prefer best performing ads
✔️ Ad extensions
- Sitelink extensions: Choose the ones that are most appropriate for your business
- Check out our Sitelink Extension Tutorial
- Callout extensions: Not recommended
This is to avoid “wrong company” calls from customers who thought they dialed your competitor’s phone number.
✔️ Set up ad groups
- Ad group name: Enter competitor’s name here
- Default bid: $3 (and check if your bid is too low)
- Keywords:
- [competitor name]
- [competitor name + industry]
- [competitor name + service]
- [competitor name + specific product]
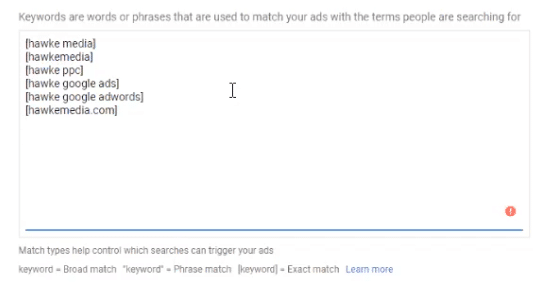
A Word on Keywords
- Don’t start broad
- Use a lot of “exact match”
- Variations are good, but don’t overdo it
- Ad group name: Another competitor
- Default bid: $3
- Keywords: Enter your competitor’s site
- Click Get Keywords
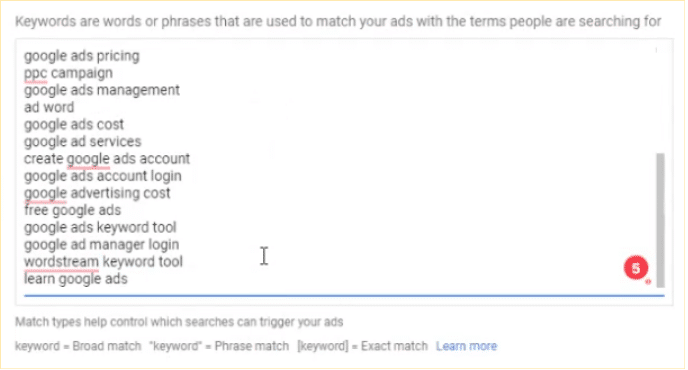
- If the results are relevant keywords to you, use them. If not, use the same tactic in the first ad group build out.
- Look for intent-driven keywords
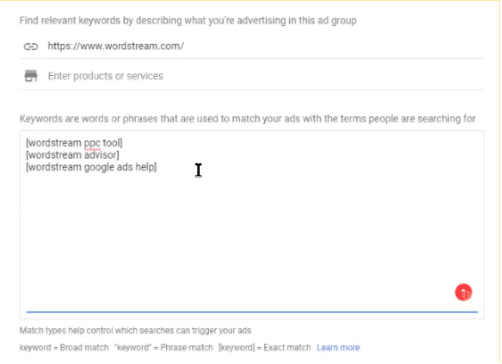
✔️ Responsive Search Ads
Final URL:
- If you have a 1-to-1 competitor (e.g. you sell ten different products and your competitor sells one) send your visitor to the product page you and your competitor have in common.
- Otherwise, send them to the most relevant page for that they searched for.
Display Path: Come up with a URL relevant to your offer.
The display URL is only what your visitors see. It doesn’t affect the actual URL of your landing page.
Example:

Headlines
- Avoid putting your competitor’s name in your headline. Instead, use the “item/product” your users are searching for.
Once finished, click Done > Save and Continue.
If you see an error saying “ Your campaign isn’t ready yet. No traffic expected. Check your campaign targeting to fix this,” ignore it.
Just click “Publish.”
✔️ Audience Setup
Next, go to your competitor campaign and click Audiences.
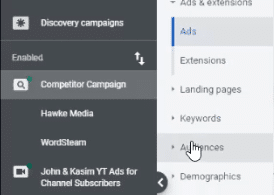
Click “Type” > Remove it by clicking the “x” symbol until you have no filters displayed.
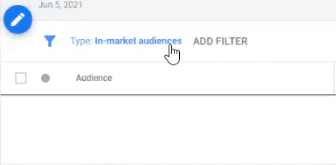
✔️ Remarketing List for Search Ads (RSLA)
This is when someone clicks on your ad, visits your website, doesn’t convert, leaves—and in the future searches again using the same search terms they used before.
To start, click on the pencil icon to edit the audience:
- Select “observation (recommended)”
- Add to campaign
✔️ Difference between Observation and Targeted:
Observation: They have to search the keywords and be repeat visitors to your website (but not yet on your list), and do what you want them to do.
Targeted: They are in the existing audience and searched the specific keywords.
Go to Browse:
- Choose “How they have interacted with your business”
- Website visitors
- Choose “All Visitors” (Google Ads)
- Save
In the “All visitors” row, go to Bid Adj column and click the pencil icon to edit > Increase by 40%.
Go to Exclusions > Exclude all converters (this is optional–only for competitive campaigns).
*If you see an error that says “Not eligible, low search volume,” it means there’s not enough traffic searching for it to justify running Google Ads.
You can either change the keyword to something else or remove it.*
Dynamic Search Ad (DSA) Campaign
Go to campaigns:
- Click the “+” symbol
- New campaign
- Create a campaign without a goal’s guidance
- Search
- Skip “Select the results you want to get from this campaign”
- Continue
✔️ General Settings
Type: Search
Campaign Name:
Network: Search Network > Only choose “Search Network” and select “Include Google Search Partners”
Skip start and end date
Skip Campaign URL Options
Click on “Dynamic Search Ads setting” > yourdomain.com
For newer websites, you’ll have to wait until Googlebots scan or “crawls” your site (usually around 1 month after your site is published
✔️ Language
Language: All languages
Select a target source > Use Google’s index of my website
Ad Schedule: All day
✔️ Budget and bidding
Budget: $30
Bidding: Conversions > Set a target cost per action
Conversion: Account-level conversion setting
Ad rotation: “Optimize: Prefer best performing ads”
Sitelink extensions: Choose the ones that are most appropriate for you.
Once finished, click Save and continue.
✔️ Set up an ad group
It will automatically choose “Dynamic.”
Ad group name: All Webpages
✔️ Create a rule to target webpage
Select URL > contains > Enter the “root” domain where all your products are found (e.g. “underdoggames.com/collections/” or “underdoggames.com/products/”
This will let Google crawl your product pages.
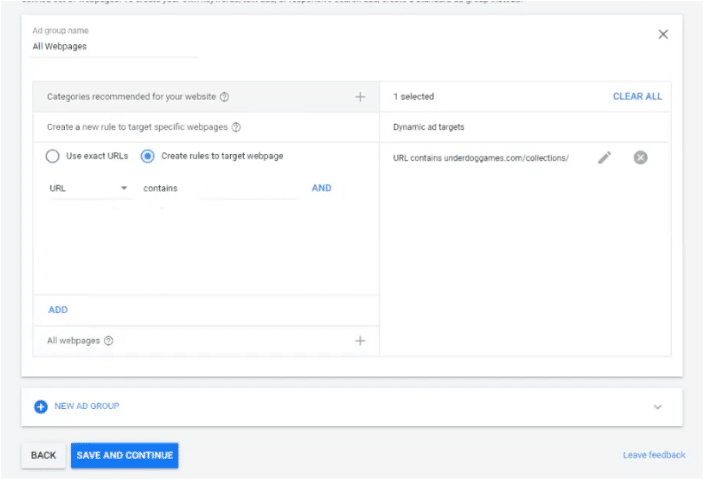
However, if you want to use the exact URLs:
Select “Use exact URLs” > paste the exact URL of the product > Add
✔️ Create ads
- Final URL
- Headline – will be pulled right from your page title
- Display URL
- You can only add descriptions
- Use the full length
- Should be about your products
- If you have a theme for your store, put it here.
Once finished, click Save and Continue.
To check on what ad group goes to your pages
Go to Dynamic Search Ads > Dynamic Targets

✔️ Negative dynamic ad target
Use this if you don’t want Google to crawl a specific page.
- Copy the URL of the page
- Inside Dynamic Search Ad go to Negative dynamic ad target
- Click Add to > Campaign
- Use exact URLs
- Paste the url here
- Add
✔️ Adjusting your Target CPA
Inside Dynamic Search Ad:
- Go to Ad groups
- Select the Target CPA of the ad group
- Click the pencil icon
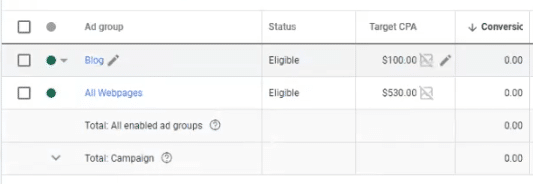
✔️ How to find the pages that are getting traffic
Inside Dynamic Search Ad > Landing pages
✔️ How to add a negative keyword of your brand in DSA campaign
- Inside Dynamic Search Ad > Negative Keywords
- Click the “+” symbol
- Add negative keywords or create a list
- Add your brand name
Brand Campaign
Inside Google Ads:
- Campaigns
- Click the “+” symbol
- New campaign
- Create a campaign without a goal’s audience
- Search
- Skip “Select the results you want to get from this campaign”
- Continue
✔️ General Settings
Campaign name: Brand Campaign
Network: Search Network > Only choose “Search Network” and select “Include Google Search Partners”
- Skip Start and end dates
- Skip Campaign URL options
- Dynamic Search Ad setting: leave it blank
- Ad schedule: all day
✔️ Location: United States
Target: “Presence: People in or regularly in your targeted locations”
Exclude: “Presence: People in your excluded locations (recommended)”
✔️ Languages
Choose All languages
Audiences: default/skip
✔️ Budget: $20
- Should be on the lower end
- It’s the easiest to convert
- It’ll have the cheapest CPCs
- It’s going to perform the best
✔️ Bidding
Select your bid strategy: Manual CPC > uncheck “Help increase conversions with enhanced CPC.
Conversions: Account-level conversion setting
Ad rotation: “Optimize: Prefer best performing ads”
Sitelink extensions: Choose the ones that are most appropriate for you.
Once finished, click Save and continue.
✔️ Set up an ad group
Ad group type: Standard
Ad group name: Brand
Default bid: $.20
Keywords: Enter your different variations of your brand name here
[brand name]
*brand name*
*brand name Google*
Once finished, click Save and Continue.
Create ads
Final URL: https://yourdomain.com
Display Path: Come up with a URL that’s relevant to your offer.
Headline:
For Headline #1: Use your brand name and pin it
- Look at what your competitors don’t have (or have) put it in your headline.
- Put your USP or anything that’s good about your company
Once finished, click “save and continue.”
If you see an error saying “ Your campaign isn’t ready yet. No traffic expected. Check your campaign targeting to fix this,” ignore it.
Just click “Fix it” and “Publish.”
✔️ Adjust your CPCs accordingly
Go to Brand Campaign > Search Keywords > Look at columns:
- First page bid
- Top of page bid
- First position bid
Go to Audiences:
- Add audiences
- Add to campaign
- Browse
- Observation (recommended)
- How they have interacted with your brand
- Website visitors
- All visitors (Google Ads)
- Save
Discovery Campaign
This campaign is for those folks at the very top of the funnel. Don’t run them yet because they don’t have product images in it.
In the meantime, let’s get to building:
✔️ New Campaign
Inside Google Ads:
- Campaigns
- Click the “+” symbol
- New Campaign
- Sales
- Discovery
- Continue
- You can run YouTube ads on your own
- But, it is not recommended to run YouTube ads with Discovery Campaigns
At Solutions 8, we don’t like Discovery…yet. Here’s why:
- Discovery runs through Gmail and gets 40% – 60% open rate, which is counted as a click. In other words, you pay when a user opens the Gmail Ad, and this will eat up your budget quickly.
- Running a YouTube ad is probably better than running a Discovery.
However, low barrier, free offers work well on Discovery, such as a free ebook or a 10% discount coupon or promotion.
✔️ Create your campaign
Campaign name: Discovery Campaign
Location: United States
Languages: English
Bidding: Conversions > uncheck “set a target cost per action”
Ad schedule: all day
Skip start and end date
Skip Campaign URL
Conversions: Use account-level “include” in “Conversions” settings
If you’re running a 10% coupon or some sort of “lead magnet,” include that in your campaign conversion settings.
Additionally, don’t “choose conversion actions for this campaign,” offer a lead magnet, and then only track that conversion—you’re going to miss people who subsequently buy.
Content exclusions: Can’t control this so keep the default settings.
✔️ Create your ad group
Ad group name: Discovery
- Click add or create audiences
- New Custom Audiences
- Audience name: Purchase Intention – [your product] (e.g. Black Leather Wallet)
- Choose “Include people with any of these interests or purchase intentions
- Create
- Include people with any of these interests or purchase intentions. These are people who’ve been looking at competitors or your own site and checking out very specific products.
- Include people who searched for any of these terms on Google. If your audience is visiting websites that aren’t Google-hosted but include the same terms/keywords, they’ll use this type of targeting.
- Important: For eCommerce, you need to build an audience per product.
6. Remarketing: skip this for now
7. Interest and detailed demographics: Skip this for now
8. Audience expansion: Uncheck “show your ads to more people are likely to convert”
9. Demographics: keep the default settings
- If you have a more expensive product, you can test by removing “Lower 50%” under Household income.
- Household income is relative to the area/zip code of your audience.
✔️ Create your ads
Choose Discovery Carousel Ad > Create Campaign:
You can have multiple carousels. This is good if you want to build out each one of your products (once Smart Shopping is up and running and you know your most scalable products).
- Click Image And Logos
- Enter your domain >
- Get your images scanned
Complete the information needed:
- Final URL
- Headline
- Description
- Business name
✔️ Build your card(s)
You can edit your photos and add them here.
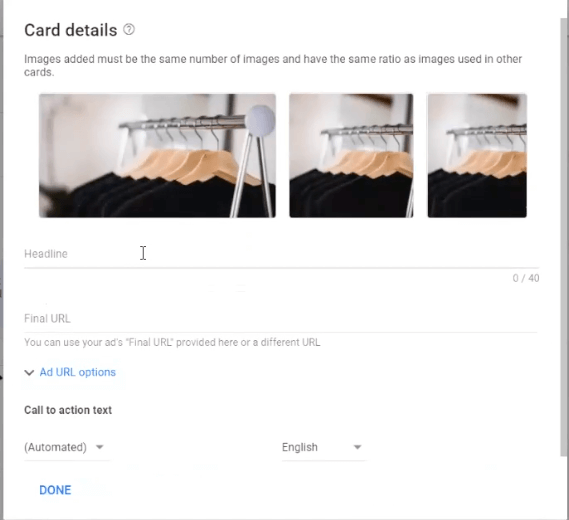
- Enter your headline
- Enter your final URL—make sure this is the URL of your image or the product page as the final URL
- Add a call to action: Shop Now
- You can build up to 10 cards
Once finished, click done > Create Campaign > Continue Campaign.
YouTube Campaign
Before building your campaign, make sure to build your audiences first.
Here’s how:
In Google Ads Dashboard > Tools > Shared Library > Audience Manager > Custom Audiences > Click the “+” symbol.
Display Search Keywords (DSK)
- Functions like your Search campaign.
- Good Practice: Take your search campaign keywords and pasting them in DSK.
Inside Google Ads > Campaigns > New campaigns > Create a campaign.
The best YouTube campaign to run alongside Performance Max is a YouTube Shopping Campaign. This is what it looks like.
✔️ New campaign
- Choose “Create a campaign without a goal guidance”
- Video > Shopping
- Connect your feed
- Campaign name: Video Shopping
- Product filter: Choose specific products
- Choose the products that are relevant to the video
- Bid strategy: Maximum CPV
- You can’t use automated bidding strategies. You’re relying heavily on relevancy and high traffic because your safety net is Performance Max and Remarketing–it’ll take care of everyone who clicked on your ad.
- Start with high amount and work your way down (e.g. $1.00 – $2.00)
- Budget and dates: Set to “Daily” and “$30”
- End date: none
If you choose “campaign total” you’ll have to set an end date.
10. Networks: Uncheck YouTube search results
11. Check “YouTube videos”
12. Uncheck video partners on the Display Network
13. Locations: United States
Your location is going to run where your feed allows it to run in.
14. Languages: English
15. Content exclusions: Standard Inventory
16. Excluded types and labels: Depends on your business preferences.
17. Conversions: Keep the default setting
18. Devices: Exclude TV screen
You need visits and searches. They usually happen on computers, mobiles, and tablets only.
19. Operating systems: Your preference. We keep the default settings.
20. Frequency capping: uncheck “cap view frequency”
It usually takes 33 impressions before a person takes action.
✔️ Create your ad group
This could be an ad group per video per product.
- Ad group name: Use your product name (e.g. 2-pack Trial size bottles)
- Demographics: keep the default settings
- Audiences: DSK works best
- Keywords: add your search campaign keywords here
- Topics: Choose the topic that’s relevant to your products
- Placements: Click Browse > search for the YouTube channel you want your ads to appear in
- You can place your ad on a specific channel or video.
- Use one targeting method PER ad group.
7. Bidding: $2.00
✔️ Create your video ad
- Add a YouTube video URL
- Add your Final URL
- Add a display URL (this is your “vanity” URL)
- Enter an ad name
Display Campaign
Pre-setup your display campaigns by:
- Building your custom audience
- Stick that to one ad group
- Use DSK in one ad group
- Use topics in a different ad group
A note on “Non-skippable in-stream”
Use it if you need to have your audience see your ads. However, you won’t get watch rates. You can’t gauge engagement and relevance because everyone’s “forced” to “engage” in your ad.
Inside Google Ads:
- Campaigns
- Click the “+” symbol
- Create a campaign without a goal guidance
- Display
- Standard display campaign
✔️ Create your campaign
Campaign name: DSK
- Location: United States
- Target “Presence: People in or regularly in your targeted locations”
- Exclude “Presence: People in your excluded locations (recommended)
- Languages: English
- Bidding: Maximize conversions
- Budget: $30
- Additional settings
- Optimize: Prefer best performing ads
- Ad schedule: All day
- Skip Start and end dates
- Devices: Show on all devices
- Campaign URL options: Your preference / if you want to set it
- Dynamic ads: Uncheck “Use dynamic ads for personalized ads” (if you’re on a lower budget)
- Product filter: No filter
- Conversions: Account-level conversions setting
- Content exclusions: keep the default setting
✔️ Create your ad group
Ad group name: DSK Ad Group
- Skip Audiences
However, if you built your custom audiences, go to Browse > Your custom audiences > select your audience.
2. Skip Demographics
3. Content targeting: put your DSK keywords here
3. Keyword Setting: Choose “Content: Only show ads on webpages, apps, and videos related to these keywords.”
4. Target expansion: Use it with an “off” in the beginning
✔️ Create your ads
- Final URL: This depends on what your ad says. (e.g. For multiple products, send them to your “collections” page)
- Images and Logos: scan your page by pasting your URL > Select the photos you want to use
- Videos: add your videos (use them sparingly)
- Headline: Add your headlines here > Choose “Google Properties” to view your headlines.
- Make your images and headlines relevant and expansive enough to offer choices.
- Long headline: you can be more descriptive here.
Business name: Use title case URL:
https://yellowbirdfoods.com → YellowBirdFoods.com
This gives you a little bit of brand recognition.
Additional format options: Check all.
Once finished, Click Create Campaign > Continue to campaign
PART NINE:
Optimization
After your campaigns are built, the deep work begins.
We’re talking optimization.
We’re not going to lie: optimization is time-consuming and super important to the success of your campaigns. That said, keep in mind that improper optimization (i.e. changing things too frequently) is equally as detrimental.
With that out of the way, let’s jump in:
Prerequisites
Back in Part One, you determined Google Ads was right for your business and (hopefully) used our estimates and projections calculator to determine the expected performance of your campaigns post-launch.
Using those predictions (in conjunction with our ROAS calculator), it’s time to revisit your goals and document them.
- What is your target CPA?
- ROAS?
- What are your main key performance indicators?
Daily Optimization
On a daily basis, there won’t be a lot of optimizations to make; however, it is important to check your account daily for:
☐ Ad Disapprovals
☐ Budgets
Review spend per day and per campaign: Are you spending the daily budget?
☐ Credit Card Declines
☐ Active Conversion Tags
Catching these issues early can save you during your optimizations later.
Weekly Optimization
☐ Review Your Budget and KPI Goals
Are you on track with your budget?
ROAS goal?
☐ CPA and ROAS Bid: Review
Does your current CPA bid match your target?
If not, optimize!
☐ Search Terms: Review and Qualify
☐ Add Negative Keywords at the appropriate level (account, campaign, or ad group)
☐ Add Positive Search Terms that you aren’t bidding on as keywords (appropriate match type)
☐ Add a Coded Negative Keyword at the account level using the following naming convention: “gads+[YYYYMMDD]+checkin” So, for example: [gads20210927checkin]
☐ Budget: Check to Ensure Spend is on Target
☐ Products, Ads, and Extensions: Check Eligibility
☐ Are there more than 1,000 products?
☐ Check for Shopping Campaign disapprovals
☐ Check Ad eligibility (showing or not showing and why)
☐ Check Ad extensions eligibility (showing or not showing and why)
☐ Tracking Codes and Actions
☐ Check Google Tag to ensure remarketing is firing more than 0% with eComm ProdID
☐ Confirm all codes are intact (GTM, Analytics, etc.)
☐ Test conversion actions (forms, downloads, phone numbers)
☐ CallTrackingMetrics (If Using)
☐ If you are using CTM, review and manually score your recorded calls
Monthly Optimization
☐ Product Performance (Analyze and Include/Exclude as Needed)
☐ Go to “Product Groups” and check if the products are distributed at item ID leveL
If not, split them into IDs
☐ Sort by Conversions: Check if ROAS (last 30/60/90 days) is above par (3x or more)
☐ Sort by Clicks: Check if clicks are above 50 and ROAS is below par them EXCLUDE
☐ Identify Keyword Opportunities from Google Ads Interface
☐ Go to each ad group (under each campaign)
☐ Hit the “+” button and check the keyword suggestions
☐ Take relevant keywords and populate them in a Google Sheet for each campaign/adgroup
☐ Check with your Specialist for approval and add to the respective ad groups when approved
☐ Check Bidding Strategy Performance
☐ See if the bidding strategy in use is performing as expected
☐ Check CTR on High-Performing Assets
☐ Check CTR on high performing assets Videos, products, keywords, ads, etc
☐ Make a note of the CTR for the last month
☐ Look into optimization to improve CTR
☐ Check Auction Insights and Impression Share
☐ Check for new competitors bidding on your keywords, especially Brand Keywords
☐ Add these competitor brand keywords in your competitors campaign (if applicable)
☐ Check increase/decrease in impression share
☐ Accordingly optimize bids to mitigate the change (if applicable)
☐ Check Analytics Goals Vs. Conversion Actions
☐ Check if identical Goals are being tracked properly in Google Analytics
☐ Check if the Analytics Goals are in line with Conversion Actions (and vice-versa)
☐ Create Analytics Goals if missing
☐ Check and Optimize Bid Adjustments
☐ Check:
☐ Device bid adjustments
☐ Demographics ID adjustment
☐ Day/Time/Hour bid adjustment
☐ Location bid adjustment
☐ Audience bid adjustment
☐ Quality Score Review
How many keywords fall under the following buckets?
- QS < 3
- QS 3-7
- QS 8-10
☐ For keywords with a low quality score (QS < 3) create ad headlines with the low QS keyword (in other words, make sure your ads are relevant)
☐ Audience Segments: Analyze and Create New Segments (if Needed)
☐ Test New Ads
If there are improvement opportunities (and ONLY if there are improvement opportunities):
☐ Test new headlines (use different ad angles)
☐ Switch headline position
☐ See if it would make sense to test these ads evenly Vs. Google’s optimization
Annual Optimizations
Each year, it’s a good time to review your products and campaign data from the year prior. Consider:
☐ The Seasonality of Your Products
How does this impact your campaign year-round?
☐ Cyclical Products
☐ Time Lag for Busy Season
☐ Long Term Value of New Vs Returning clients
☐ Updating Your ROAS Goal
Set your ROAS goal using annual customer value
Other Optimizations: Display Network
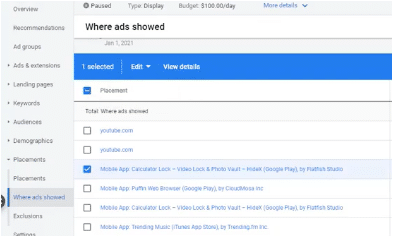
Display Campaigns: Look at where your ads are showing and make exclusions as needed (if they aren’t relevant).
From the Google Ads dashboard:
- Placements
- Where ads showed
- Select irrelevant sites and exclude
What’s Next?
You’re ready to fly, friend!
But if you’re feeling a little overwhelmed at the idea of running these campaigns on your own, the Solutions 8 YouTube channel is chock full of educational content including step-by-step tutorials, detailed explanations, and the latest updates and to help you along your Google Ads journey.
Subscribe to
The Solutions 8 YouTube Channel
Or, you can sign up for Traffic Ahead, the weekly newsletter that rounds up the best Google Ads content and delivers it straight to your inbox.
Subscribe to
Traffic Ahead: The Sol8 Weekly Update
Author
Patience is the former director of marketing and communications for Solutions 8. A phenomenal content writer, copywriter, editor, and marketer, she has played a prominent role in helping Solutions 8 become an authority in the Google Ads space. Patience is also the co-author of The Ultimate Guide to Choosing the Best Google Ads Agency and You vs Google.