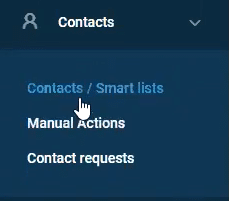
 Patience Hurlburt-Lawton
Attention GoHighLevel Users: Are you running Google Ads yet?
Google Ads is the best way to generate traffic, collect qualified leads, and of course, close clients—and it integrates smoothly with GoHighLevel.
But there’s something you need to know about setting up your account (that Google won’t tell you).
If you follow their automated settings, you’ll lose significant control over the money you spend. You’ll have limited options to optimize your campaigns, bidding strategies, and ads.
Which only means one thing: you won’t make the most of every dollar you spend on ads.
Fortunately, you’re about to learn exactly how to create Google Ads in expert mode–literally.
By the end of this post, you will:
- Create your Google Ads campaign
- Set up different ad groups
- Set up conversion tracking
- Set up a remarketing list for search ads
Start generating traffic and getting qualified prospects for your service-based business by learning how to create Google Ads from scratch, the right way.

Creating Your Google Ads Account
- Go to ads.google.com
If you don’t have a Google Ads account, this is the first screen that you’ll see.
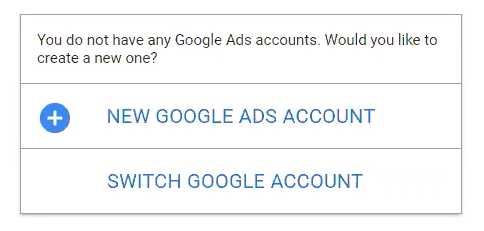
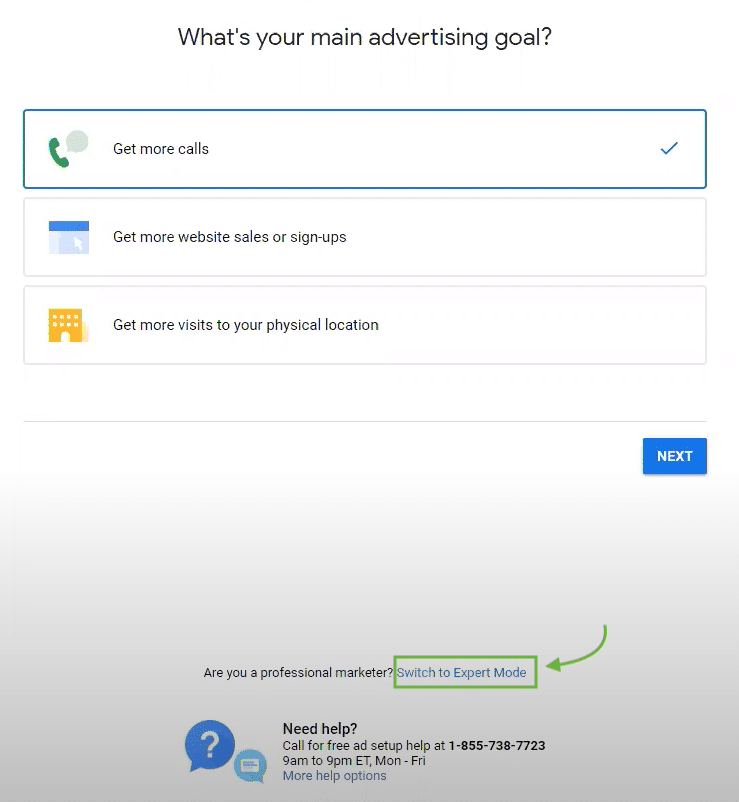
- Click New Google Ads Account. You’ll see a page that prompts you to choose any of the following:
- Get more calls
- Get more websites sales or sign-ups
- Get more visits to your physical location
Our recommendation? Don’t pick any. This is one of Google’s automated settings which means you won’t have the level of control you want over your ads.
It’s like the difference between cooking your own meal and ordering fast food.
It might be harder to cook the meal yourself but at least you get to choose what ingredients you use and produce the best dish. By ordering fast food, you don’t really have much of a choice.
- Going back to the set up: Choose the option down below that says “Switch to Expert Mode.”
New Campaign
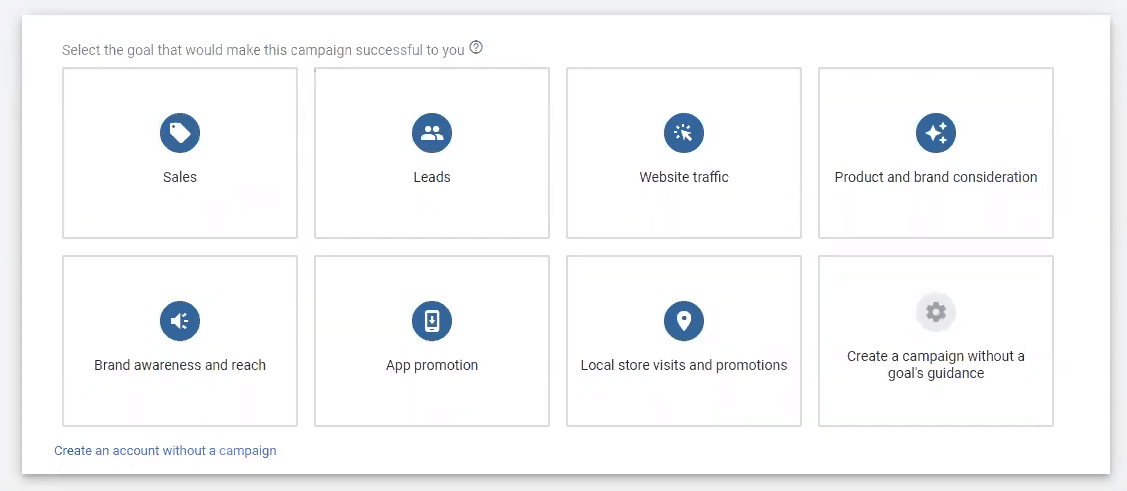
In this section, you need to choose a goal for your campaign. Keep in mind that each goal has its own limitations when it comes to ‘bidding strategies.’ We’ll go through that in more detail in a bit.
Choosing “Leads” will set an automated bidding strategy that’s best used by those who already have some history in running ads and getting leads. But for now let’s build it manually so we can pay for exactly how much we want.
- Select Create a campaign without a goal’s guidance
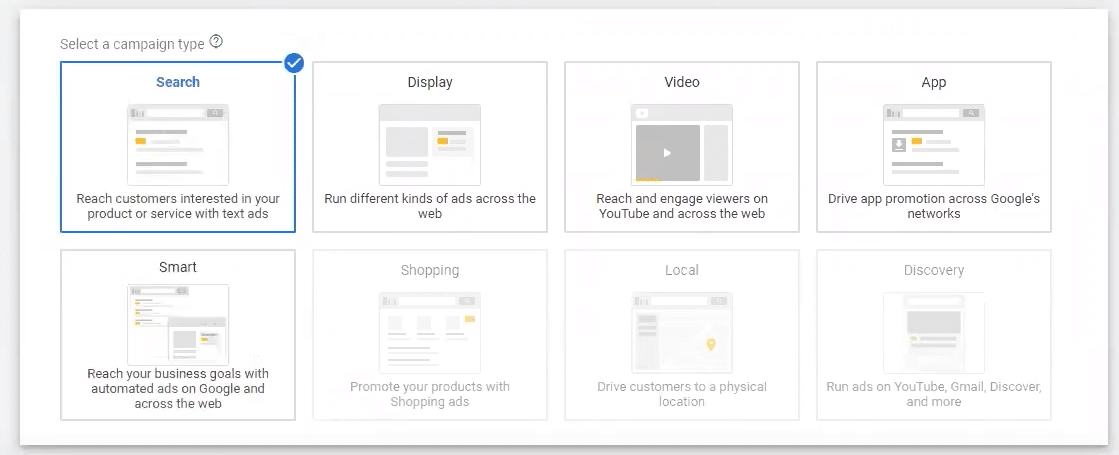
You’ll see another box with different options to choose from–these are the different campaign types you can use in Google Ads.
- Select Search
We’ll use search because we want to target people who search for services on Google using keywords.
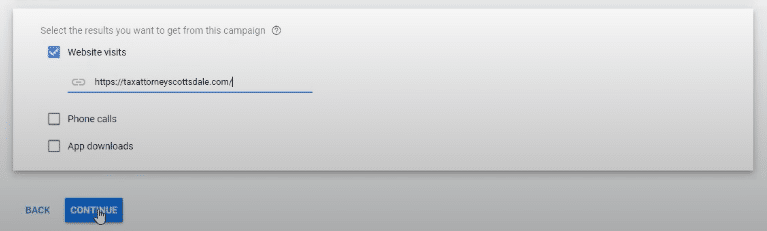
Once selected, Google will ask you what results you want to get from the campaign. Since we want to generate leads using our website, we’ll ignore “Phone calls” and “App downloads.”
6. Check the box Website visits, enter the URL of your website, and click Continue
New campaign – Select campaign settings
Before we move on, I want to talk about an important aspect of building campaigns. If you have different services in your business, you might need to create a campaign for each service. And here’s why.
Say that you’re a lawyer and you have two services: Personal Taxes and Corporate Taxes.
Building one campaign for both services means you can’t make changes separately–one setting will affect the other. If you want to increase your budget for personal taxes only, it will affect your corporate tax service.
So it’s ideal to create a one campaign for one service.
Campaign name
Name your campaign depending on the service or offer you’re providing. In this example, we’re creating a campaign for people who are searching for a personal tax lawyer.

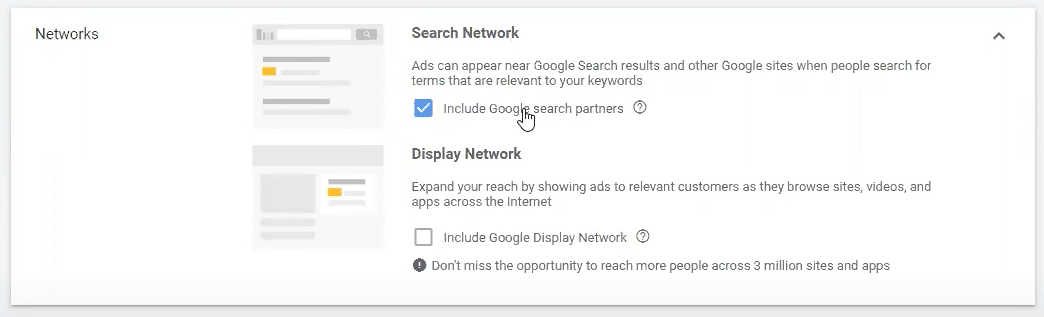
Networks
You’ll see that there are two options:
Search Network – your Ads can appear only when people are searching for terms relevant to your keywords.
Display Network – Google automatically finds people who are interested in your services and puts your Ads in front of them.
Only use Search Network for now–especially if you have a low daily budget–because you’re going to get more out of your daily ad spend by finding people who are “actively” searching.
Check Search Network only.
Show more settings
Start and end dates: You don’t need to change this unless you have a specific start and end date for your campaign.
Campaign URL options: This helps you track actual conversions inside GoHighLevel (or whatever platform you’re using). Read this to know more about why you need UTM parameters.
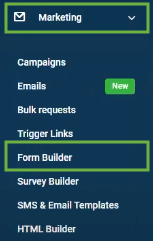
Here’s how you set up UTM parameters in GoHighLevel:
In your Dashboard, click on Marketing and select Form Builder.
Once you’re in the Form Builder, all you have to do is fill it out with your UTM parameters.
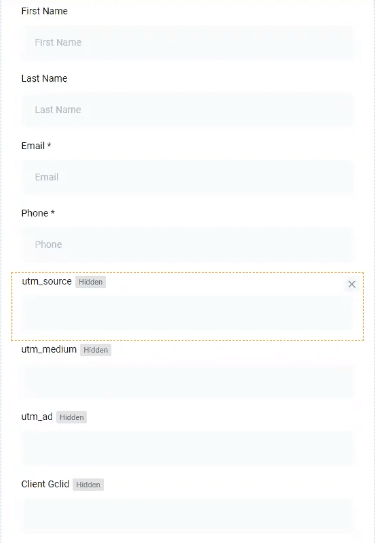
You can either create your own UTM template or use one that we have:
{lpurl}&utm_source=google&utm_medium={medium}&utm_campaign={campaign}
Drop this template in the Campaign URL Options under “Tracking Template.” This will dynamically insert the campaign information and the keyword used, allowing any campaign and keywords to pass through your hidden form fields anytime it’s used in your campaign.
Pro-tip: From Bojan Samardzija who commented in our YouTube video, you can paste the code at an account-level so you don’t have to add it to each campaign you create. Click on “All Campaigns” in the upper left corner, then click on Settings > Account Setting and then paste it under Tracking.
Once you’re done, you should be able to see all of the information inside of your “contacts.” And you can filter them by the UTM source you used.
Now, back to Google Ads.
Dynamic Search Ad Listing: This is used for another campaign called “DSA” (Dynamic Search Ads). We’re not going to cover and use this here.
Ad Schedule: This refers to the days and times your ads are going to run. Most of the time, this should be set 24/7. And here’s why:
When someone searches for you, they might not contact you right away. If your ad is running at the time they search, then they’ll see your ad–and maybe contact you later. But if your ad is not during that time, then that lead is lost.
Locations
By default, it’s set to “United States” (or the country you’re in.) If your business is location-specific, set it to the specific city or zip code. But what if you don’t know the city or zip code but you want to target (or not target) a specific area?
Target it by “Radius.”
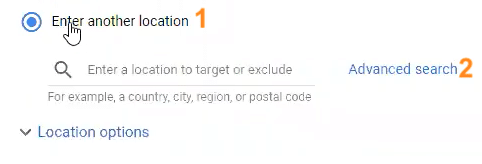
- Click on “Enter another location.”
- Click on “Advanced Search.”
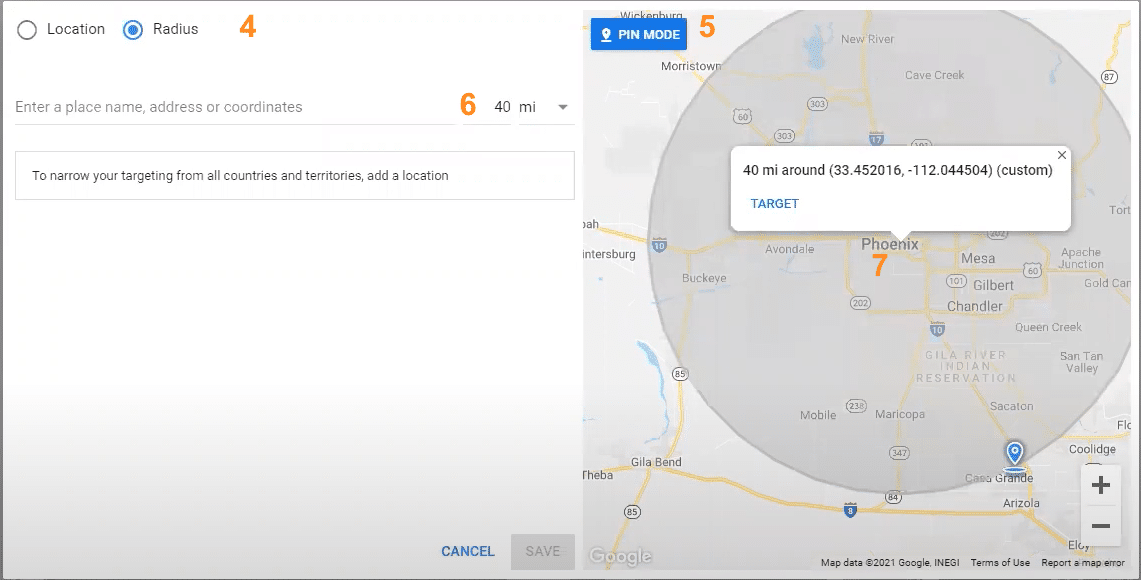
- Search for the area on the map you want to target.
- Click on “Radius.”
- Click on “Pin Mode.”
- Type the adjust the radius range.
- Drop the pin in the area you want to target.
Target: There are three options here but you’ll want to choose “Presence: People in or regularly in your targeted locations.”
Exclude: Choose “Presence: People in your excluded locations (recommended).”
Languages. Set this to “All languages” so even if your users’ browser is set to other languages (e.g. Spanish, French, Korean), as long as they’re using your keywords (in English), they’ll still see your ad.
Audiences: Leave this for now.
Budget: Enter your desired budget here.
Important: Google can spend 30.4 times of your daily budget in its monthly daily budget. Say that your daily budget is $1. Sometimes Google will spend $2.00/day. But on other days, it will spend $0.75/day. On average, your total spend should just be around $30.4/month.
Bidding: This is the most important part of your campaign.
In the beginning, don’t choose Google’s recommended bidding strategies. Instead, choose “select a bid strategy (not recommended).”
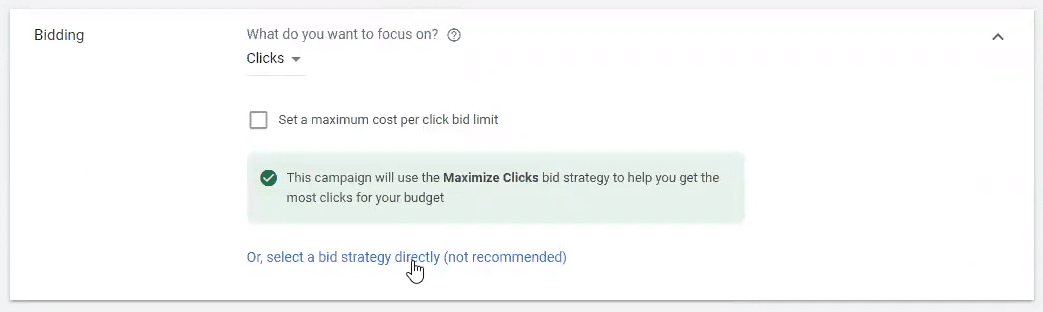
And then, select Manual CPC.
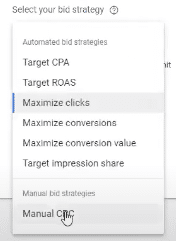
With Manual CPC, you get to choose what you want to place your bid at and test it there. This gives you more control over the keywords you want to test and bid on.
Show more settings
Conversions: Skip this for now
Ad rotation: Leave it to its default settings
Sitelink Extensions:
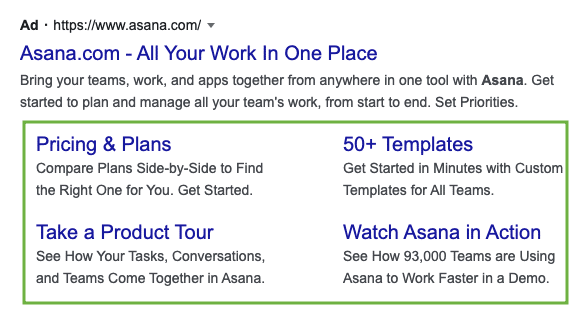
This is what sitelink extensions look like.
By using sitelink extensions, Google will reward you with a better ad placement–you’ll have more “real estate” in Google’s Search Engine Results Page (SERP). Watch our full tutorial on How to Use Sitelink Extensions.
Set Up Ad Groups
Ad groups are groups of ads tied to a group of keywords. They’re a subset of your main campaign and they help you select the right keywords relevant to the product or service you’re offering.
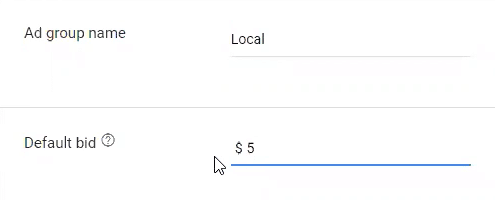
Ad group name: Enter your ad group name here.
Default bid means if you don’t set the bid manually, what bid should Google set for you?
Default bid: Enter your desired bid amount here. You can start with what’s affordable for you, and adjust later once the campaign starts.
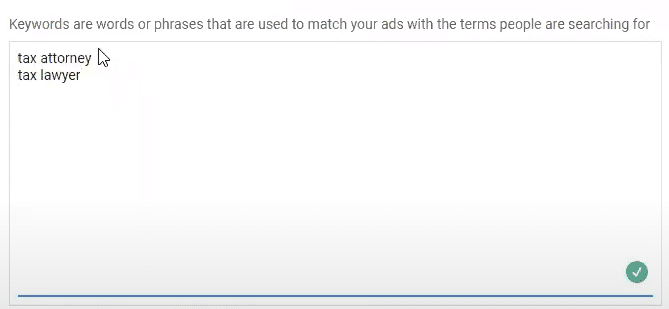
Keywords
There are two ways to automatically generate relevant keywords that people are bidding on.
- By entering your website URL.

- By entering your product/service.

Once you’re done, just click “Get Keywords” and you’ll see the relevant keywords generated in the box below.
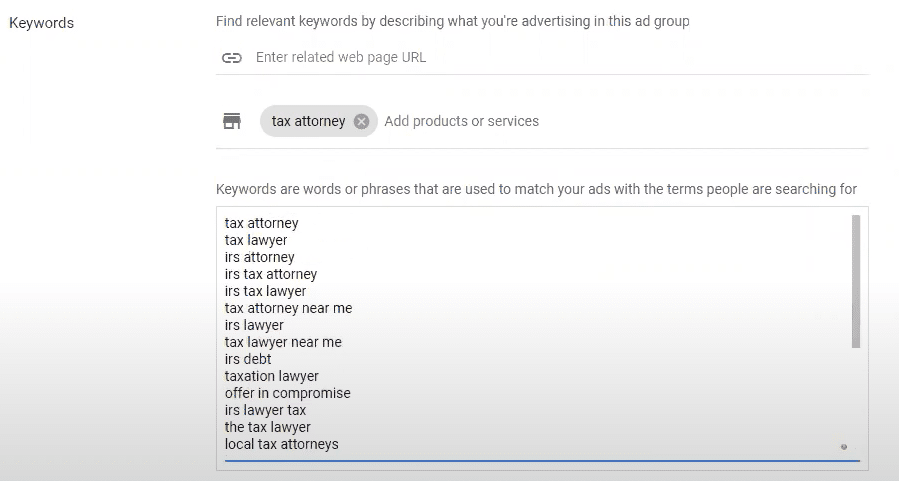
You might not want to get all the keywords listed, just pick the most relevant keywords only.
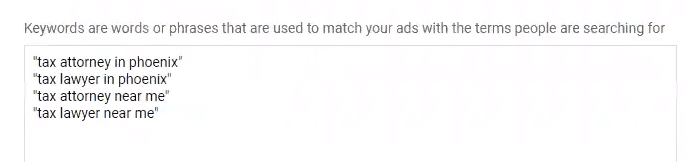
Next, create different variations of the keywords you picked.
4 Different Match Types
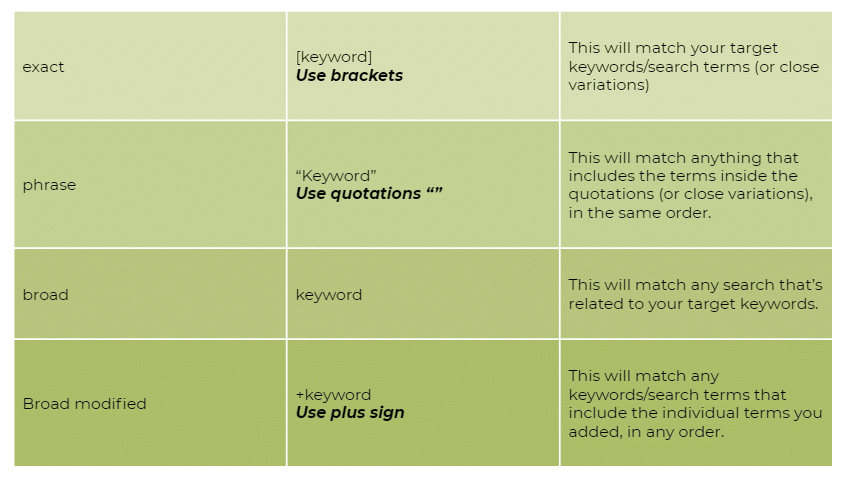
To illustrate these 4 match types, look at the table below:

Update: Google stopped supporting Broad match modifier keywords in July.
Our recommendation? Start with a phrase match.
Once you’re done, click Save and Continue.
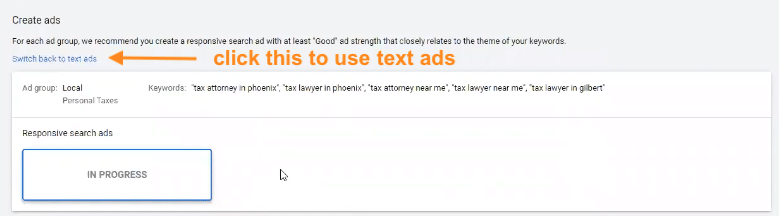
Create Ads
This section is where you can create your ads. By default, it will ask you to create responsive text ads. However, since you’re just starting out, we highly recommend using text ads–so you can have two expanded text ads and one responsive search ads.

Just click on “Switch back to text ads” to enable text ads.
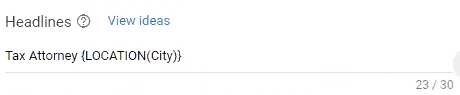
Inside your text ads, you can use dynamic keyword insertion. It allows you to insert different variables like keyword, countdown, and most importantly, location.
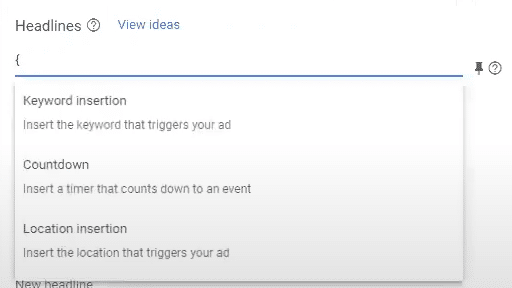
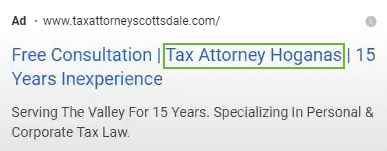
If the person is searching from New York, my headline will automatically change from “tax attorney in Phoenix” to “tax attorney in New York.”

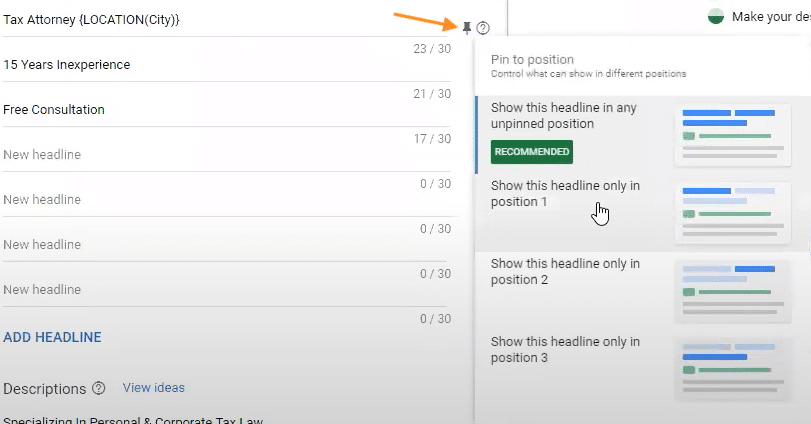
Pro tip: If you want to make your headline’s position fixed, just click on the pin icon and select the position you want.
So now you’re ready to create your text ads. We’ve created a post on how to write amazing text ads here. You can also watch this video.
Need help with writing your ad copy? Here’s a video on how to write successful Google Ads copy (with REAL examples).
Set up billing
You’re almost done! Just add your billing information and click submit.
How to bid for your position in Google’s SERP
Getting on the first page and being the first result on the first page have different bidding costs. How do you find out about the cost? By adding attributes and modifying your dashboard’s columns.
- Go to your Google Ads Dashboard, on the left side you’ll see the campaign you created, click it.
- Click “Search Keywords.” You’ll see the overview of your search keywords.
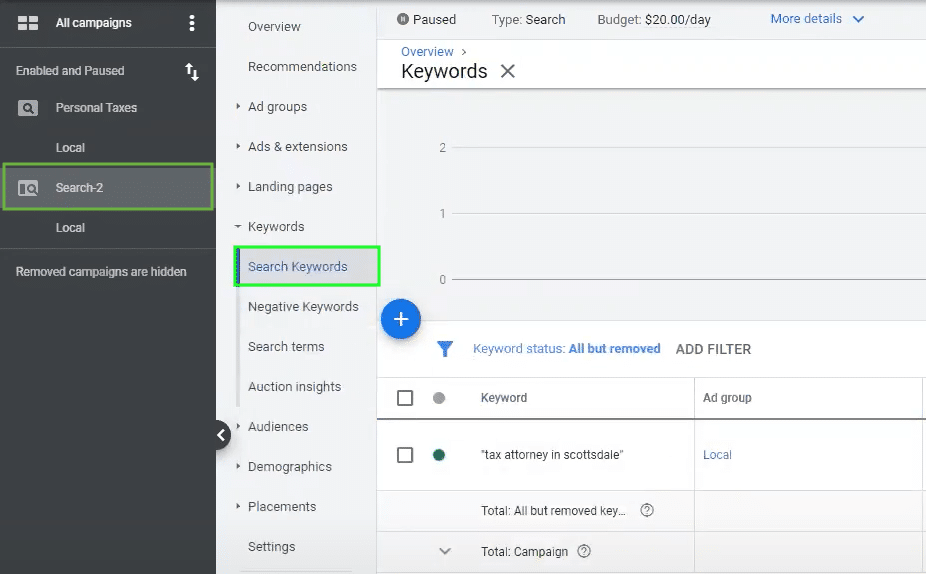
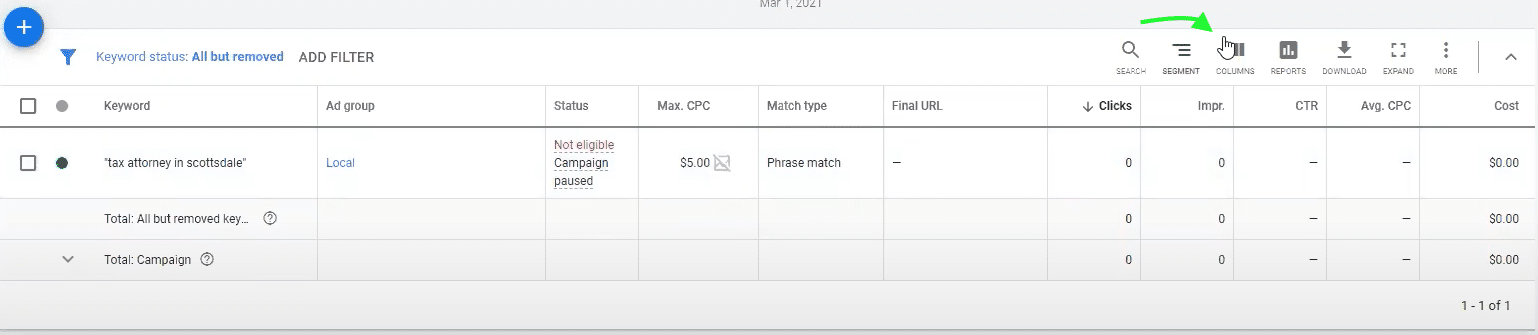
- Click “Columns.”
- Click “Attribution” and check the following boxes:
- Est. first page bid
- Est. first position bid
- Est. top of page bid
- On the right hand side, arrange the order of attributes and bring them up. Then click Apply.
You should now see those attributes in your columns.
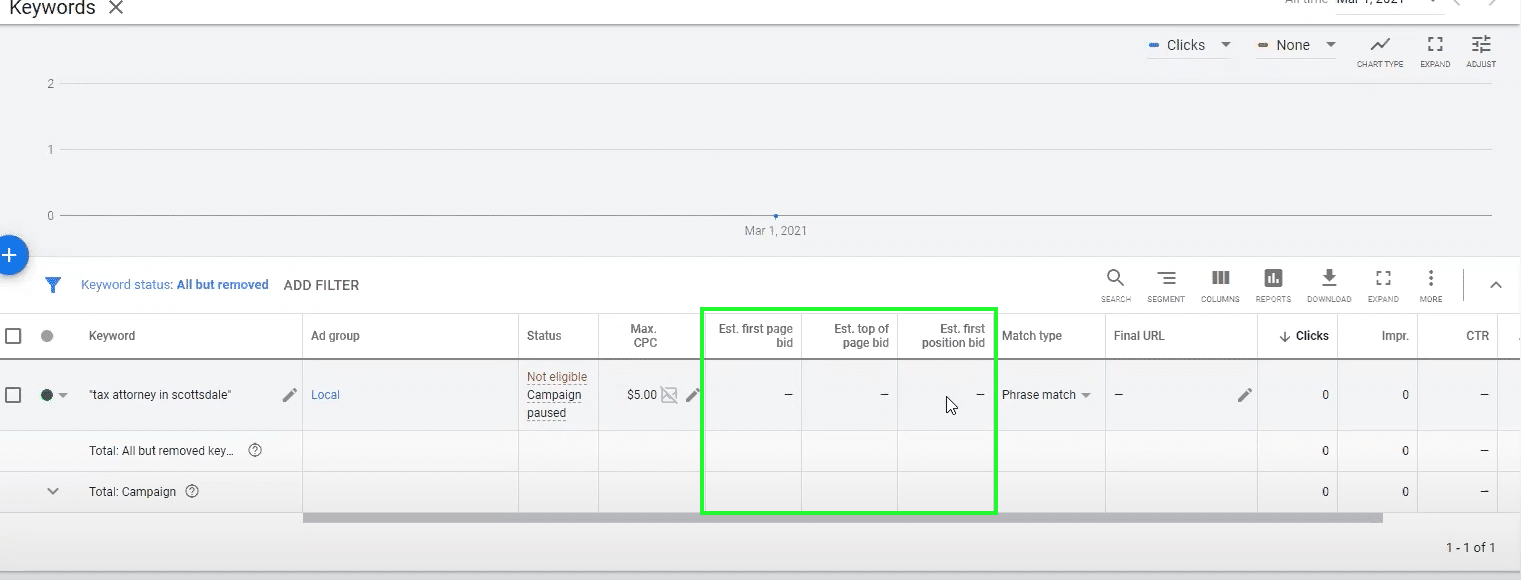
Once your campaign is running, the costs will appear in each column.
What position should you be in? Always choose be on the top page, between the second and third position. If you’re always in first position, you’ll be overspending. If you’re at the bottom, you’ll be underperforming–most people don’t even get to the bottom page.
How does bidding work?
Let’s say you want to be in the fourth position and the Est. Top of bid page costs $1.05. Bidding higher than that would probably get you in the fourth position.
Now, in order to identify which position you think you’ll be in, you also need to monitor other metrics like search impressions, search top impressions, and search absolute top impressions share.
Conversion Tracking
Conversion tracking allows you to track user actions and behavior on your site. It helps Google understand what your goals are and tells you if you achieved your goals and how.
If you want to track your conversions, we highly recommend using Google Tag Manager (GTM). If you haven’t created an account yet, follow the instructions in this video.
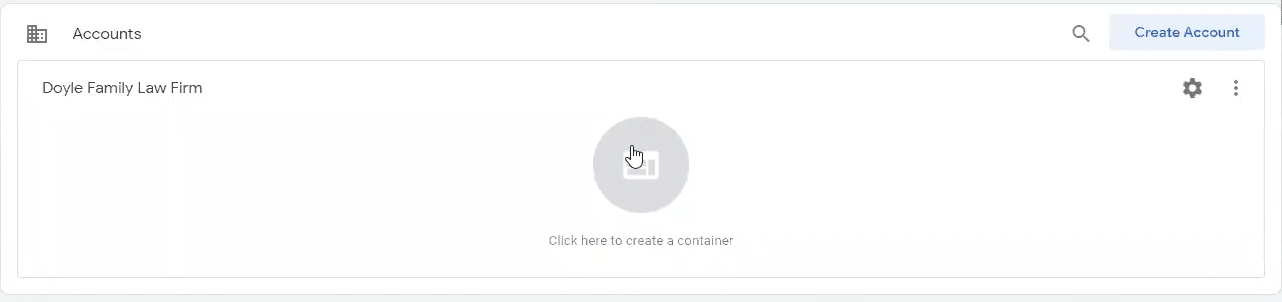
When you’re done, you should see your account in GTM, under “All Accounts.” And now you’re ready to create a container.
Create a Container
Container name: Enter your site URL here “[yoursite.com].”
Target platform: Since we’re not dealing with any applications, just choose “Web.”
3. Click “Columns.”
As soon as you click “Create,” you’ll see a pop-up with some codes. Don’t close that window. You’ll need those tracking codes so that GTM can monitor all traffic on your site and report back on it.
So, head over to the backend of your website in GoHighLevel.
- In GoHighLevel Dashboard, click on Funnels and Websites > Websites. Select the right website and click the edit button.

- You should see the different pages of your website. Click “Settings.”
- Remember the pop-up window in Google Tag Manager that has codes in it? Copy the codes and paste them in the head and body of your website.
- Paste the code <head> to “Head tracking code” and <body> to “Body tracking code” and click “save.”
Setting up Your Conversion Tracking
Now that you’ve successfully installed Google Tag Manager in your site, you’re ready to set up conversion tracking.
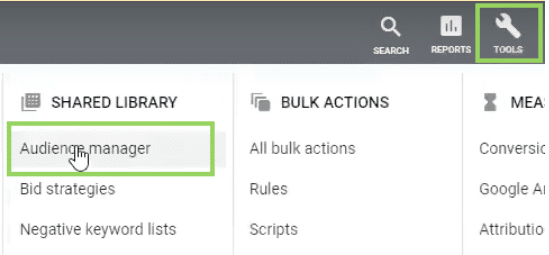
- Back to Google Ads, on the upper right part of your dashboard, click “Tools” and under Measurement, click “Conversions.”
- Click the “+Conversions” button.
- Click “Website” to track actions on your website.
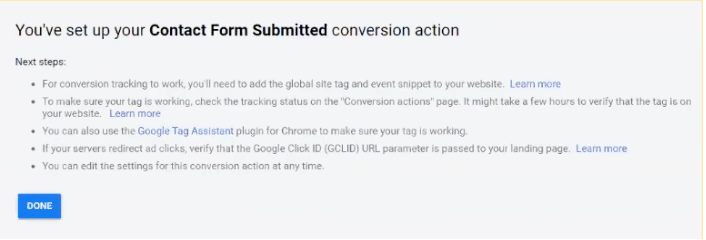
New Conversion Action – Create an action
In this section, we’re going to create a conversion tracking to track users who submitted a lead form.
Category: Select “Submit lead form.”
Make sure that you choose the right action because whatever you choose, Google tag it as a “conversion” and get more of those people who will probably take the same action.
For example, if you choose “Subscribe,” Google will find more people who will likely subscribe. But what if you want to have more people to submit a lead form? You won’t. That’s why it’s important to select the right conversion action.
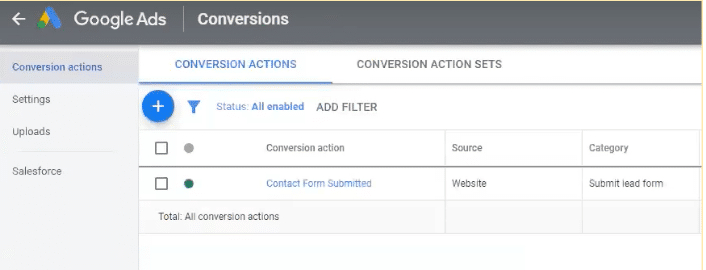
Conversion name: Contact Form Submitted
Enter a name that’s relevant to the action and easy to remember.
Value: Choose “Don’t use a value for this conversion action (not recommended).”
Unless you’re an ecommerce and selling products, it’s best to leave it to this setting.
Count: Choose “One”
By choosing “One,” every action is counted as one. Let’s say that the user:
- Filled out a contact form
- Completed an action plan
- Booked a phone call
These three actions would’ve been 3 conversions. But in reality it’s only 1. By setting up your count to “One”, you avoid having false conversions that will hurt your data.
Click-through conversion window: Set it to “90 days,”
You want to track your user for as long as possible. This means, anybody that clicks and converts within 90 days, you’ll be able to track them.
View-through conversion window: Set it to “30 days”.
Include in “Conversions”: Keep the default setting “Yes.”
Attribution model: Select “Last click.”
The standard setting we use is last click attribution. But if you want to know more about how different attributions work, watch this video.
Don’t forget to turn on “Enable Enhanced CPC.”

Setting up the tag
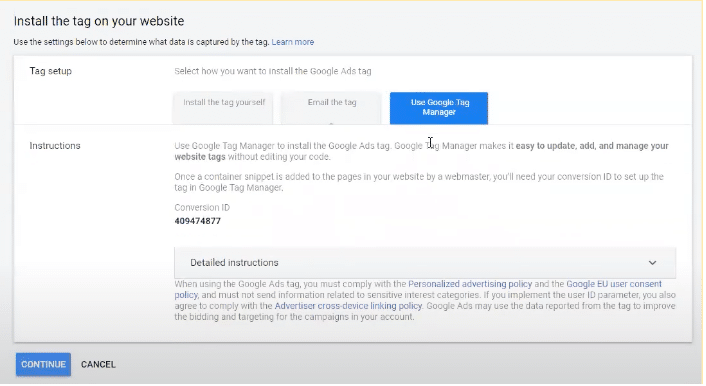
Since you already installed Google Tag Manager, all you have to do is choose “Use Google Tag Manager.”
For now, just keep this window open. You’ll need the Conversion ID and Conversion label once you’re setting up the tags in Google Tag Manager.
Go back to your Google Tag Manager dashboard to set up your trigger and tag.
A tag is a snippet of code or tracking pixels. A trigger allows you to control what tags are being fired on your website. You can also think of them this way:
Trigger means “Did something happen?”
Tag means “Well, how do we report on it?”
How to set up your trigger
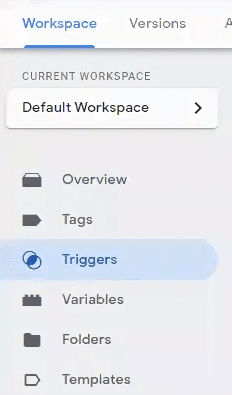
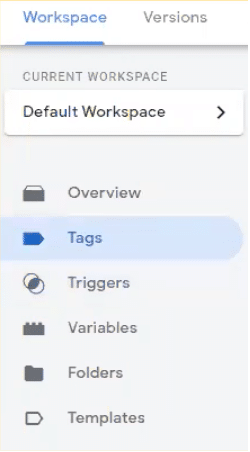
- In your Google Tag Manager workspace, click “Trigger” and then “New.”
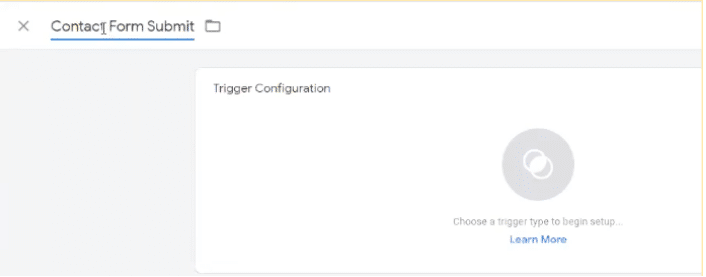
- Name your trigger “Contact Form Submit,”
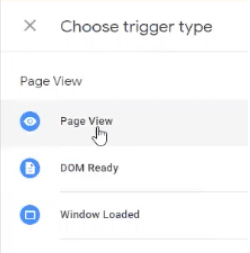
- Choose Pageview as your trigger type.
- Choose Page URL, contains, and copy the address of your contact form’s thank you page. You want to only copy everything after “.com.”
For example, let’s say that your site site is “https://abc.com/thank-you-contact” only copy “/thank-you-contact.”
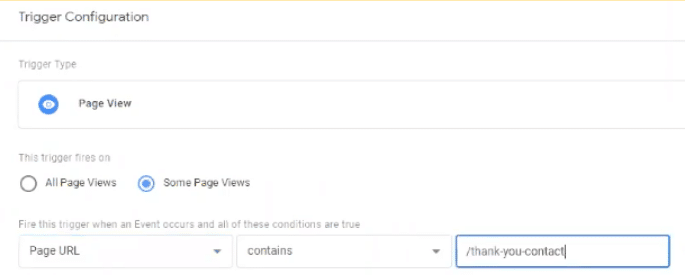
So if your user lands on your contact form’s thank you page, you know that they filled out your form–and this trigger will fire.
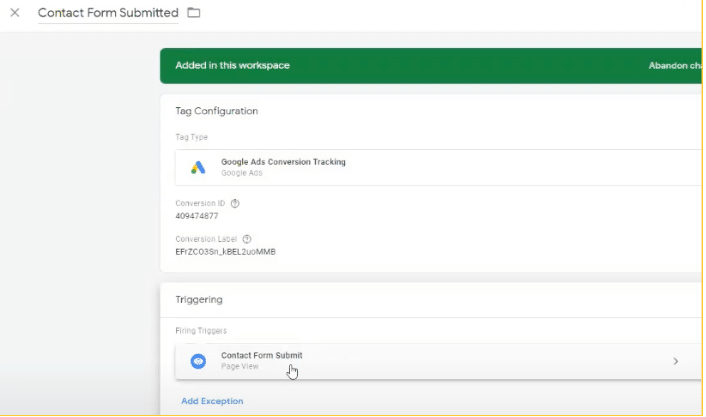
How to set up your tag
- In your Google Tag Manager workspace, click “Tags” and then “New”.
- Name your trigger “Contact Form Submitted,”
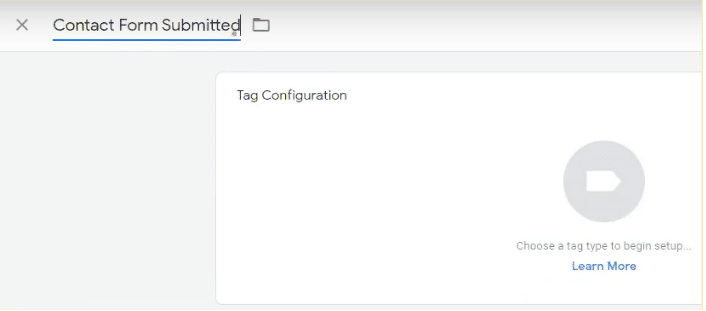
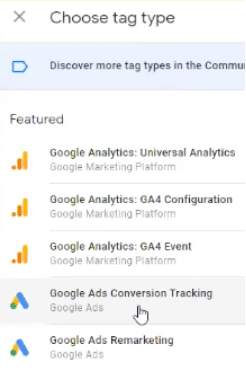
3. Choose Google Ads Conversion Tracking as your trigger type.
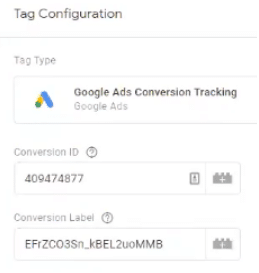
4. Go back to Google Ads and copy the Conversion ID and Conversion label, then paste them in the corresponding fields in GTM.
- Leave everything else as is..
- Under “Triggering”, set it to “Contact Form Submit.”
- Go to the top right part of your GTM workspace and click Submit.
- You can add a name and your notes. When you’re ready, click Publish.
- Go back to Google Ads, click “Done”.
Quick reminder: If you want to test your Google ADs Conversion Tracking and see if the tags fire up, watch this quick video tutorial.
You should see this conversion action in your dashboard.
Remarketing List for Search Ads (RSLA)
How to set up a Remarketing Tag (Google Ads Tag)
Go to your Google Ads Dashboard, on the upper right part of your dashboard, click “Tools” and under Shared Library, click “Conversions.”
2. Once you’re inside the Audience manager, on the left hand side, click on Audience sources.
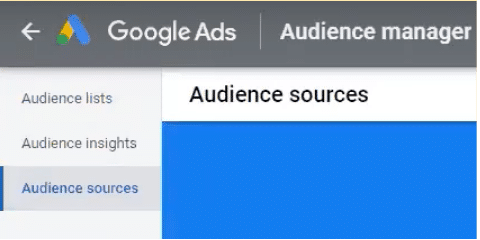
3. You should see a bunch of options. Look for “Google Ads tag” and click “Set up tag”
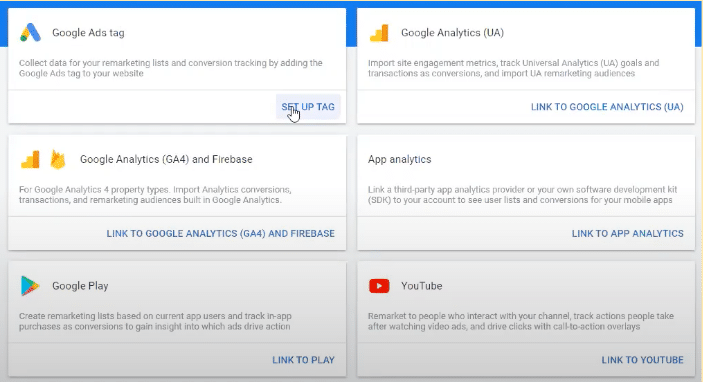
Setting up your Google Ads tag
Create data
Remarketing: Select “Only collect general website visit data to show ads to your website visitors.”
Restricted data processing: Click Exclude California users from remarketing list data.
Before you include California users, it’s best to consult an attorney first. However, if you’re okay with complying to all the GDPR type of restrictions that California has, you can uncheck Exclude California users. Learn more about California Consumers Privacy Act here.
User ID: Just keep it to its default setting (unchecked).
Click “Save and Continue.”
Installing the tag
1. Go back to your Google Tag Manager dashboard. Inside your Workspace, click “Tags” and then “New.” to set up your trigger and tag.

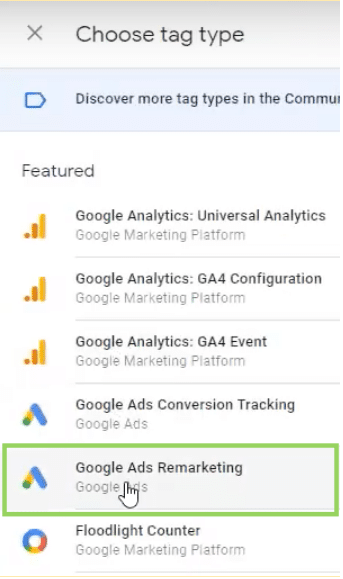
2. Name your tag “Remarketing Tag” and then click “Tag Configuration.”
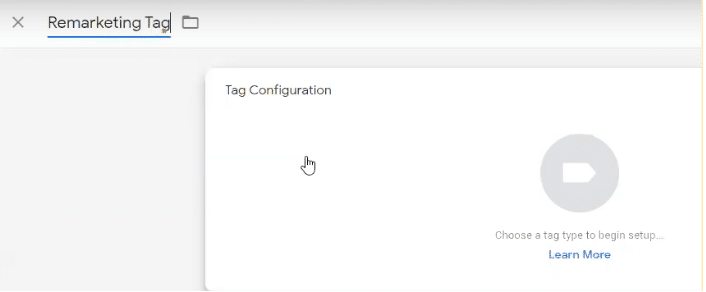
- Choose Google Ads Remarketing as your trigger type.
Warning: Don’t get confused. Google Ads Conversion Tracking and Google Ads Remarketing might look the same, but they are different. For this set up, make sure you choose Google Ads Remarketing.
4. Go back to Google Ads and copy the Conversion ID, then paste them in the corresponding fields in GTM.
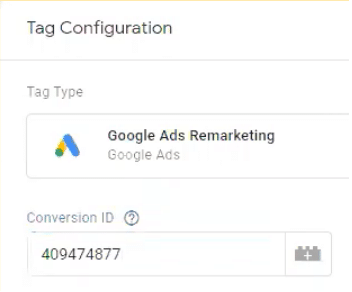
- Leave everything else as is and go back to your “Contact Form Submitted” Tag.
- Under “Triggering”, set it to “All pages.”
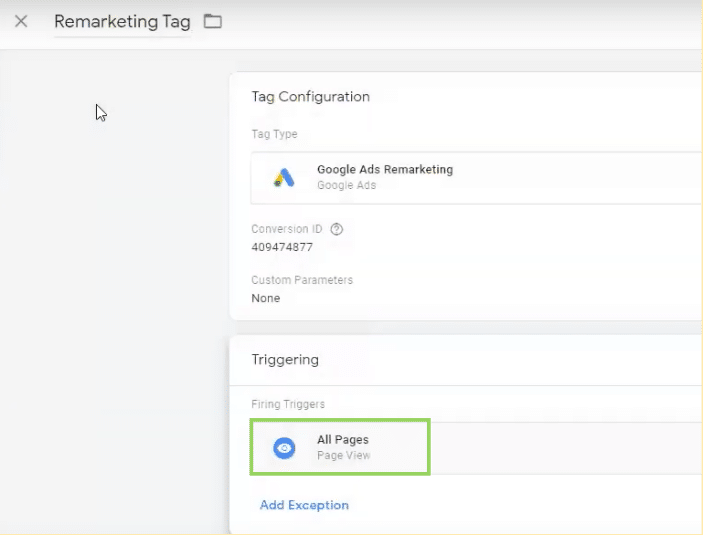
- Go to the top right part of your GTM workspace and click Submit.
- You can add a name and your notes. When you’re ready, click Publish.
- Go back to Google Ads, click “Done.”
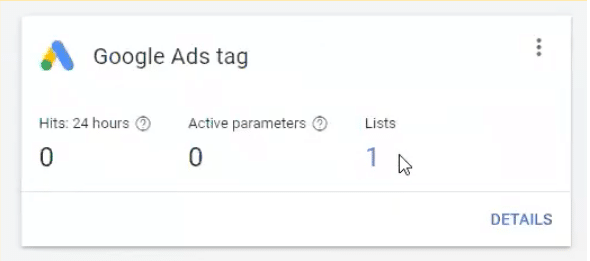
You should be able to see a tag on your site now.
Set up your remarketing list
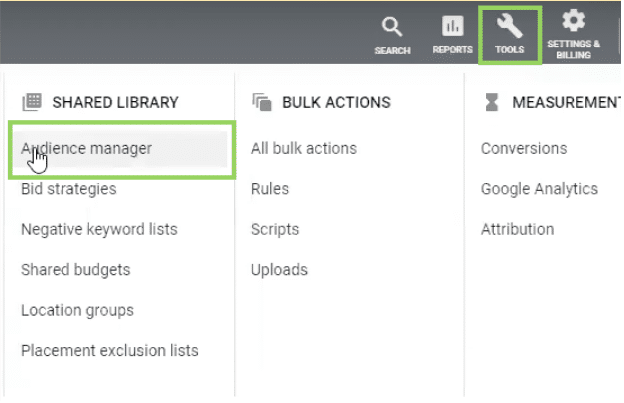
- Go to your Google Ads Dashboard, on the upper right part of your dashboard, click “Tools” and under Shared Library, click “Audience manager.”
- Click the “+” symbol to create a remarketing list, then choose “Website visitors.”
New Audience: Website visitors
In this section, we’re going to create your audience list.
Audience name: All Website Visitors
Just pick an obvious name that’s easy to remember.
List members: Choose “Visitors of a page.”
Visited page: Choose “Match any rule group,” then “Page URL” “contains” “/.”
You can either leave this to its default setting or just add a “/”. It’s up to you.
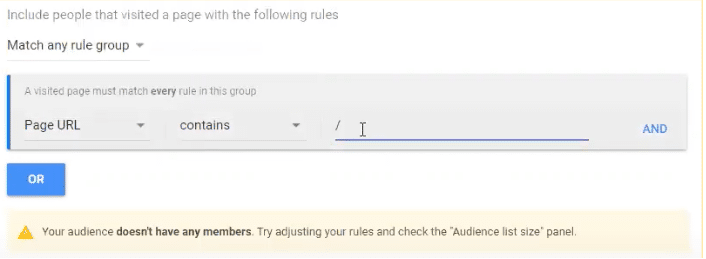
You might see a warning that says “Your audience doesn’t have any members. Try adjusting your rules and check the “Audience list size” panel. Ignore it–you just installed the tag that’s why there are no members yet.
Prefill options: Choose “Pre-fill list with people who matched the rules within the past 30 days.”
Membership duration: Enter the maximum number of days “540.”
This means how long the user (who visited your site) stays on this list.
Description: You can add a description if you want to.
Don’t forget to click “Create audience.”
How to set up your RLSA
- In your Google Ads dashboard, click on the name of your main campaign, then click “Audiences”.
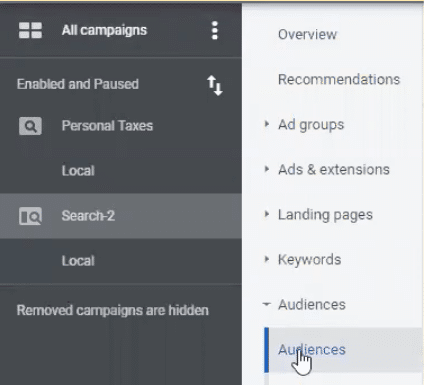
2. Click on “Add Audiences.”
3. Once you’re inside “Audiences,” click “Observation (recommended),” then click on “Browse.”
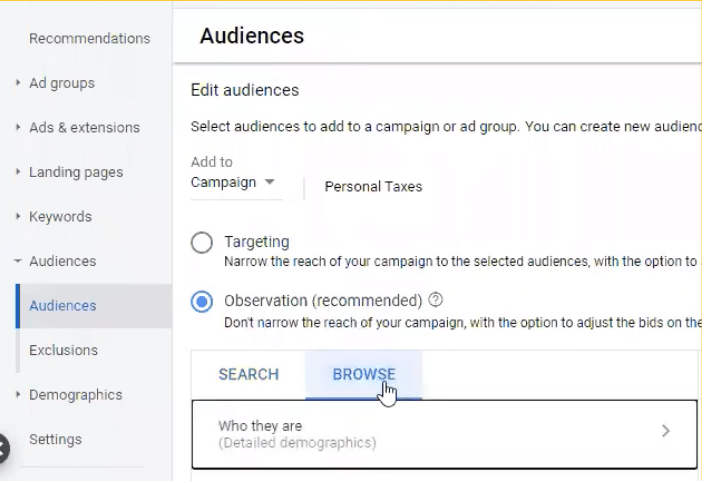
4. Under “Browse”, click on “How they have interacted with your business”.
5. Click on “All Website Visitors” then hit Save.
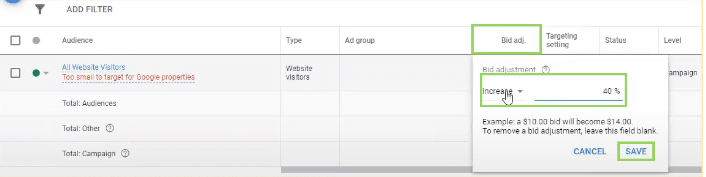
If you’re still in the Audiences dashboard, click on “Bid adj”. Then, increase your bid to 40% and Save.
Now you’ve just set your RSLA. This is a simple set up but nonetheless, a VERY powerful strategy. And here’s why.
When someone searches for your service, say, “Tax attorney in Phoenix,” they’ll probably click on all the ads they see–and one of those is your ad in the third position.
Let’s say that this person isn’t ready to make a decision yet and leaves your website.
A few days after, he’s ready to get an attorney. He searches on Google again and types “Tax attorney in Phoenix,” and guess what happens?
He sees your ad ranked in the FIRST position. Because you’ve set up your RSLA, you essentially told Google:
“I’ll bid 40% higher for anyone who visited my website before and are still searching for the keyword.”
With RSLA, you’ll not only be able to drive MORE leads, you’ll also improve the lead quality, reduce ad costs and get more conversions.
And that’s how you create Google Ads from scratch. I know, it’s a lot to take in. But don’t get overwhelmed! You can always download this FREE step-by-step guide and use it later as a reference in creating your Google Ads account OR send it to someone who can do it for you.
Want to get more awesome tips, best practices, and PROVEN Google Ads strategies? Subscribe to our YouTube channel. We post the latest updates about everything Google Ads, every single day.


Tim Lyons
Founder || ProFit Marketing Solutions
Two-time “Two Comma Club Award” Recipient

Interested to work with us?
No cost. No obligation. No high-pressure salesmanship. The action plan is yours to keep regardless of whether or not you choose to move forward with us. What do you have to lose?
Author
Patience is the former director of marketing and communications for Solutions 8. A phenomenal content writer, copywriter, editor, and marketer, she has played a prominent role in helping Solutions 8 become an authority in the Google Ads space. Patience is also the co-author of The Ultimate Guide to Choosing the Best Google Ads Agency and You vs Google.