First things first:
We’re about to tell you everything you need to know about running Google Ads for lead generation.
Looking for the tutorial on Google Ads for eCommerce?
We have that.
Not just what buttons to push (and not to push), but the why and how of Google, so you can be Google Ads savvy long-term.
But here’s our disclaimer: We are not following the rules.
If you’ve taken courses elsewhere, gotten certified, or noticed those little [recommended] notes in the Google Ads dashboard, those are all the things we’ll break rank on.
And that’s what makes this ultimate guide (and our agency, Solutions 8) different from all the others out there.
What’s In It For You?
By the end of this guide, you’ll walk away with:
- The ability to navigate the Google Ads dashboard like a pro
- Five campaigns ready to run
While we’ll touch on Performance Max campaigns, you can read the Ultimate Guide to PMax here.
- *An understanding of the core concepts and philosophy of Google Ads, so you can adapt to Google’s (many) changes for years to come
Want a Permanent Copy of This Guide?
Download Yours For Free!
Table of Contents
Useful resources for this guide:
- Google Ads: Ads.Google.com
- Google Tag Manager: Tagmanager.googgle.com
- Google Analytics: Analytics.google.com
PART ONE
Learning: Google Ads for Lead Generation
Why PPC?
Before we dive into building campaigns (or even determining if Google Ads is right for your business) we want to make sure you really understand the foundations of paid ads.
Afterall, when it comes to digital marketing for lead generation businesses, there are a whole lot of channels to choose from:
Social media can boost brand awareness and make connections.
Email marketing can keep your community active.
…And PPC (specifically Google Ads) can enable steady growth and sales.

And, know what? Each channel is effective when executed properly.
Why PPC for Lead Generation?
PPC (pay per click) advertising is a favorite among marketers, adored for its “quick results” (we’ll talk more about this soon).
Reminder:
PPC Advertising = Ads that appear on search engine result pages, videos, apps, websites, and social media.
Because we live in a highly digital world (checking emails, watching YouTube videos, posting on social media), these kinds of ads appear everywhere (the top of our inbox, a pre-video ad, mixed into our social feed)—so they get a whole lot of views.
But the business owner doesn’t pay for views, they only pay when a user clicks.
And perhaps the best part? PPC advertising is about finding customers who are ready to buy through search history, audience type, and a whole lot of data.
The only caveat is you have to know what you’re doing to find those ready-to-buy customers.
Which is especially hard if you’re trying to master multiple PPC advertising platforms, like Microsoft Ads, Facebook Ads, Instagram Ads, and Google Ads, all at once.
Why Google Ads? (And Google Ads Only)
We’ve been trained to turn to Google with every question we have.
But, still, Google is so much more than a search engine, it is also YouTube, email, apps (like Google Calendar), Google Maps, and Android.
…And, Google collects information about us all, and can therefore predict intent—which means Google can put somebody who’s willing to buy your service or product in front of your ad (sometimes before the user even knows they want to buy).
Need a Refresher on the Basics of Google Ads?

In fact, 67% of all high commercial intent keyphrases go to a paid ad.
We’ll reiterate:
When someone wants to buy, two out of three(!) of those Google searches result in clicking on an ad.
That tells us that when people are in the learning phase of the buying process, they go for organic search results.
But when they are ready to buy—customers click the ads.
What Is Google Ads?
Want to know a bit more about Google Ads and how it works before committing to building your own campaign?
For all those foundational questions (like how a Google Ad appears or how the Google Ads auction works) you can learn all the basics first here.
Or:
How Google Ads Works: The Google Network
We tend to think of Google as the search engine, right?
But the Google ecosystem is massive and includes:
- YouTube
- Gmail
- Apps (think Google Calendar)
- Google Maps
- Android
- The Google Display Network
And for every piece of “real estate” owned by Google (email, search engines, YouTube, apps) there is a way to advertise (i.e. a campaign type).
Different Types of Campaigns
Let’s briefly cover the different types of Google Ads campaigns:
Google Search Campaigns

This is the campaign we generally refer to when we talk about Google Ads.
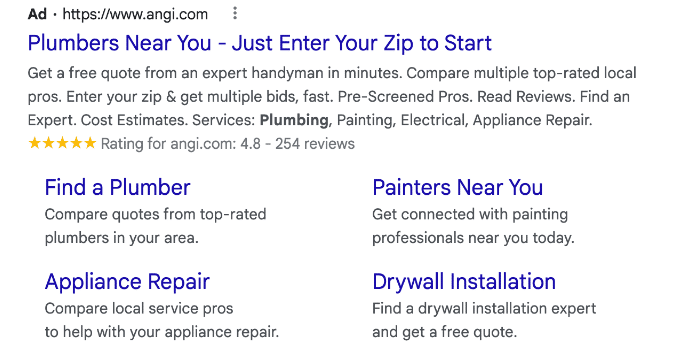
Again, you’ll recognize these ads as the first results that pop up on the top of a Google search results page:
Google Shopping Campaigns
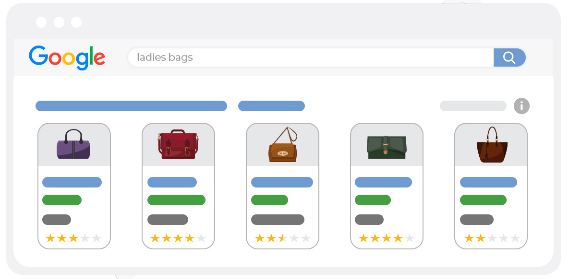
This campaign type exists inside Google’s shopping ecosystem but can also be expanded to other types of responsive display ads.
Google Display Campaigns
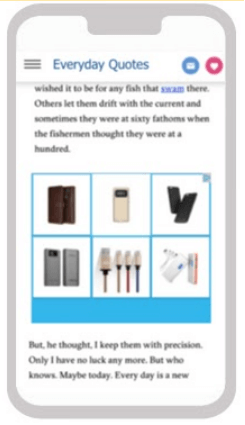
Websites that allow advertisements to take up space on their pages. The ads are usually an image (see: “display”).
Video Campaigns
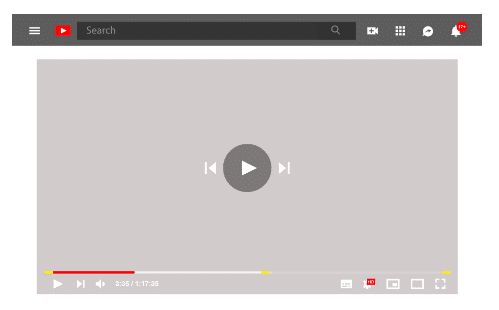
Video ads that pop up before, after, or in the middle of a YouTube video.
These video ads can also appear at the top of a YouTube search:

But! Video campaigns are not just for YouTube. These types of ads can appear through Google display network (see above) and other areas of Google’s ecosystem.
App Campaigns

Promote your app across Google’s networks, including Google Search, Display, YouTube, and Google Play (the app, game, ebook, and general entertainment store for Android devices).
Performance Max Campaigns
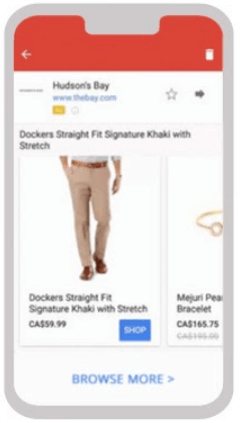
Algorithmically controlled automated ads on Google and across the web.
Google Discovery Campaigns
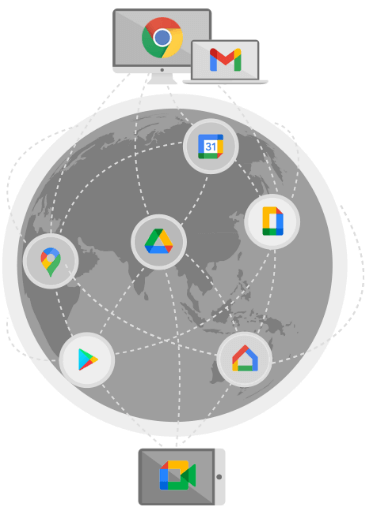
These ads are pushed across the entire Google ecosystem.
Believe it or not, there’s more.
But for the sake of this guide (and our sanity) we are going to focus primarily on search campaigns.
Why?
Search is the strongest indication of intent. For example, when a user is ready to buy, what’s the first thing they do? They probably don’t go looking for ads that pop up on a website or YouTube video. They Google it.
Which is when those handy search ads appear at the top of the results page.
So, while all campaigns have their place—we like using search first.
In fact, three out of the four campaigns we will build together are search.
How Google Ads Works: The Google Search Advertising Network
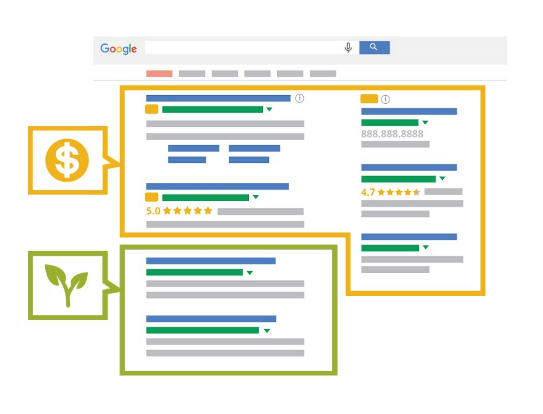
Paid search results = Ads that appear on the Google search results page.
Organic search results = All other search results that are not advertisements.
Historically, organic search results ranked much higher than they do now.
Now, organic search results are far below the fold—and if you’re on a smartphone or mobile device, you might have to scroll two or three times before you even get to the first organic result.
Suffice to say, Google now heavily prioritizes ads.
Here’s a quick explanation of how Google search ads appear:
- Up to four ads that land at the top of the search results
- Sometimes also found in the maps
- Marked with a subtle “Ad” label
- Typically occupies the entire page “above the fold” (especially on mobile)
It’s important to understand that Google also prioritizes relevance. They want people to respect their ecosystem. For example, if your ad is relevant to the search, you will rank higher and spend less money.
Google is training their user base to trust their ecosystem.
And, even if you think you never click on the paid results—the data shows otherwise.
How Google Ads Works: The Google Ads Auction
(I.e. How Do Ads Show Up?)
Google is a matchmaker:
1. User performs a search
2. Google matches that user’s search (including specific information about that user) with all of the advertisers who are bidding on that search term and geography
*For example: if you spent the last day researching presidents and performed a search for “Washington,” your results will likely be related to George Washington; however, if you spent the day looking into the Pacific Northwest, your results would likely be geared toward Washington state.*
3. A real-time auction is performed based on the advertisers’ ad rank (quality score)
4. The highest ranked advertisers appear in order of ad rank
Let’s emphasize: this all happens in real-time.
Just Because You’re Willing to Pay More, Doesn’t Mean You Will
The more quality you bring to the table, the less you pay and the higher you rank.
This is where things get even more interesting with the Google Ads auction:
The highest bidder may win the bid, but only pays the second highest bidder’s price.
This is brilliant because it means advertisers are bidding for the value of the click, instead of bidding against each other.

It also means the first position could be paying $15 after bidding $80 for a click, which means there’s a massive chasm between where they are and where you would need to be in order to be competitive.
Furthermore: Being #1 Isn’t Always Most Profitable
If you’re in position #2 or #3, you’ll pay much less for a click than you would at position #1—and you might get enough leads to justify the concession of not being in first position.
In fact, if you bid against a competitor who is extremely competitive (think of those companies whose names you see everywhere)—chances are users already know who they are and may skip over them anyway.

Google Ads: Ad Rank
How much you bid on your ad is only one of several factors Google takes into account when determining ad rank (who earns which spot at the top of a search).
The quality of your ad is another key factor, along with the expected impact of ad extensions.
Bid = The maximum amount of money you’re willing to pay for a user clicking on your ad
Quality = The usefulness of your ad and the site it links to, according to the user’s search
Ad Extensions = When you created your ad, you have the opportunity to include additional information (like a phone number), referred to as ad extensions. If you don’t have any ad extensions, you will have no extensions impact. If you are only eligible for one extension, you will have a low extensions impact. But if you are eligible for many extensions (so, you include direct page links, a phone number, and address in your ad, for example), you will have a high extensions impact.
Additionally, Google calculates other factors such as the competitiveness of the auction, the ad rank thresholds (your ability to compete in an ad auction), and who the user is (based on things like geographic location, device, and past searches).
In other words, the more likely Google thinks a particular user will engage with your ad, the higher your ad rank will be; but this can change from user to user depending on relevance.
So, there is no way to know your ad rank because this measurement is recalculated every time your ad competes in an auction. But, as we mentioned above, Google gives us some indications into what is included in the ad rank:
- Your bid (How much you’re willing to pay for the click)
- The quality of your ads and landing pages (well written ads, relevant landing pages, interesting content, consistent offers)
- Competitiveness of an auction
- The context of the search
- The expected impact from your ad extensions and other ad formats
Is Google Ads Right for Your Business?
One more thing before we go any further:
It’s imperative to determine if Google Ads is right for your business.
For most businesses, the answer is yes. But there’s a catch. It takes time to build, launch, and optimize campaigns—and ultimately, see results.
That means you need to have realistic expectations. Here are seven quick questions to consider first:
1. Are you ready to commit? It typically takes about 90 days to determine if there’s potential for a predictable, scalable growth schedule.
2. Can you afford the cost to get the ball rolling? You’ll want to spend at least $1,000-$1,500 per month at the bare minimum; but we recommend starting at a $2000 minimum.
3. What are your business goals? Ask yourself:
- Do I know my close rates?
- Do I know how many leads I need to make a sale?
- Do I know how many leads each month I need to make a profit?
By establishing your specific goals, you can determine if you can successfully run a Google Ads campaign in the long-term.
4. How is the quality and speed of your website? We recommend your website is:
- Fast
- Mobile responsive
- Informative
- Easy to use
5. Can you handle an influx of traffic?
- Are you going to answer your phone when customers call?
- Will people call you directly, or will you have a sales team that’s trained and ready to take calls?
- Are you fully stocked and ready to ship?
- Can you accurately forecast how much product you need?
6. What is your audience size and location? If you’re local and rural—with only a handful of people nearby—your audience size might be too small. In this case, Google Ads probably doesn’t make sense for your business.
7. Are you ready to be competitive? Make sure your ad spend is competitive enough to get enough clicks; Otherwise, Google Ads won’t work in your favor.
There’s no way to guarantee Google Ads will work.
But, you can use our Estimates and Projections Calculator to predict the success of your business’s campaign.
PART TWO
Core Concepts
Conversions
Conversions = The action you want your visitor to take on your website
Examples include:
- Fill out a form
- Download a document
- Sign up for a newsletter
- Call
Conversion Tracking = A tool inside Google Ads that tracks the actions taken by a website visitor that you specified as valuable
To run Google Ads, you have to be conversion-minded.
The entire machine learning algorithm that is Google depends on conversions to see what’s working.
Everything we’ve talked about up to this point (all the data collection, the information Google houses, the common denominators Google seeks to identify), depends on conversions.
So, if a user goes to your website and makes a purchase, Google says, “Nailed it. Now I’m going to find more people just like this user.”
If you don’t tell Google what you consider a conversion, Google is unable to go after more people who are likely to convert.
You also won’t be able to optimize your campaign.
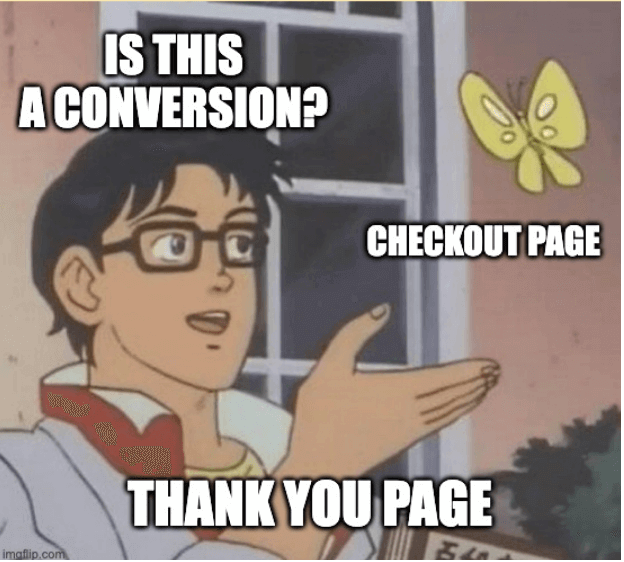
Or, worse, if your conversion tracking is installed incorrectly, you could get false positives(!), where Google might count an action (such as landing on the purchase page) as a conversion (as opposed to landing on the thank you page after making a purchase).
In other words, Google will think every user who goes to their cart made a purchase—even if they didn’t follow-through—and will blow through advertising money to find more similar users.
So, you want to be extremely diligent with conversion tracking (which we’ll explain in detail soon—promise!).
The goal, after all, is to convert.
Let’s emphasize this again:
Any action you want a user to take is a conversion.
And you want to track every possible conversion action on your site. Even smaller, less important conversions are predictive indicators of intent.
We often see campaigns with only bottom of the funnel conversions (finalized a purchase, for example) that see major improvements after adding a top or middle-funnel conversion point.
Why?
Well, you’re still letting Google know which users may be interested in the future.
And in the meantime, this gives Google an opportunity to identify folks who are closer to the buying stage.
In conclusion *ahem*
- Do: track every single conversion action possible on your site
- Don’t: spam visitors with pop-ups and form fills to increase your conversion actions
- Do: ask visitors early and often to do the thing you want them to do throughout their scroll
- Dont: forget that different users may want different conversion options—some may prefer to fill out a form, others may prefer to call. Your responsibility is to offer both. If you don’t, your competitor will
Conversions are the key performance indicator for campaign health and success.
Don’t get distracted by non-relevant vanity metrics like ranking for specific keywords or outranking competitors. Your focus should be on bringing in money, which is directly correlated to those conversion actions.
In fact, sometimes you get better conversions from position #2, because you’re spending less and getting more in the way of permeation and impressions.
So, don’t get obsessed with or preoccupied by vanity metrics.
The goal is always conversions.
Google Ads is a game where we always try to increase quality and quantity of conversions while decreasing the price.
Google doesn’t do this for you automatically, but Google gives us the tools to make it happen ourselves.
Keywords
Now, let’s take a moment to define keywords and explain why they are, also, so critically important.
Keywords are like labels.
Google perusers use keywords to search for answers and solutions. Now, they don’t think of them as keywords—to a user, “keywords” are just the words they type into the search bar.
But as advertisers, we use keywords to organize, categorize, and craft our ads.
We include keywords in the copy of our landing pages (the page of your site that your ad directs the user to). We also use keywords to let Google know when we want our ad to appear on the search engine results page (SERP) through the Google Ads auction.
Keywords range from product and service descriptions (example: red shoes), brand name (example: shoe store brand name or a specific shoe brand), geographic location (example: Chicago shoe store), and questions the user asks about a problem the business solves (example: how to find the right shoe fit).
Clearly, Google Search relies heavily on keywords (afterall, Google Ads was once called Google AdWords).
So when it comes to time to create your ads, here are some things to keep in mind regarding keywords:
- Empathy – You are trying to use Google Ads to connect with leads and prospective clients. The words you use (keywords!) are powerful. You cannot connect without understanding what they want and need. You have to care about them and understand them. Use empathy to pick the words you use.
- Semantic Architecture – The words you’re using to describe your product and service are not always the words your leads will use to describe your product and service.
- What Your Customers Search For – Going off our note above, you can actually find out what your customers are searching, using tools like Answer the Public. Just enter your general service or product term and find out what people are searching for in relation to your industry.
Other useful keyword research tools include:
- Indicators of Intent – Let’s say you are a realtor. Well, a search for “realtor” could mean anything, right? Someone who wants to become a realtor is just as likely to search for that term as someone looking to hire a realtor. Compare that to “sell house,” which is a bit closer to an indication of intent, and “sell house fast for cash,” which tells us exactly what the searcher wants.
In other words, consider indications of intent when it comes to your keywords.
- Consider Multiple Conduits to a Single Offer – If you are an airline company, your offer isn’t just flights, it’s getting where you need to go. In other words, an airline shouldn’t just bid on search terms related to flights, they should also bid on search terms related to methods of travel (like Greyhound Bus).
Not All Keywords Are Equal: A Note on The Sales Funnel and Keywords
Here’s a quick reminder of the sales funnel (and how it impacts your keywords):
Top of the funnel – Discovery
Middle of the funnel – Intent
Bottom of the funnel – Action
Bottom of the funnel phrases are the most valuable and most expensive. But, you want to have phrases that land at every stage of the funnel—and adjust your campaign according to each stage.
We like to start with the bottom of the funnel and work up. We like to see who buys first and learn about them to build backwards up the funnel. So, don’t stay at the bottom of the funnel—just start at the bottom and use the information you gather to travel up.
Research Phrases: Should, why, can, how, where
Qualifier Phrases: Best, top, reliable, near me
Start at the bottom (action-based keywords) and move up (intent and discovery).
Offers
Everything you present to your visitor should be an offer:
- The search terms you bid on should allow you to present an offer
- The ad copy you use is an offer
- Your landing page should include a very clear and compelling offer
We mentioned earlier that you need to be conversion-minded. Well, a conversion is just the technical implementation (the action!) of whatever your offer is.
It is “doing the thing.”

So, your offer is the thing you’re giving your prospective customer. Above all else, we want to focus on giving value.
Too often, we see advertisers essentially introduce themselves in their ad copy and landing pages, rather than inform the user what they will do for them.
What should the visitor do?
What’s the offer?
And why is it valuable?
Credentials mean nothing without a clear understanding of how it will directly change the customer’s life.
And while we’re at it, make sure the offer is compelling and consistent with what the user searched for. Sure, free consultations are a suitable offer—but consider if there’s another offer that is more in line and helpful with the needs of your prospective customer.
Crafting Your Offer
- Make sure your offer matches the search
- Always be closing
- Every step of your conversion process is an offer (moving them toward the next step)
- Value based: cheaper isn’t always better
- Your core offer isn’t always the right offer (ascension)
- Features vs. benefits (features tell, benefits sell)
The Magic Formula for Crafting Your Offer
Specificity
+
Continuity
=
Success
The Flywheel
Now that we covered the core concepts of Google Ads, we want to take a minute to lay out what we call the Google Ads Flywheel.
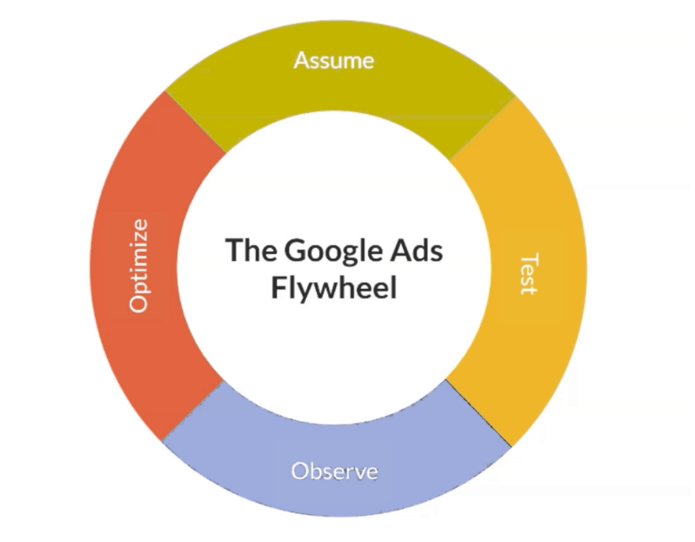
Before we dig into building our Google Ads campaigns, it’s important to understand the cycle to success (and it probably isn’t what you expect):
1. Assume
Yep. While “assuming” typically has a negative connotation, it’s the very first step toward successful Ads campaigns. In the beginning, you are going to guess. And you’re probably going to guess wrong as often or more often than you guess right—and that is okay.
2. Test
This is the scary part. Once you’ve made assumptions (about search terms, target audience, offers, ad copy, your landing page), you have to put them to the test.
It’s scary because there’s a chance your assumptions might be dead-wrong and you’ll fail. But if you don’t go for it, you’ll never find out what works. And remember, finding out what doesn’t work is also valuable.
3. Observe
Allowing ample time is imperative to learning more about your campaigns. Once you launch, you need to let it sit—no tinkering. Google is a machine learning mechanism that needs data to work its magic. If you don’t let it learn over time, it will not work.
How long? There’s no set rule, which makes this hard.
We optimize off of the statistician’s model (the base 100 model), which is that, in theory, 100 impressions will tell you what your click-through rate is. 100 clicks will tell you (roughly) what your time-on-site is.
Now, some campaigns aren’t big enough to hit that magic 100 data point. And that’s okay. The important thing is to give yourself the time to acquire the data.
4. Optimize
This is the fun part! This is when we find out which ads were successful and try to identify why. Then, using that data, recreate more of those ads.
But, just to clarify: this is not the place to make assumptions. And it’s important not to overdo it when it comes to those updates to your ads. This is where we use hard data.
…And then? We look to expand and scale with new ads, starting with step one again.
This flywheel never ends.
PART THREE
Prerequisites and Website Set Up
Business Planning: Must-Haves
You are hereby (lovingly) forbidden from building a Google Ads campaign until you have the following items:
- Reasonable monthly spend
- 90 days to prove concept
- An eCommerce enabled website with a product feed
- Enough margins to support a traffic campaign
- Unique selling proposition
- Completed Customer avatars and assets
- Fifteen-question minimum form fills
Let’s explain:
1. Reasonable monthly spend
Think of your monthly budget early on as an investment.
You are buying data you need to understand what works in your campaign, what doesn’t, and where to make changes—in a reasonable amount of time.
With that investment, Google will start to build an audience specifically for you that you will capitalize on later. And it will be worth it! You *must* have enough monthly ad spend to accumulate enough accurate data for testing and optimizing down the road.
For context, here at Solutions 8, won’t take a client whose budget is under $2000/month.
Budget under $2000 per month? Maybe you want to hold off until it’s more feasible.
Google is a learning algorithm. The first three months are going to be the most “painful” part of your campaigns. Which brings us to our next requirement:
2. Appropriate time expectations
It bears repeating that Google is a learning machine. And learning takes time.
In fact, we’re asking Google to do some pretty spectacular behavioral analysis.
In the past, our rule of thumb was that it took 90 days for a campaign to be fully optimized and ready to see some results.
This meant after 90 days, we would have enough data to determine whether or not the campaign would work long term.
But with the introduction of Performance Max, the 90-day guideline no longer applies. Instead, it takes roughly 45 days just to see what you’ve built and how it’s going to work.
Essentially, Day 46 is now Day 0.
Once Google has gathered and analyzed all the available data, then you can start to see how the foundation you put into place will perform over time.
Put simply, it takes time to successfully optimize a campaign and position it to scale. But more often than not, being patient during that initial learning period pays off in the long run.
3. Quality website
This one may sound obvious, but here goes:
Your ads will send prospective customers to your site. Therefore, you need an appealing, easy-to-navigate website.
See, we live in the age of the educated consumer. Long gone are the days of the ol’ click-to-convert model.
Site visitors want value.
They want to learn.
They want to feel connected and understood.
Your website should be full of quilty content that showcases your products or services, learning materials, readily available answers to common questions—all in a website that is fast and easy to navigate.
And with Performance Max in the mix, a campaign-type with more reach and a greater ability to learn from your site, SEO and quality content has never been more important.
This is why you need more than a single page website. You need to help them get to know your product or service and who you are.
4. Enough margins to support a traffic campaign
Running ads takes money. Can your profit margins support these campaigns?
5. Unique selling proposition
The more heavily saturated your market, the harder it’s going to be to turn a profit from Google Ads.
So, what makes you different?
And, sorry, being the cheapest option isn’t the answer.
Think about your favorite products: what makes them your favorite? Is it the company’s dependable return policy? The quality of the product? The materials used?
Your unique selling proposition is key for the success of your campaigns—specifically longevity and return traffic. After all, it’s six times less expensive to sell to an existing customer than a new one.
6. Completed customer avatars and assets
You need to know the people you sell to on a very deep level: who are they? Where do they live? What do they read? What are their goals? What are their pain points? We do this by creating customer profiles (avatars).
Now, a lot of business owners think in terms of demographics—not avatars.

Here’s the difference:
A demographic is a generalized description of your population of customers (physicians, for example).
An avatar is the sub-type of customer that comes from your larger demographic.
So, using our physician example, this demographic could easily be split into two very different avatars:
Dr. Mike: An older physician in his late fifties to sixties, looking at retirement, with a successful practice and anti-technology.
Dr. Sally: A young physician fresh out of medical school, in debt but looking to get started with her own practice and a solid understanding of technology.
Here, we can see how vastly different these two avatars are within the same demographic.
All this is to say, get specific with your customer profiles.
Once you have your avatars clearly defined, you’ll need assets (photos, videos, and copy) specifically catered to these audiences once you start building your Performance Max campaigns.
Best to start churning out those assets now!
How to Define Your Customer Avatar

Use this worksheet to identify your customer avatar (and who is NOT your customer avatar). The questions in the worksheet help you get in the mind of the customer.

Once you’ve defined your customer avatar(s), it’s time to consider the transformation they make when purchasing your product. After all, customers don’t buy products—they buy feelings, results, and solutions.
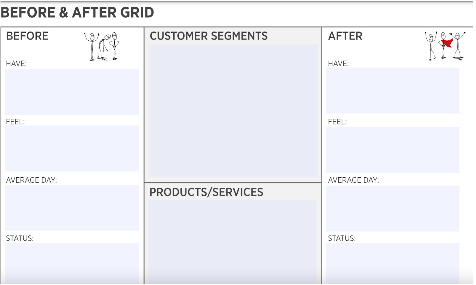
DigitalMarketer has a phenomenal “before and after” worksheet that you can download here.
Make a copy and fill it out with your customers in mind, including:
- What your customer has (or doesn’t have) before buying your product—and what they gain once they do.
- How they feel before your product—and how they feel after
- What an average day looks like before your product—and an average day after
Next, consider your Customer Value Journey.
7. Fifteen-question minimum form fills

When your goal is lead generation, your Performance Max campaign will be at high risk of heavy spam due to its expansive reach (with YouTube especially).
For context, there are a lot of “paid growth” YouTube companies that use fake accounts. To avoid getting flagged, these “click farms” fill out forms from ads to show account activity.
The solution:
Make your lead generation form more complicated to complete—at least fifteen questions—so click farms that are paid to complete forms don’t target your campaign.
Website Optimization
Assuming you have those must-haves in order, it’s time for some website optimization. We’ll provide a quick checklist you can breeze through to make sure your site is Google Ads-ready, including:
First Up: On-Site Optimization (Light)
☐ Define the page where you will send traffic (depending on the ad)
- Homepage (remarketing and branded traffic)
- Service-specific pages
☐ Site includes a very clear statement of value
☐ Social proof (reviews!)
☐ Mobile friendly
☐ Multiple conversion conduits (CTAs)
Website CRO (Conversion Rate Optimization) Best Practices
Next up, here are some CRO best practices to ensure your site is not only presentable, but also ready to make sales:

The Big Three:

You can’t drive traffic to a broken website. So, it’s crucial to ensure you catch any website issues or errors.
- Frequently (at least once a month) check your site and make sure everything is working properly and there are no high-risk issues and errors.
- Schedule a website audit at least once a month.

Website speed has a massive impact on your quality score; in fact, it is considered slightly more important than content(!) according to Google. A few things to consider:
- Mobile users are going to be less tolerant of slower websites due to the smaller size of the device and often slower connection.
- The biggest contributing factor for slow sites are large image sizes.

- 60-65% of website visits are done on mobile devices. So ensure your site is mobile-friendly!
- Look at your conversion path: although many purchases happen on desktop computers, research is often done on mobile devices. In other words, consider each step of your buyer’s journey so you can make it as effortless as possible.
Conversion Rate Optimization Checklist
☐ Everything works properly
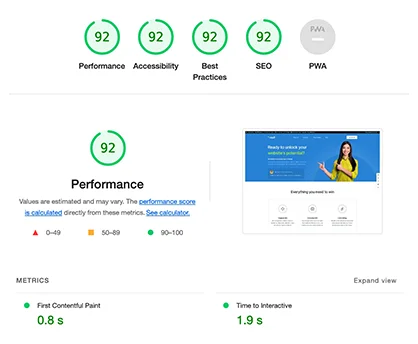
☐ Website is fast (under 2-3 seconds load time)
- (use PageSpeed Insights to measure this)
☐ Your email/phone number is in the header or footer
- Customers need to know they can trust you (i.e. get in touch with you)
☐ Website design is appealing to your audience
- Make sure the design is centered around your product and isn’t a distraction
☐ High-quality images
☐ Clear call-to-action (CTA)
Isolate the action you want them to take: make the CTA a BIG button (not just a hyperlink)
- If you don’t tell people what you want them to do they won’t do it
- A clear, bold CTA nudges your customer to the next step
☐ CTAs are in a contrast color (bold!) and easy to find
- Check out BOOM by Cindy Joseph for inspiration
☐ Separate “thank you” pages for all conversion points
☐ Verification badges (secure payment, BBB, SSL, guarantees, free returns, etc.)
- This helps improve the trustworthiness of your site and brand
- Turn anything you offer to a badge (free shipping? Make it a badge! Free returns? Badge! Much more exciting than text)
☐ Call tracking software
Google will track phone calls on your behalf, but you can use more sophisticated platforms for increased accuracy
☐ Privacy Policy
You need one on your site! You can easily find a template, but make sure you read through it first!
☐ Google site speed optimization
We’ll talk more about this in a moment
☐ Https Vs. http
You must have a secure page: i.e. https
Website Speed Optimization Checklist
☐ Choose a “light” theme
- A good developer can improve your site speed a lot—but make sure you don’t rely too heavily on customization
☐ Scale your images properly
- Try PicResize
☐ Decrease the weight of your images without losing quality
- Try TinyPNG
☐ Limit the amount of plugins/apps
☐ Limit the amount of displayed products on category pages
☐ Check in on your page speed
- Try PageSpeed Insights
- Don’t aim for a 100/100 score—just aim for good user experience
Quality Assurance (QA) Checklist:
Include quality assurance checkups in your monthly standard operating procedures to make sure your site is in tip-top shape. You can do this through internal QA and external QA:
Internal QA: Pretend to be your own customer
☐ Try to break the site
☐ Navigate through your site the way a customer would
☐ Gauge how easy it is for a distracted customer to use your site.
☐ Ask yourself, “If I weren’t paying full attention, could I still do this?”
☐ Make an actual purchase
*You can hire someone to go through your site on fiverr.
External QA: Have someone else pretend to be a customer
☐ Just tell them where you want them to go—but not how to get there
Analyze Top Competitors:
☐ What is different between their website and yours?
Pro-Tip! Diagnosing Issues: Screen Recording Software
You can install screen recording software on your site that tracks users’ navigation via heat mapping (note: it will likely slow the speed of your site). This works on desktop and mobile—so for eCommerce sites that aren’t converting, you can use this software to figure out what’s going wrong along the way.
Here are a few notable options:
Keep in mind: You don’t need to use these apps forever. Diagnostic tools are a great way to assess the state of your website and determine any site optimizations or product additions.
We’ll walk you through the installation process later.
Product/Service Page Preparation
Product and service pages are the most important pages on your website. In most cases, it’s the landing page for your traffic: your very first impression.

Many businesses put tons of energy into optimizing their homepage, yet neglect the product/service pages customers land on. What’s worse? Smart Shopping can only drive traffic to product pages. So let’s make sure your product/service pages are ready to shine:
Product/Service Page Checklist
☐ Product title and subtitle
- Make sure the product or service title is clear, descriptive, and honest enough for Google to identify the product and send relevant traffic your way (Look at Amazon for inspiration)
- But avoid “keyword” stuffing! Honesty and simplicity are key
☐ Descriptions
- Descriptions are supplementary to your title
- Use this opportunity to elaborate on the specifics of your product or service: any particular materials, special features, ingredients that are worth highlighting but would be too long for your title
☐ Media (images and videos)
- We purchase with our eyes first
- Custom imagery is always going to be better than stock photos, particularly lifestyle images that help customers picture themselves using your product
☐ Nested navigation
- Make sure navigation is clear, easy, and accessible—we don’t want people to get lost
- Use breadcrumbs so users can always find their way back
☐ Social proof (i.e. reviews)
- Aggregating enough reviews takes time, so ask your customers for a review after 30 days of purchasing and give them an incentive or reward for completion
- The 30-day rule gives you at least a few days/weeks to resolve any issues—and get a good review for it
- Once you have enough five-star reviews, you can add them to your site.
Live Chat
We strongly recommend live chat on your website. Here’s why:

- Live chat allows you to compile visitor questions and create content that answers those questions for future customers
- Add helpful information to your product pages and place them near the top of your page
*Try tawk.to*
*Check out Shopify’s app integration here https://apps.shopify.com/tawk-to*

- Live chat can give you insight into what holds customers back from making a purchase—what questions do they ask before abandoning their cart? What concerns do they bring up in the chat?

- Sometimes, all it takes is a little supportive nudge for customers to make a purchase
By “being there” through their virtual journey, you have a higher likelihood of making a conversion
PART FOUR
Google Account Setup
Creating Your Google Ads Account
Finally! It’s time to build your Google Ads account.
☐ First step: Head to Ads.Google.Com
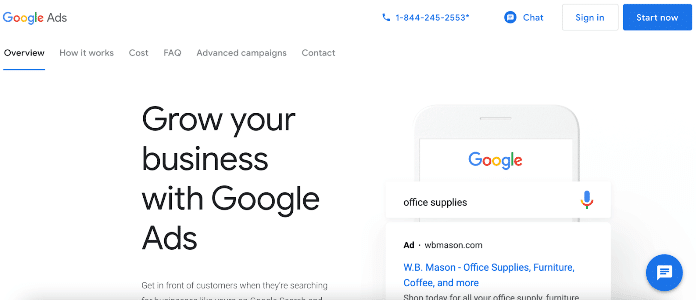
☐ Click the bold, blue CTA that says “Start now”

If you already have some sort of Google account (Gmail, for example), Google will automatically connect that existing account to your new Google Ads account.
This next step is where things get sticky.
Earlier, we discussed how critically important it is to track conversions.
Well, in this next step of setup, Google will try to get you to build a campaign before you build conversion tracking(!).
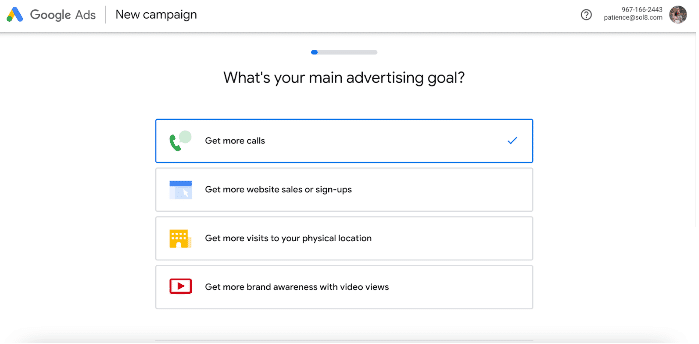
If you aren’t super familiar with Google Ads, you probably don’t see the problem here:
During setup, Google asks what your main advertising goals are so you can build your campaign around that goal.
Makes sense, right?
But here’s the thing: If you select any of the goals offered by Google for an easy setup (get more calls, more website sales or sign-ups, or more visits to your physical location), you’ll end up with a scaled-down version of Google Ads:
Think templatized campaign as opposed to a customized campaign.
So, instead, scroll down a bit to the tiny font below that reads, “Are you a professional marketer? Switch to Expert Mode”
☐ Click “Switch to Expert Mode”
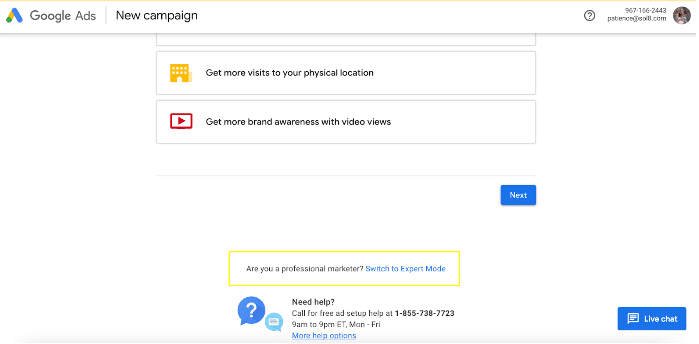
When you click on this, Google will once again try to push you toward a templated campaign, instead of one that is customized to your specific needs:
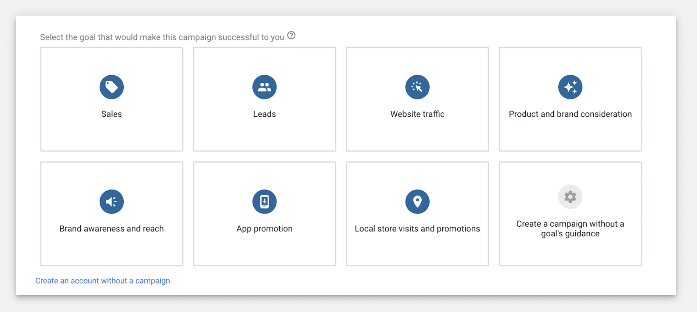
Which, again, seems easy and helpful enough.
But the reality is that when you select one of these preset goals, Google limits the functionality available to you—and, they aren’t very forthcoming about the functionality you will (or won’t) receive by selecting a goal.
Think of it this way:
Let’s say you want to build a website for your business.
You go to a DIY website building platform that offers templates.
You find a design you like, download it, and “fill it in” with your business’s information.
Soon, however, you might notice that you can’t add important features or new pages.
And while the website serves its general purpose, it’s nothing like if a professional designer and web developer created a site around your business.
So, looking back to our campaign setup, instead of selecting a specific goal:
☐ Click “Create an account without a campaign”
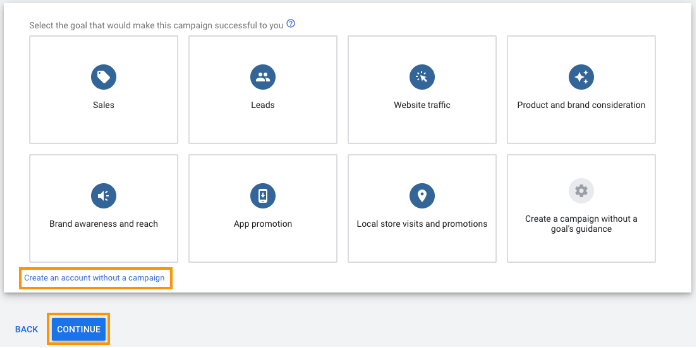
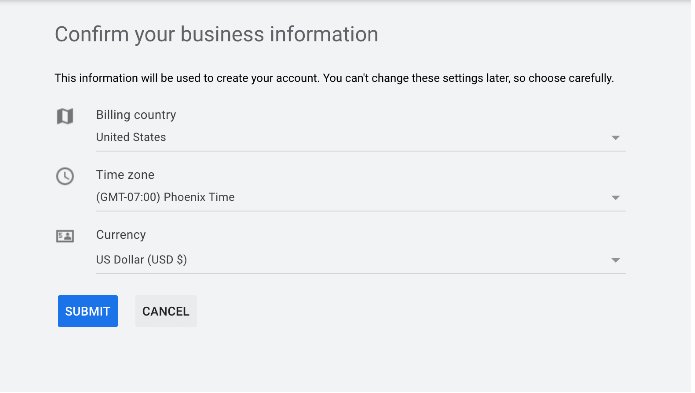
☐ Next, fill out the business information requested, then click “SUBMIT”
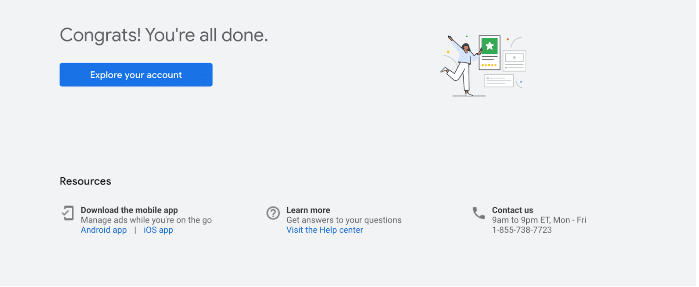
☐ Next, click “Explore your account”
What’s interesting is that Google is going to give you very little functionality until after you’ve created your campaign:
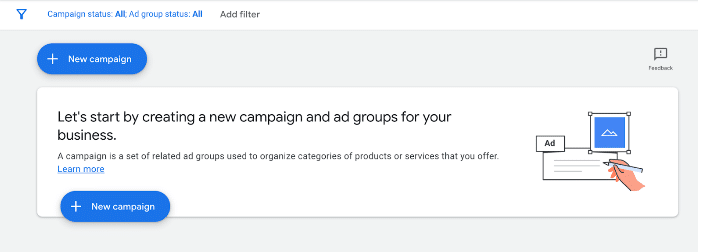
However, here’s what you can do:
☐ Click “Tools & settings”
☐ “MEASUREMENT”
☐ “Conversions”
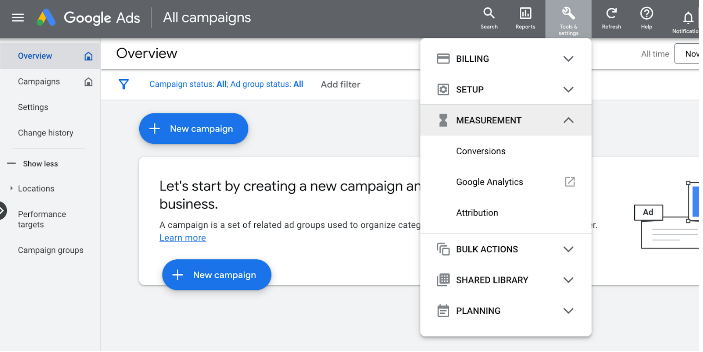
Now, leave this page open:

We’re going to walk through how to set up conversion tracking in the next chapter.
But, before we can connect conversion tracking to your account, we need to set up Google Tag Manager.
Let’s explain:
Creating Your Google Tag Manager Account
Next, we need to create our Google Tag manager Account.
Hold Up: What is Google Tag Manager?
Google Tag Manager is Google’s free software that allows you to install tracking on your website using a snippet of code to track actions taken on your site, and thus, evaluate the success of your campaigns.
In other words, instead of hiring a web developer to install custom code on your site, Google Tag Manager acts as your personal developer, so you can install codes more easily using the GTM interface.
Here’s how to get set up:
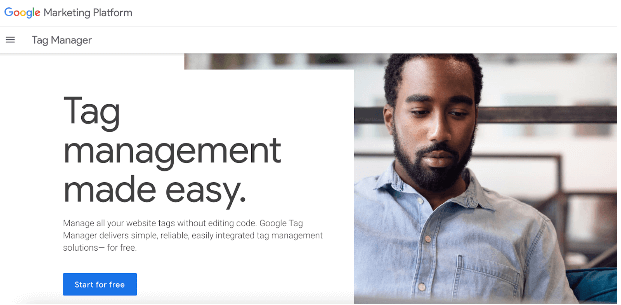
☐ Go to marketingplatform.google.com/about/tag-manage
☐ Click “Start for free”

☐ Create Account
☐ Fill in your account details, including your company name, country, and website URL, and target platform (make sure to select “Web”)
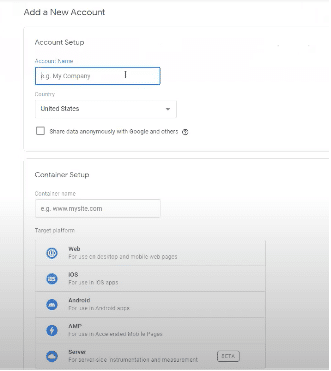
☐ Click “Create”
☐ Agree to Google Tag Manager’s Terms of Service Agreement

☐ Now, leave this tab open (and maybe even save these codes somewhere) and open a new tab—we’ll go over how to install Google Tag Manager soon!
PART FIVE
Conversion Tracking Setup
Overview
Now that your account is set up, let’s talk a little bit about Google Tag Manager and how it pertains to the rest of the Google ecosystem.
…And why, exactly, we use it when running Google Ads.
What Is Google Tag Manager?
Google Tag Manager is a free platform that allows you to plop bits of code onto your site. These pieces of code have the important job of tracking the actions visitors take on your site (and when they arrive on your site from an ad)—and reporting those actions back to Google Ads, so that Google can “learn” from these behaviors.
Now, you don’t need Google Tag Manager to track conversions…technically; however, GTM is far easier to implement, use for testing, and making campaign improvements down the road.
So, if you want to be successful long term, use Google Tag Manager.
What Does Google Tag Manager Do?
Essentially, GTM carves out space in your website, allowing you to put anything you want inside that “box:” analytics codes, new tracking codes, Facebook Pixel—whatever you use or want to use—while keeping the backend of your website super clean.
How Google Tag Manager Fits with the Rest of the Google Ads Data Ecosystem:
- Google Tag Manager collects data
- Google Analytics stores data
- Google Data Studio reports on the data
In this guide, we won’t go over how to use these tools.
But it would be worth your time to do so going forward. In the meantime, we’ll briefly touch on how GTM works.
How Google Tag Manager Works
GTM is broken into three facets: tags, triggers, and variables.
1. Tags: The workhorse (what you want the system to do)
Examples:
- Tell Analytics when someone sees my page
- Tell Facebook when someone becomes a lead
- Let TruConversion know when someone is on my site
- Let Google Ads know when someone buys
2. Triggers: The logic (when you want the system to do it)
Examples:
- Here’s when I want you to do the thing that I want you to do
- Do [this] when [this] happens
3. Variables: Additional information needed to get the job done
Examples:
- Account number
- Order forms
Tracking Conversions with Google Tag Manager
Through Google Tag Manager, Google Ads is able to track every conversion—which, as we have perhaps overstated, is critically important to the success of your campaigns.
This includes conversion actions, such as filling out a form or scheduling an appointment.
Most conversion actions (except for, say, phone calls or chats) allow for their own separate thank you page, which makes tracking these actions easy.
However, don’t forget to track predictive indicators as well.
For example, Montessori schools often have “schedule a tour” as their main CTA and conversion action; however, not many parents and guardians are ready to take that step right away.
So, instead, these schools might offer a free checklist or brochure—indicators of interest—and track those actions as well. If a parent downloads a brochure and, several weeks later, schedules a tour, that is valuable data and feedback for your campaigns and website.
Finally, manual conversions for phone calls or chats should also be tracked.
Later in this lesson, we’ll go over the “easy way” to track phone calls; however, the real expert-mode way to track calls is to use a call tracking software, score the phone calls (so you actually know which calls were high quality), and manually import that data at the end of every month.
How to Install Google Tag Manager
Now, let’s go over how to install Tag Manager!
Earlier, we went over how to create your account and recommended that you keep that tab open (if you closed it, no worries! We’ll show you how to get back to your GTM account).
But here’s the thing:
Every website is a little different. You might be on WordPress, Wix, or Squarespace—so depending on which platform you use, the way you install Google Tag Manager is going to be a little different.
However, it’s *basically* the same across all web applications. So, as we move forward, just note that some of the step-by-step instructions might be a little different for you, but you should still get a solid understanding of how to install GTM.
Here we go:
☐ First, if you don’t have that tab open from earlier, head to TagManager.Google.Com
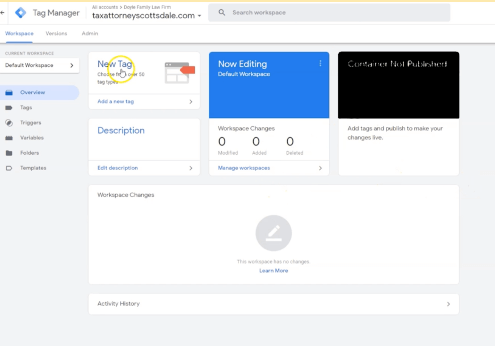
Your codes might be clearly accessible to you on your dashboard, but if not:
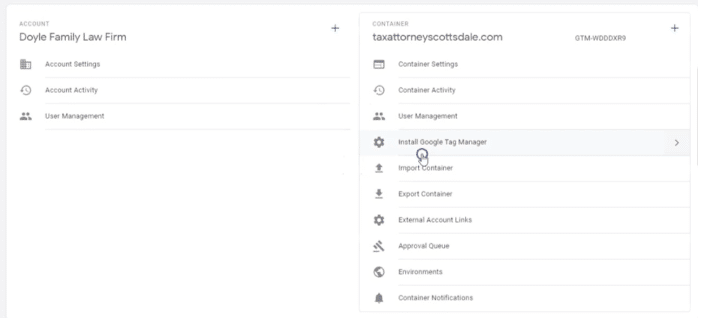
☐ Head to the “Admin” tab of your dashboard

☐ Click “Install Google Tag Manager”
Next, it will show us the code to paste in the <head> tag and <body> tag.
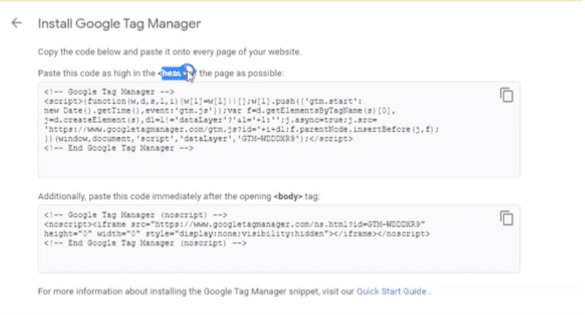
Interestingly, we only need the code provided for thetagfor our intended purposes. But we still recommend installing them both, in the event you’d like to dive deeper into Tag Manager in the future.
If you have a web developer, this may be the part where you simply send the two codes over to them to install.
But, if you are doing this yourself, we’ll show you how to get these codes installed.
☐ Head to the backend of your website
☐ For our CMS example, we click on “Settings,” which brings us to a page that includes a box “Head tracking code” and “Body tracking code” (again, your CMS platform may be a bit different here)
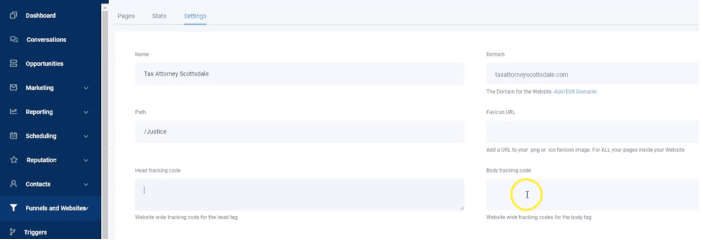
☐ Once you find the right spot to paste your <head> tag and <body> tag, go back to Google Tag Manager
☐ Copy the codes
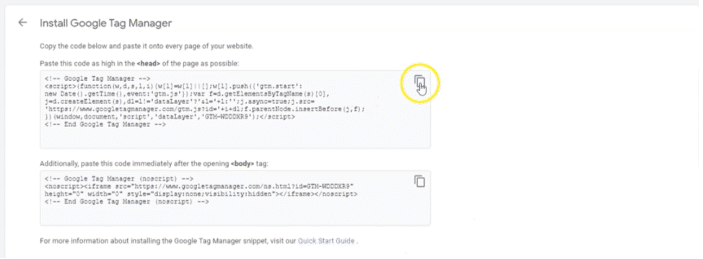
☐ Go back to your CMS platform and paste the codes—ours looks like this:

☐ Click “Save” or “Submit” to ensure the <head> and <body> tags are installed
Next, we want to test these tracking codes to make sure they work. We can do this using Google Tag Assistant.
What Is Google Tag Assistant?
Google Tag Assistant is a free Chrome extension that ensures tags on your website are installed properly.
You can download Google Tag Assistant here.
☐ Next, go to the homepage of your website

☐ Click the Google Tag Assistant icon at the top of your browser, a dropdown will appear that should show that Google Tag Manager is installed on the page
Once you confirm that Google Tag Manager has been successfully installed, you can move on to tracking conversions with Tag Manager!
Tracking Website Conversions with Tag Manager
Now that we know it’s installed on your site, we’re going to build conversion tracking inside Google Ads using Google Tag Manager.
First up:
☐ Login to Ads.Google.Com
☐ Go to “Tools & settings” and click “Conversions”

☐ Go to “Tools & settings” and click “Conversions”

☐ Click “Add Conversions” or blue (+) button
☐ Select “Website” conversions

☐ Category
Choose a category that applies most accurately to your conversion action—this can be tricky!
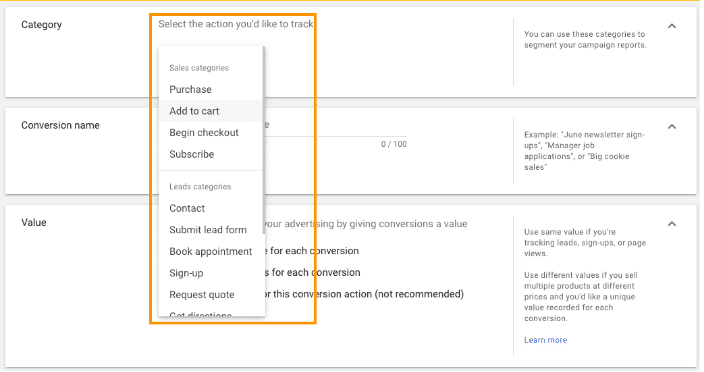
☐ Conversion Name
When naming your conversion, use the following formula:
Page + Action
For example: “Page-Contact>Action-Form”

☐ Value
Select “Don’t use a value for this conversion action (not recommended).”
Ignore Google’s commentary—we DO recommend this option!

☐ Count
Select “One”

☐ Click-Through Conversion Window
“90-days,” i.e. as broad as possible!
☐ Engaged-view conversion window
Select “3 days”

☐ View-Through Conversion Window
“1 day”

☐ Include in “Conversions”
Check the box to include

☐ Attribution Model
Recommended: First Click
☐ Click “Create and Continue”

☐ Tag Setup
Using Google Tag Manager
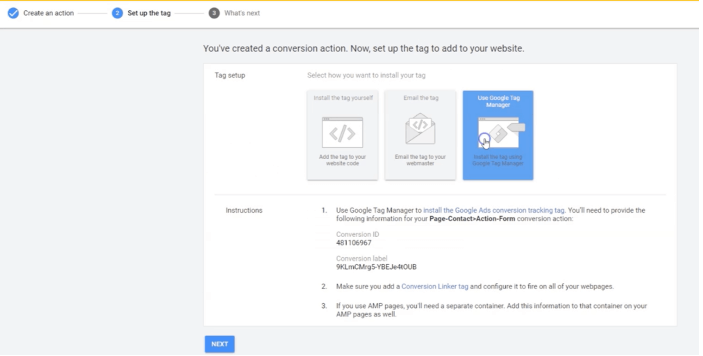
In a new tab, go to TagManager.Google.Com and login
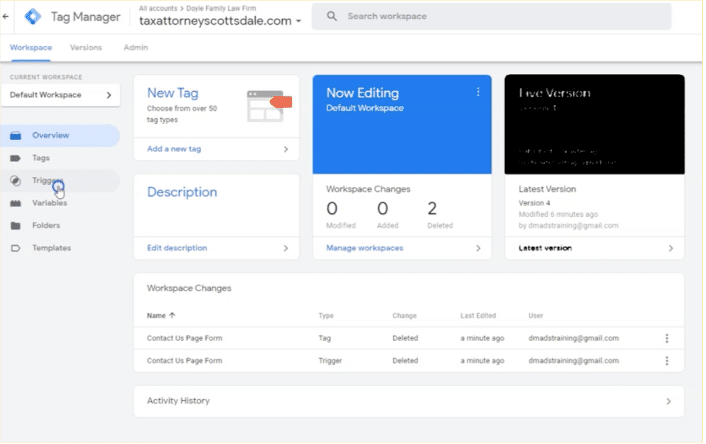
☐ Click “Triggers”
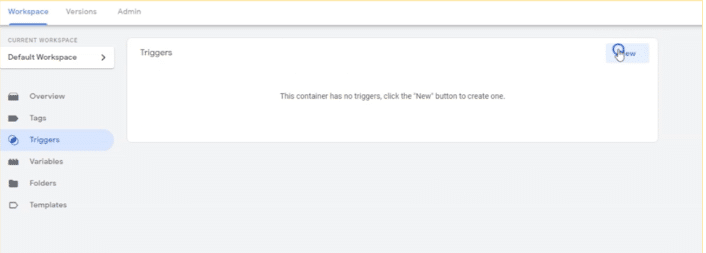
☐ Select “New Trigger” and name it so it matches your conversion action (Page + Action)

☐ Trigger Type
Select “Page View”
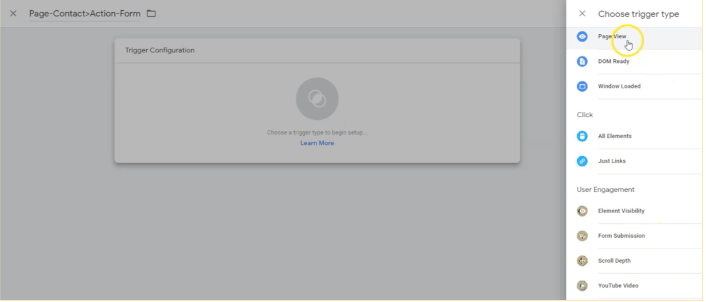
☐ This Trigger Fires on
Select “Some Page Views”
(Page URL > Contains > use the URL from your thank you page, not the form page!)
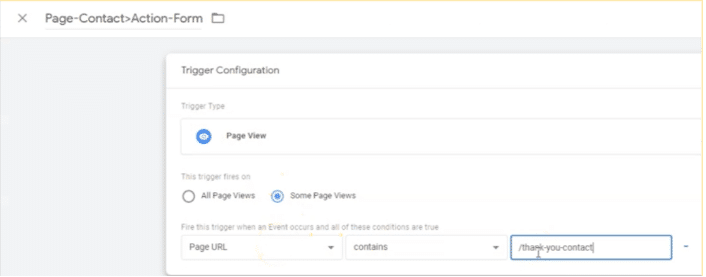
☐ Save!
☐ Next, click “Tags” on left hand side of page
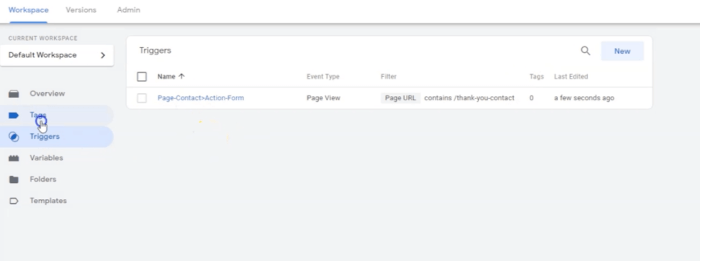
☐ Select “New”
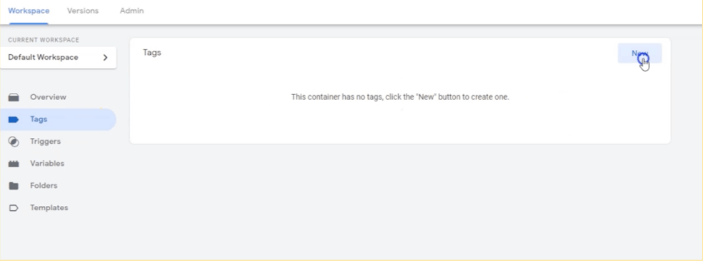
☐ Give this tag the same name as your trigger and conversion action (Page + Action)
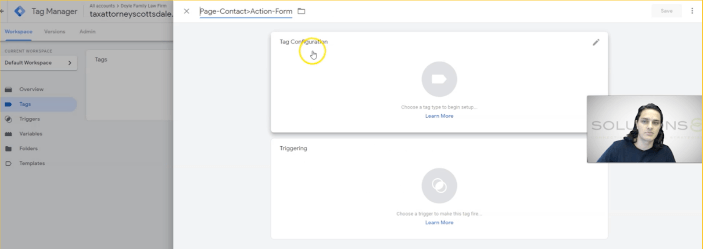
☐ Click “Tag Configuration”
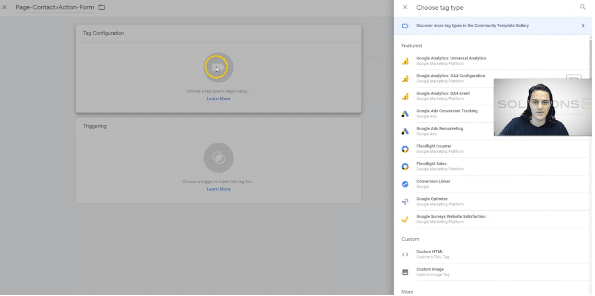
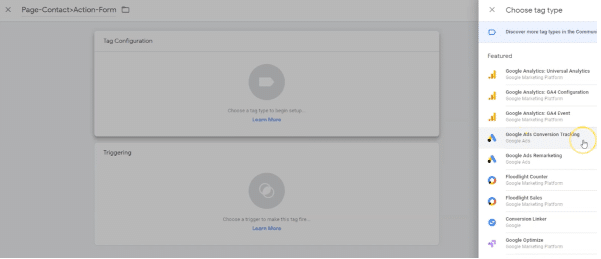
☐ Select “Google Ads Conversion Tracking”
☐ Fill out the Conversion ID and Conversion Label boxes using the information on your Google Ads account page we left open
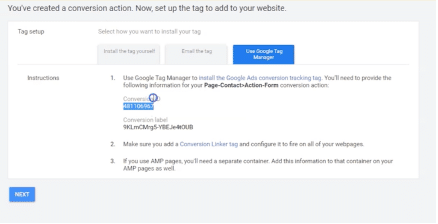
*Copy*
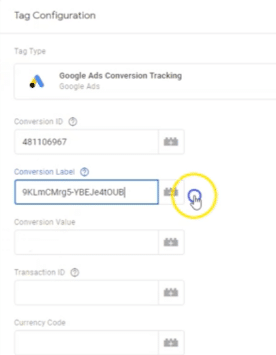
*Paste*
☐ Skip the remaining information boxes
☐ Trigger
Select the trigger you built for this conversion (not “All Pages”)
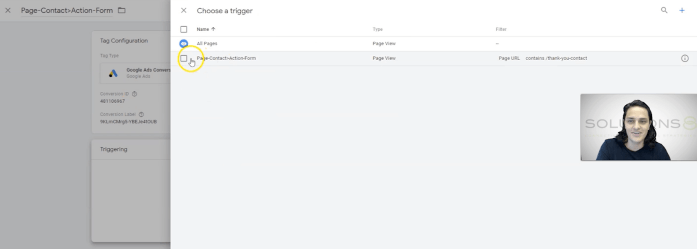
☐ “Save”

☐ “Submit”
☐ “Publish”
☐ Workspace > Preview
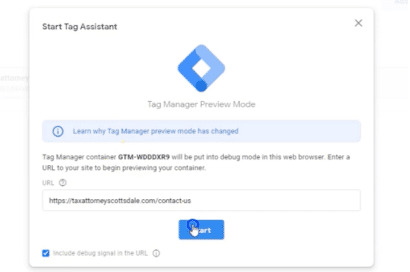
☐ Paste URL of conversion action page
…Not the “thank you” page!
☐ Click “Start”
☐ Click “Continue”
☐ Make sure no tag has fired (but there should be a tag!)
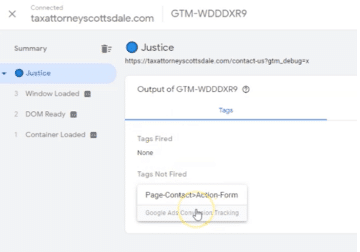
☐ Go back to your conversion action page and fill out your form (if that is your conversion action)
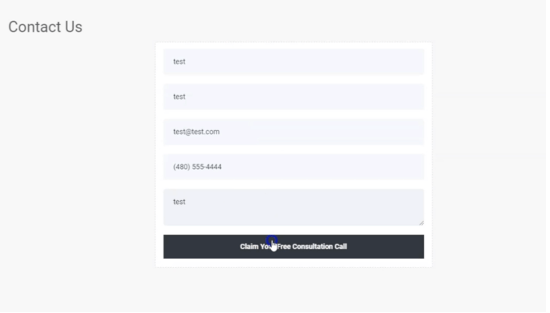
☐ Go back to Google Tag Assistant to make sure tag fired after you submitted your form
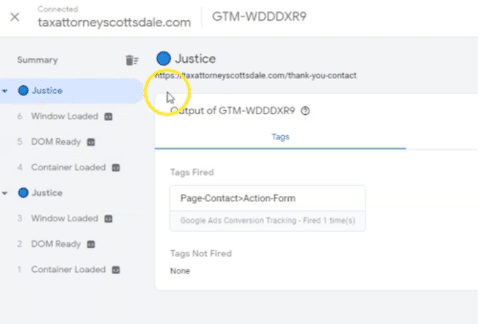
Woohoo! Success!
Now, you can go in and add your remaining conversion actions.
Wait! One More Thing: Conversion Linker Tag
Conversion Linker Tag was created when Apple rolled out something called ITP (intelligent tracking prevention).
Conversion Linker Tags assists in overcoming some of the hurdles we face in properly tracking conversions due to ITP.
But good news! It’s a super easy tag to install.
Here’s how:
☐ In Google Tag Manager, click “Tags”
☐ Name your new tag “Conversion Linker Tag”
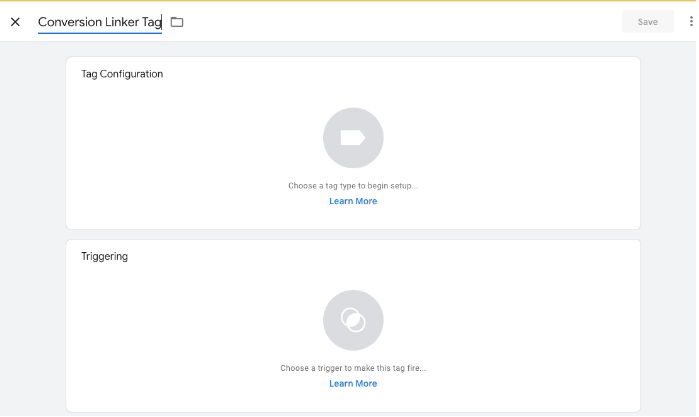
☐ Click “Tag Type” > “Conversion Linker”
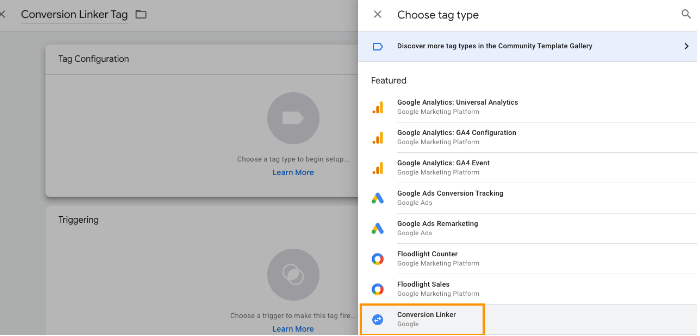
☐ Enable linking on all page URLs
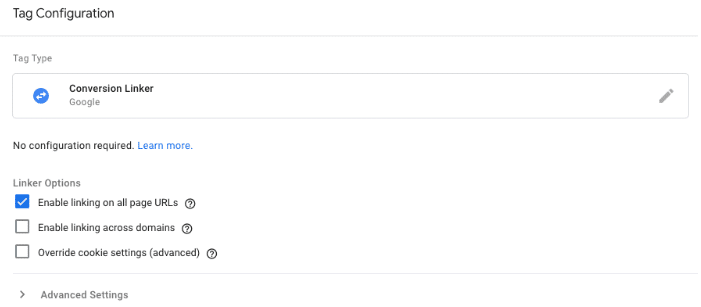
☐ “Triggering” > “All Pages”

☐ “Save”
☐ “Submit”
Now, review your tags! You should have a conversion tracking tag and a conversion linker tag.
Now, it’s time to create those tags for every other conversion action on your site!
Tracking Phone Call Conversions
Hopefully, by this point, you set up conversion tracking for every conversion action on your website.
But lest we forget, tracking phone call conversions (properly) can make or break your campaigns!
Quick disclaimer: What we’re about to teach you is not how we track call conversions here at Solutions 8.
Our process is much more thorough (and probably too much for DIYers).
Feeling Ambitious?
Follow Our Call Tracking Process (and Download the Free Guide) Here
Otherwise, let’s get to it. Here’s how to set up standard call conversion tracking:
☐ Go to Ads.Google.Com
☐ Dashboard > Top right > Tools and Settings > Conversions
(Notice that the conversion we created in the last lesson should be on the dashboard!)

☐ “Add Conversions” or blue (+) button
☐ Select “Phone Calls Conversions”

☐ Select the source of the phone calls you’d like to track
Calls to a phone number on your website

☐ Category
Leave as-is
☐ Conversion Name
Something simple is fine! Think: “Phone call lead”
☐ Value
Select “Don’t use a value for this conversion action (not recommended).”
Again, ignore Google’s commentary—we DO recommend this option!

☐ Count
Select “One”

☐ Call Length
How long does a call need to last for you to count it as a quality lead? Google’s default is 60 seconds

☐ Click-Through Conversion Window
We chose the longest option, 60 days

☐ Include in “Conversions”
Check the box to include

☐ Attribution Model
Recommended: First Click
☐ Click “Create and Continue”
☐ Tag Setup
Using Google Tag Manager
Remember: we already created a Conversion Linker Tag!
Now, we just need to go into Tag Manager to create this new tracking tag using our conversion ID and label
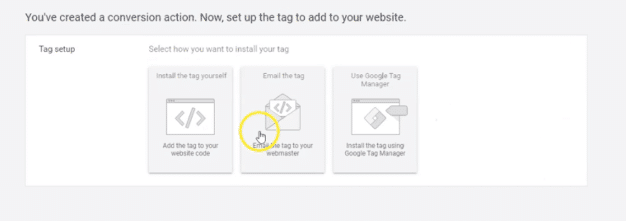
☐ In a new tab, go to TagManager.Google.Com and login
☐ Click “Tags”
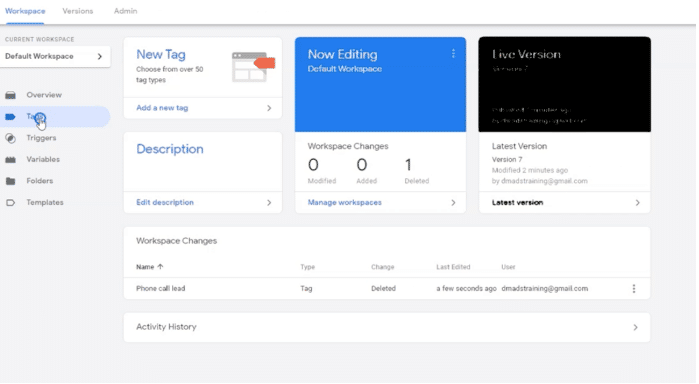
☐ Select “New”
(You should see your Conversion Linker Tag as well as the other conversion action tag(s) we created in the last lesson)
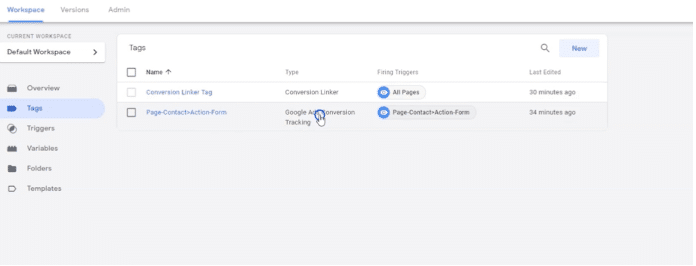
You should see many more tags than this though, right? Because you added tracking tags for all your conversion actions, right? Right?!
☐ Name your tag
“Phone call lead”
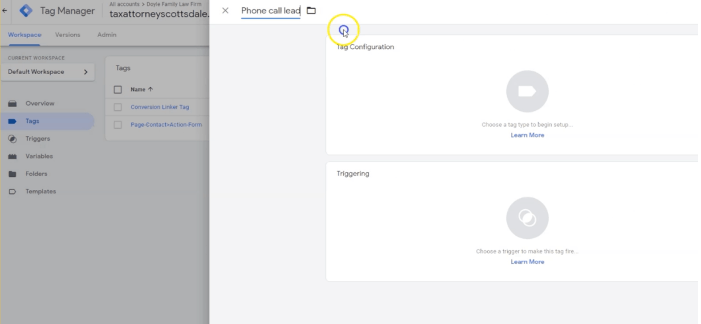
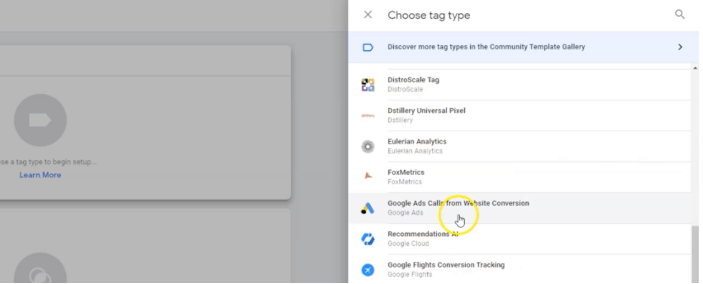
☐ Choose a Tag Type
Google Ads Calls from Website Conversion
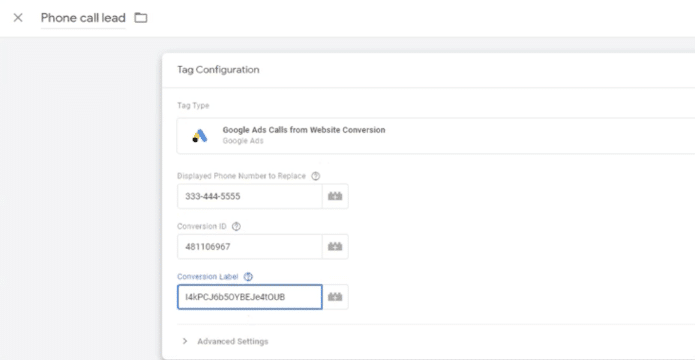
☐ Displayed Phone Number to Replace
(Google will see the number on your site and replace it with a tracking phone number—this only happens when someone clicks on a paid ad! If a user goes to your site directly, they will still see your number)
☐ Fill out the Conversion ID and Conversion Label boxes using the information on the Google Ads account page we left open
☐ Triggering
We don’t have to build a trigger because it is for “All Pages” i.e. the default

☐ Click All Pages
☐ Save
☐ Submit
☐ Publish
Now, you have a phone call conversion tag! To test this, go to your website in a new window.
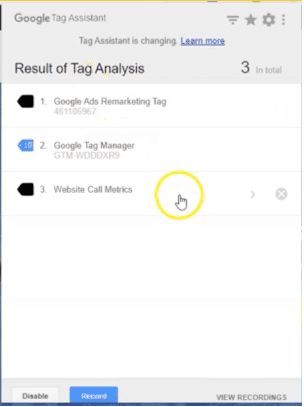
Click on your Google Tag Assistant plugin: you should see Website Call Metrics now installed (therefore firing).
Now, we can build some campaigns!
PART SIX
Campaign Types + Building Key Campaign #1 (Branded)
The Six Key Campaign Types
- Brand: Searches specifically for you or your business (10% of budget)
- General: Searches for your offer, or relevant pivots (25% of budget)
- Competitor: People searching for alternatives (10% of budget)
- Remarketing: Users who have already been on your site (10% of budget)
- DSA: Fills in the gaps in your keyword-targeted campaigns (25% of budget)
- Performance Max: Goal-driven campaign that finds the best audiences (20% of budget)
An important note about budgets listed here:
This would be a good starting point to divy up your budget; you would simply adjust budgets based on campaign performance over time. These are simply the areas to start, but you should adjust as needed depending on your goal or performance.
And let’s manage some expectations up front:
With these initial campaigns, you aren’t paying for customers, leads, or purchases—you’re paying for data.
And that’s the paradigm you need to assume.
You can’t go into this assuming that you’re going to be successful right away; infact, most things won’t work right away. But that is valuable data to use going forward to identify what does work.
Key Campaign #1: Brand Campaign | 10% of Budget
It’s time to build your first campaign! We strongly recommend starting with a brand campaign (using 10% of your budget) because they are the easiest to build and teach the foundational elements.
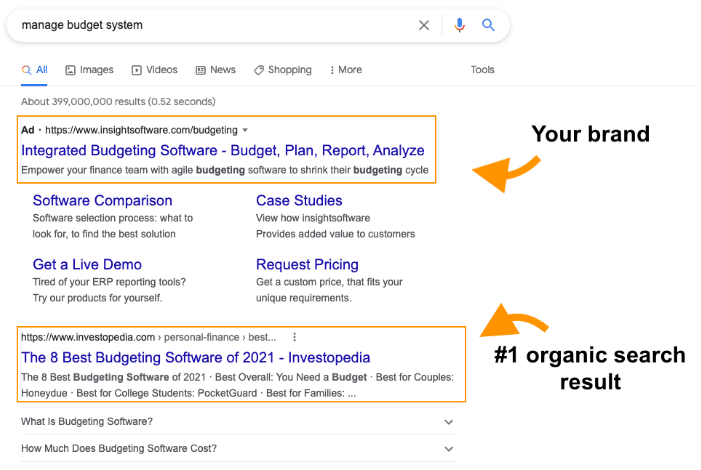
Here are a few more reasons why you should build one:
- Establish authority
- Protect your brand
- Control your sales narrative
- Improve your data acquisition
- Direct high commercial intent traffic
- Monitor your conversion paths
Now, Let’s Build!
☐ Go to Ads.Google.Com and login
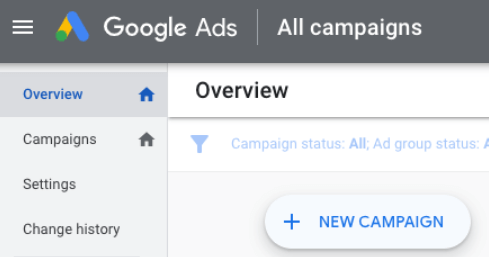
☐ (+) New Campaign
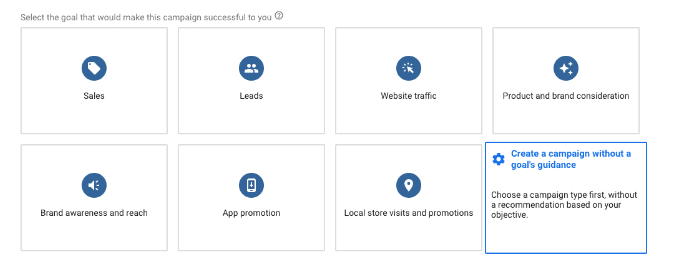
☐ Select the goal that would make this campaign successful to you Create a campaign without a goal’s guidance
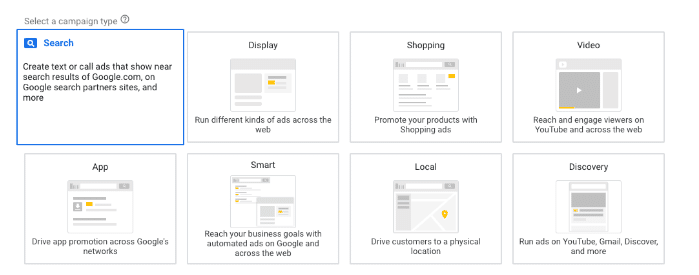
☐ Campaign type
Search
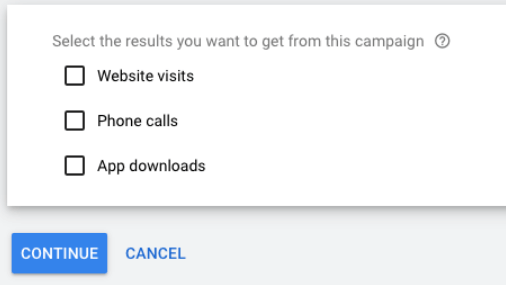
☐ Select the results you want to get from this campaign
Don’t select anything!
☐ Continue
Leave as-is
☐ General settings: Campaign name
“Brand Campaign”

☐ Networks
Select Search Network
Deselect Display Network

☐ Show more settings
Don’t change anything but take a look at your options for future campaigns: Start and end dates, campaign URL options, Dynamic Search Ads setting, and ad schedule

☐ Targeting and audiences: Locations
Select the geographic region based off how likely people are to convert

☐ Location options: Target
People in or regularly in your targeted locations

☐ Exclude
People in your excluded locations

☐ Languages
All languages

☐ Audiences
Leave as-is
☐ Budget and bidding: Budget
15% of your budget

☐ Bidding
Select a bid strategy directly > Manual CPC
Uncheck “Help increase conversions with Enhanced CPC” (…not for branded campaigns!)


☐ Show more settings: Conversions
This is why we set up our conversions first! We want Google to identify those personalized conversions as our indicators of success—hence:
Use the account-level “Include in Conversions” settings
☐ Ad rotation
Optimize: Prefer best performing ads

Extensions
Extensions are a really important facet of building brand campaigns—and something that a lot of people skip. So listen up!
What are extensions?
Ad extensions are “bonus links” or pieces of information about your business that you can tack onto your ad, including your address, phone number, direct page links, coupons, or even additional websites. Extensions show up in blue below your primary ad copy.
Think of them as boltons for your ads:
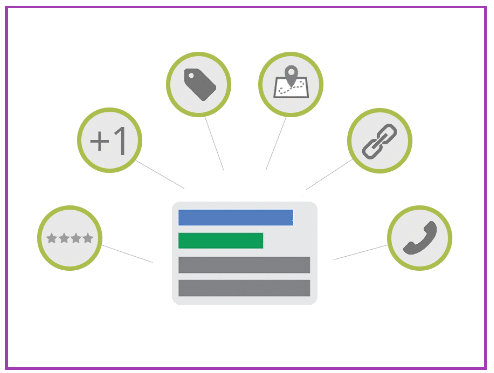
These little “additions” appear under your ad and act as featured highlights and callouts (think “About Us” and “Services” links) make your ads all the more clickable.

The frustrating part about extensions, however, is that you have no control over when or where they actually show up as a part of your ad—or even which extensions Google chooses to use.
So, you provide Google with a collection of resources (i.e. extension options). Then, in real time, Google compiles the ad features based on what they think is most relevant to that search.
The more extensions you create for Google, the more likely they are to use them. Let’s go through the different types of extensions next:
Ad Extension Types
- Sitelink extensions – links to different sections of your website
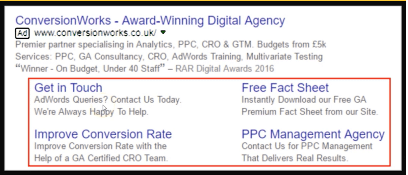
2. Callout extensions – little bullet points of information, like an extra description

3. Call extensions – A direct link to your phone number for easy calling

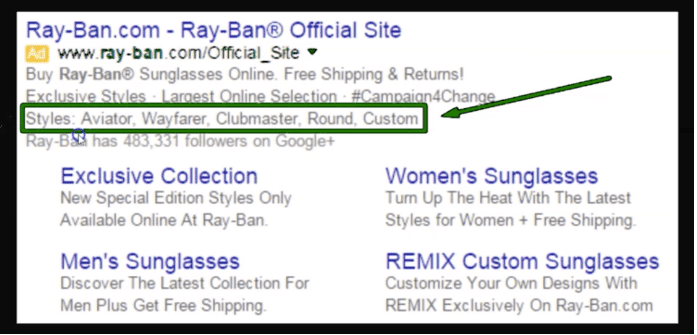
4. Structured snippets – Provides a list of product or service offers based on a selected category (for example, sunglasses styles)
5. Location extensions – your business location (you must have a Google My Business account to add this extension)

How to Build Sitelink Extensions
…Picking up where we left off in our branded campaign build:
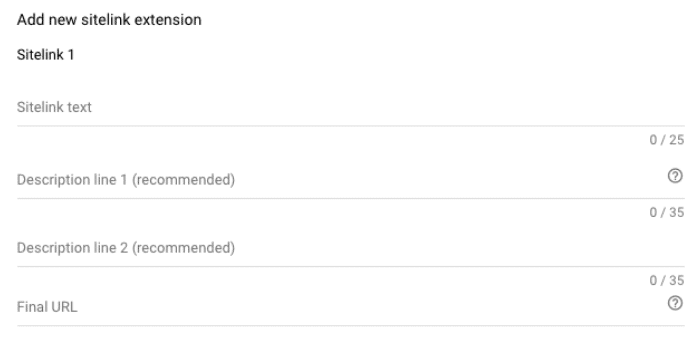
☐ Ad extensions
Click “Sitelink extensions”
☐ New Sitelink Extension
☐ Add new sitelink extension
What are additional pages of your website that you’d like to offer your audience? An “About Us” page is usually a good place to start.
☐ Fill out your Sitelink 1 text (i.e. the header for this sitelink extension)
For example, “About Us,” “Read About the Team,” “Who We Are,” or “Read Our Epic Story”
☐ Fill out “Description line 1”
Elaborate: Where will this click lead the reader?
☐ Fill out “Description line 2”
Elaborate: Why should the reader click?
☐ Fill out “Final URL”
Paste the URL of the page extension
☐ Repeat these steps for however many additional sitelinks you’d like to include without repeating yourself
Remember, each additional sitelink should be an offer of some sort—even if the offer is just for the reader to learn more!
☐ Sitelink URL options
Leave as-is
☐ Advanced options
Because we’re building an evergreen campaign, deselect mobile and leave the rest as-is
How to Build Callout Extensions
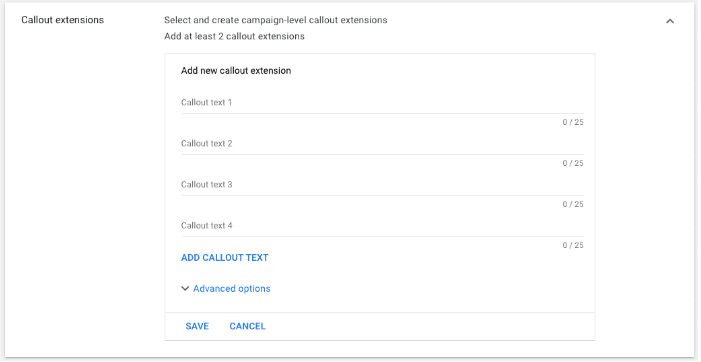
☐ Callout extensions
☐ New Callout Extension
☐ Add new callout extension
What are the “bullet points” that are important for a reader to know about you? Why are you in business? What makes you different? Take all those unique value propositions and make each one a callout text.
☐ Advanced options
Deselect mobile—if you have limited-time offers, you can create a start and end date for certain callouts, otherwise leave as-is
Review the remaining extension options to see which may be applicable to you and create accordingly!
☐ Save and Continue
Extension Resources
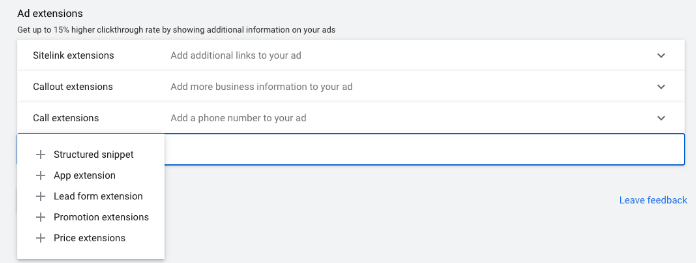
*Learn more about sitelink extensions here
*Learn more about callout extensions here
*Learn more about structured snippets here
*Learn more about lead form extensions here
Ad Groups
Ad groups are a way of organizing our ads into categories inside a campaign.
So, each ad group shares the same keywords and budget to promote a product or service.
So, for our brand campaign, we might create ad groups for:
- Business name
- Branded service #1
- Branded service #2
Let’s Build Some Ad Groups!
…Picking up where we left off in our branded campaign (set up ad groups) build:
☐ Ad group name
“Brand terms”

☐ Default bid
$1

☐ Keywords
Google can help you find relevant keywords by entering your website URL or entering your product or service—because this is a branded campaign, just enter the keywords you want to bid on (variations of your brand name, branded products, and how people might search for you)
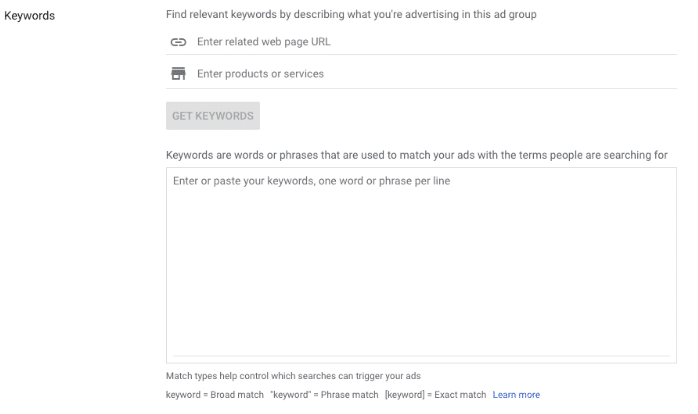
☐ Save and continue
Because we’re building an evergreen campaign, deselect mobile and leave the rest as-is
Ads and Go Live
(Creating the Ads!)
…Picking up where we left off in our branded campaign (create ads):
☐ Create Responsive Ad
A note on Responsive search ads:
In 2016, Google Introduced expanded text ads–a type of search ad that allows full control over your text asset and gives audiences more information through additional headlines and descriptions.
However, we’re not running text ads because Google decided to replace them with Responsive search ads. Learn more about why Google is killing text ads here.
☐ Responsive search ad
Now, we’ll create our responsive search ad: this is where we give Google a number of headlines and descriptions and Google will choose what to display
☐ Final URL
Make sure you still enter where you want your user to land when they click on your ad

☐ Display URL
Again, this is where you can manipulate your “URL” to reinforce your offer

☐ Headlines
Enter a number of headline options
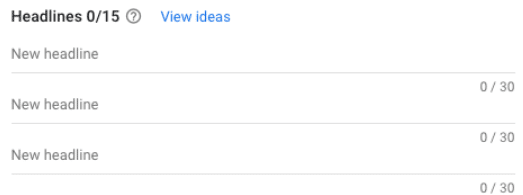
☐ Descriptions
Enter a number of description options

☐ Save and continue
Campaign Review
Look through your campaign information; if all looks good, click publish!
Now your campaign is live!
Because we still have some work to do with our campaign build, click “Enabled” on the top left hand corner of the page and then click “Pause” in the dropdown menu.
Navigating Google Ads
Now that one campaign is built (yay!), it’s important to understand how to navigate around the Google Ads dashboard without being afraid to mess things up.
Let’s take a tour:
From the Overview Page
☐ Click the slider (>) on the left hand side
☐ When that expands, take note of the “All campaigns” button
If you get lost inside Google Ads, you can always come back to this key and click the “all campaigns” button!
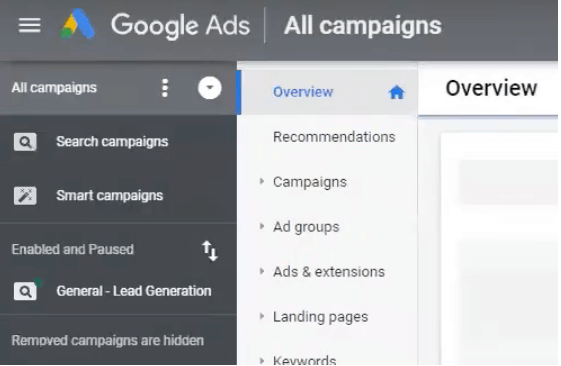
☐ After clicking “All campaign” take a tour of your dashboard
Check your dates and filters. Review the data and get comfortable with the page:
- Overview
- Recommendations
(Beware! This page is dangerous—just take a look and move on)
- Ad groups
- Ads & extensions
- Landing pages
(This page isn’t super relevant to what we’re going now—just take a look and move on) - Keywords
- Audiences
- Demographics
- Settings
This is where you can go to modify the initial settings of the campaign we built
Things to Remember
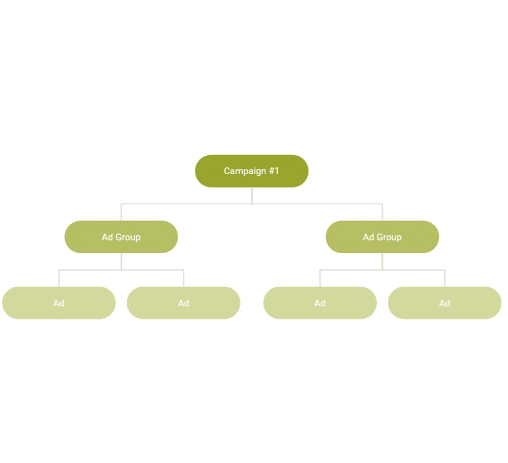
- Your Google Ads Account houses your campaigns
- Inside your campaigns lives ad groups
- Inside your ad groups live marketing assets (keywords, ads, negative keywords, etc.)
PART SEVEN
Key Campaign #2: General Campaign
It’s time to build your second campaign!
General Campaign | 25% of Budget
This campaign-type focuses on searches for your offer, or relevant pivots.
General campaigns are the real money-makers (in time!). These campaigns go after search terms that are positive indicators of intent. General campaigns:
- Capture high commercial intent traffic
- Attract customers who are ready to buy
- Identify trends in your industry
- Comete for your core offering
- Position yourself as an authority in your space
Keyword Research
You need to know what keywords you’re going to build campaigns for. Let’s determine your keywords before defining your ad groups.
- Start with Google!
- Type in your target words and see what suggestions show up
- Google offers additional recommendations at the bottom of the search results (*take note of keywords that you don’t want to rank for and begin your negative keyword list!)
*Use an Excel spreadsheet or Google Sheet document to create a rough list of keywords you want to rank for and don’t want to rank for.
- Other Tools:
- Google keyword planner
Inside Google Ads, go to Tools and Settings > Keyword Planner > Discover new keywords - iSpionage
- SpyFu
- SEMRush
- Google keyword planner
Now, It’s Time to Decide on Your Ad Groups!
With your keywords in mind, take a moment to consider who you’re speaking to—how does your audience see themselves?
If you would speak to these groups differently, segment your ad groups accordingly! Consider:
- Does the offer change, depending on your audience?
- Should the ads change?
- Should the extensions change?
- Will the landing page change?
Reminder: Budgets
- Assigned on a campaign level
- Ad Groups will “steal” budget from each other
- To ensure an Ad Group is always active, build a separate campaign
- For complete comparisons or split tests, build separate campaigns
General Campaign: Campaign Settings
Let’s build our general campaign!
☐ Go to Ads.Google.Com and login
Psst…you should now see your campaign overview when you login!
☐ (+) New Campaign
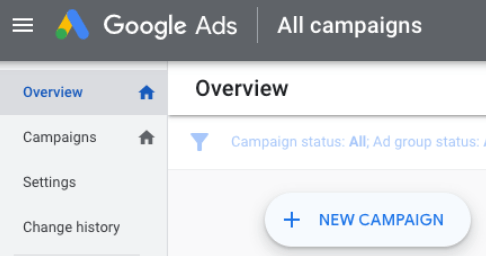
☐ Select the goal that would make this campaign successful to you Create a campaign without a goal’s guidance
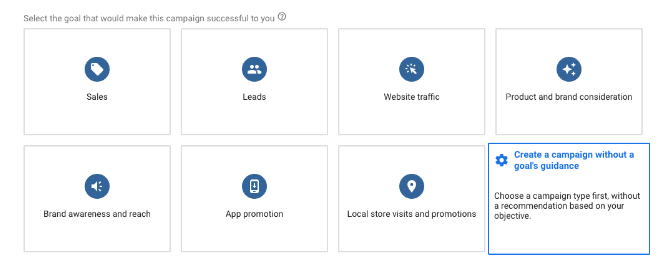
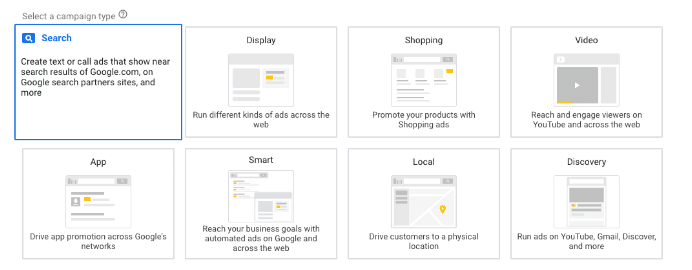
☐ Campaign type
Search
☐ Select the results you want to get from this campaign
Don’t select anything!
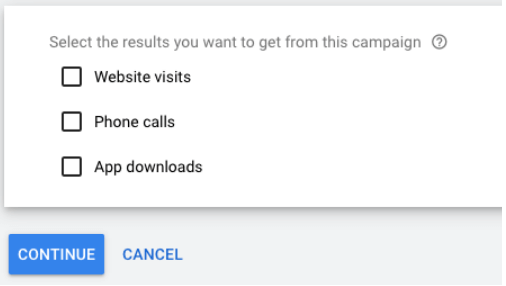
☐ Continue
☐ General settings: Campaign name
“General Campaign”

☐ Networks
Select Search Network
Deselect Display Network

☐ Show more settings
Don’t change anything!

☐ Targeting and audiences: Locations
Select the geographic region based off how likely people are to convert

☐ Location options: Target
People in or regularly in your targeted locations

☐ Exclude
People in your excluded locations

☐ Languages
All languages

☐ Audiences
Leave as-is
☐ Budget and bidding: Budget
70% of your budget

☐ Bidding
Select a bid strategy directly > Manual CPC
Important: After about 10 conversions, you should come back and select “Help increase conversions with Enhanced CPC.” Enhanced CPC allows Google to increase your bid up to 250%, which is significant—by giving Google some solid data first, your enhanced CPC will be super effective without the risk of needlessly increasing your bid upfront.


☐ Show more settings: Conversions
Use the account-level “Include in Conversions” settings

☐ Ad rotation
Optimize: Prefer best performing ads

☐ Ad extensions
Select applicable extensions from the list you already created during your branded campaign build; you may need to create more extensions relevant to your general campaign. Add as many as possible!
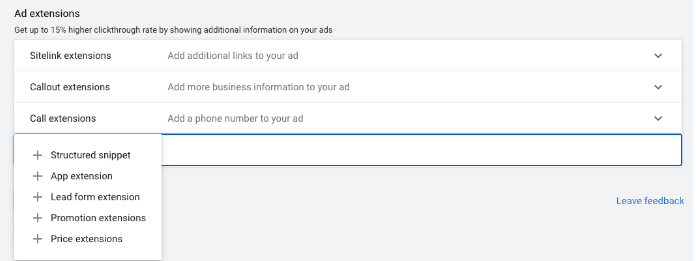
A note on call extensions:
We suggest not using call extensions for general campaigns. For branded campaigns, we know the lead is looking for you specifically and is more likely to call—for general campaigns, folks are likely to click to call before they understand the context around the ad.
☐ Save and Continue
General Campaign: Ad Groups
…Picking up where we left off in our general campaign (set up ad groups) build:
☐ Ad group name
Enter your first general campaign’s ad group name
Make sure you have considered how best to strategically split up your general campaign’s ad groups!

☐ Default bid
Think back to our estimates and projections at the beginning of this course and stick to that range, depending on your strategy and goals

☐ Keywords
Google can help you find relevant keywords by entering your website URL or entering your product or service, but don’t rely on Google for your keywords
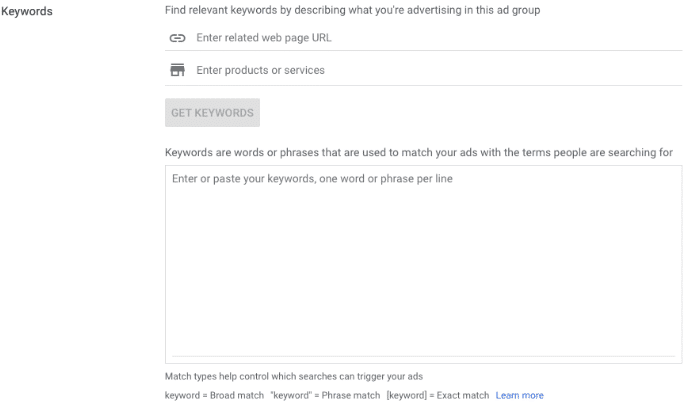
☐ Create any additional ad groups applicable to your general campaign
Remember: all ad groups share a budget!

☐ Save and continue
General Campaign: Ads and Go Live
…Picking up where we left off in our general campaign (create ads):
☐ Responsive search ad
☐ Final URL
Make sure you still enter where you want your user to land when they click on your ad

☐ Display URL
Again, this is where you can manipulate your “URL” to reinforce your offer

☐ Headlines
Remember to provide as many headlines and descriptions as possible without redundancy
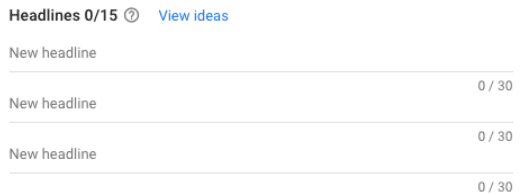
☐ Descriptions

☐ Save and continue
Campaign Review
Look through your campaign information; if all looks good, click publish!
Now your campaign is live!
Because we still have some work to do in this course, click “Enabled” on the top left hand corner of the page and then click “Pause” in the dropdown menu.
*In this lesson, we built one ad group for our general campaign. Now, make sure to build your subsequent ad groups!*
RLSA and Exclusion: Remarketing Lists for Search Ads (RLSA)
We are going to create a list that helps make sure people who have been to your site before are more likely to see your ads if they start searching for your search terms again.
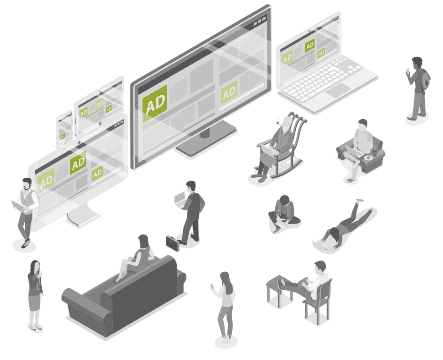
From your General Campaign:
☐ Audiences> Click Edit Audience Segments

☐ Select Observation
This means we aren’t going to limit our target to the people who have been a part of this audience, we want to see who has been a part of this audience to make a strategic decision later
☐ Browse
☐ How They Have Interacted with Your Business
Remarketing and similar audiences
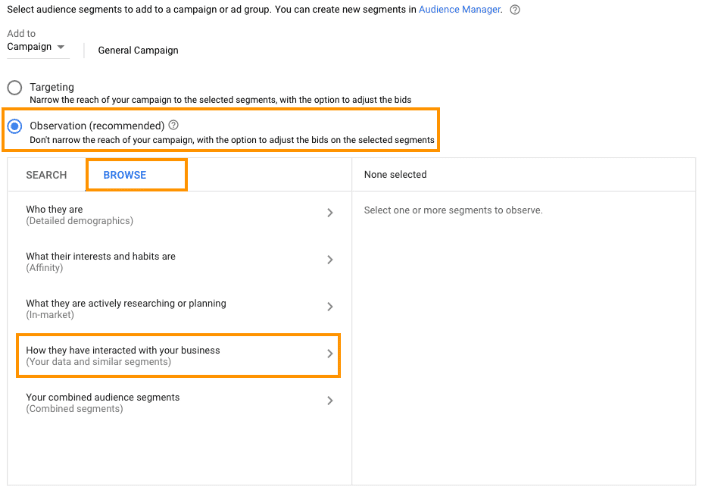
☐ Website Visitors
All visitors (Google Ads)

☐ Save!
You now have an audience in observation mode!
☐ Audiences > click Show table

☐ Bid adj.
Now you can make a bid adjustment—increase your bid (we recommend around 40%)
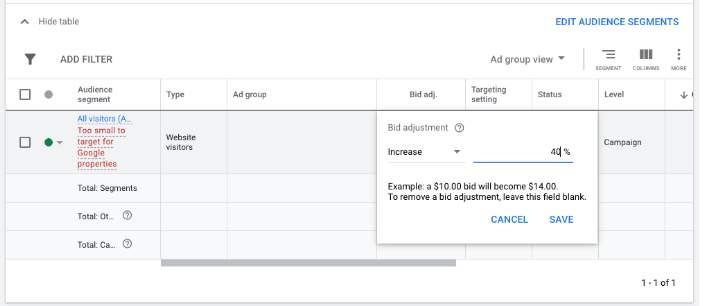
*What this means: You’ll increase the bid for people who have been to your site before and search for one of the keywords you’re bidding on.
Exclusion Section
This is very similar to an RLSA list, except instead of targeting people who have been to your site before, we tell Google not to go after anyone who has already converted with your General Campaign (filled out a form, etc.).
From your General Campaign:
☐ Audiences > Edit Exclusions

☐ Browse
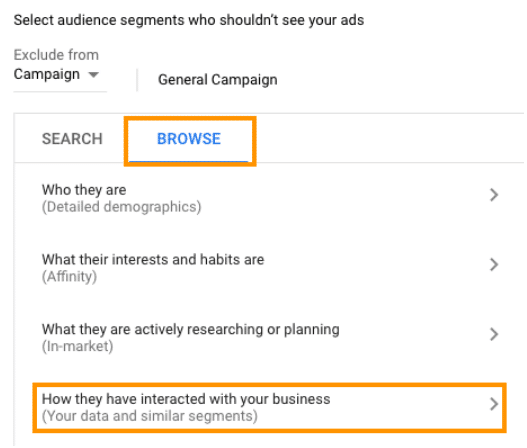
☐ Website Visitors
All visitors
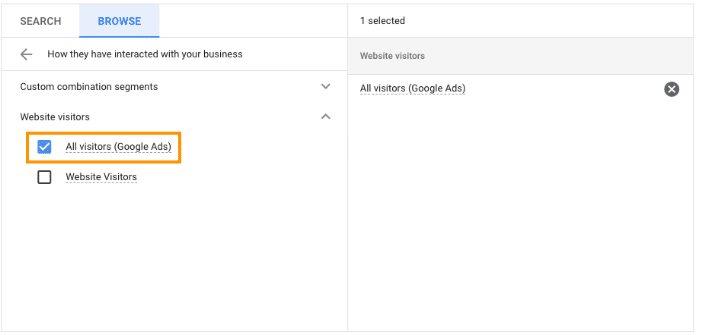
☐ Save
PART EIGHT
Key Campaign #3: Competitor Campaign

Let’s Build our Competitor Campaign!
Competitor Campaign | 10% of Budget
Competitor campaigns are designed to target folks who are searching for alternatives to your product. We typically allocate 10% of our budget to this campaign-type.
Competitor Campaign: Buildout
☐ Go to Ads.Google.Com and login
☐ (+) New Campaign
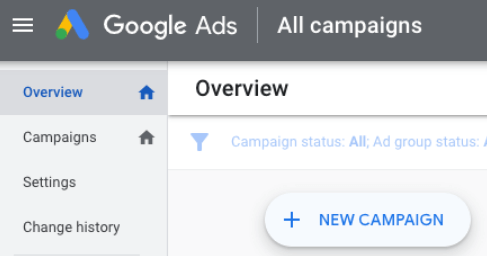
☐ Select the goal that would make this campaign successful to you Create a campaign without a goal’s guidance
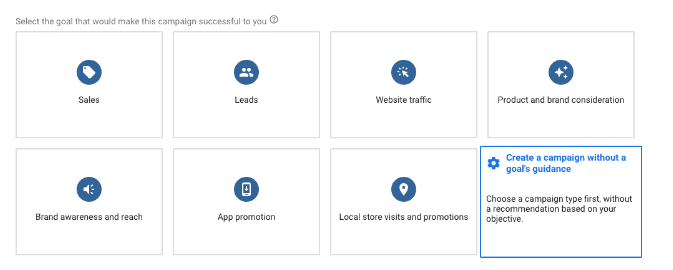
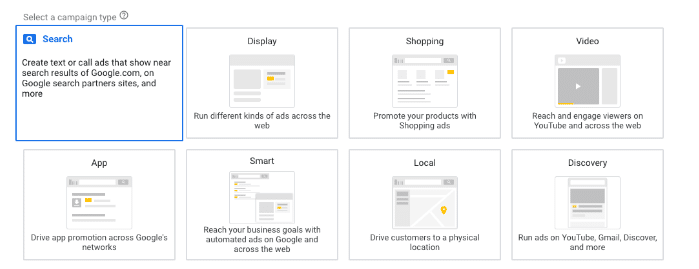
☐ Campaign type
Search
☐ Select the results you want to get from this campaign
Don’t select anything!
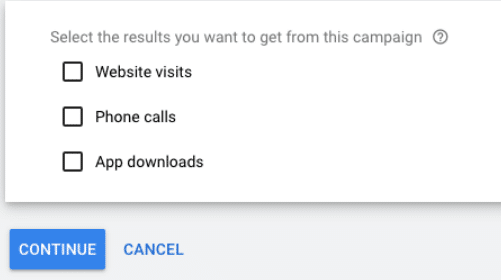
☐ Continue
☐ General settings: Campaign name
“Competitor Campaign”

☐ Networks
Select Search Network
Deselect Display Network

☐ Show more settings
Don’t change anything!

☐ Targeting and audiences: Locations
You may be more or less expansive in this campaign than you are with your branded and general campaigns, depending on your competitors

☐ Location options: Target
People in or regularly in your targeted locations

☐ Exclude
People in your excluded locations

☐ Languages
All languages

☐ Audiences
Leave as-is
☐ Budget and bidding: Budget
10% of your budget

☐ Bidding
Select a bid strategy directly > Manual CPC


Important: for Competitor Campaigns, never use Enhanced CPC. Because you aren’t the most relevant result for these particular searches (your competitor is!) your quality score will never be as high. Don’t offer to pay more money for Google to try to get you to be the #1 result when that is an impossible endeavor.
☐ Show more settings: Conversions
Use the account-level “Include in Conversions” settings

☐ Ad rotation
Optimize: Prefer best performing ads

☐ Ad extensions
It may be appropriate here to create new extensions that are specific to the competitors you’re bidding against (but not attack ads!).
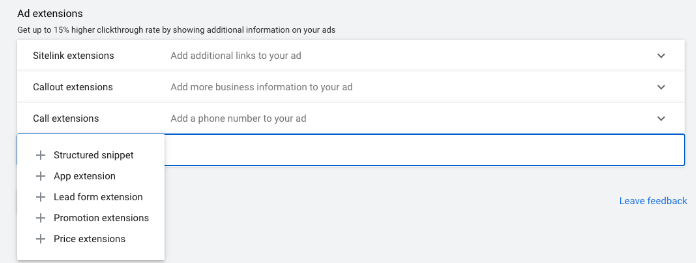
☐ Save and Continue
Set Up an Ad Group
Split up ad groups by your different competitors!
☐ Select an ad group type
Standard

☐ Ad group name
Competitor #1

☐ Default bid

☐ Keywords
Qualify your search terms! For example, if a competitor offers some services you don’t offer, use keyphrases that only include their brand name and the relevant service or product to you.
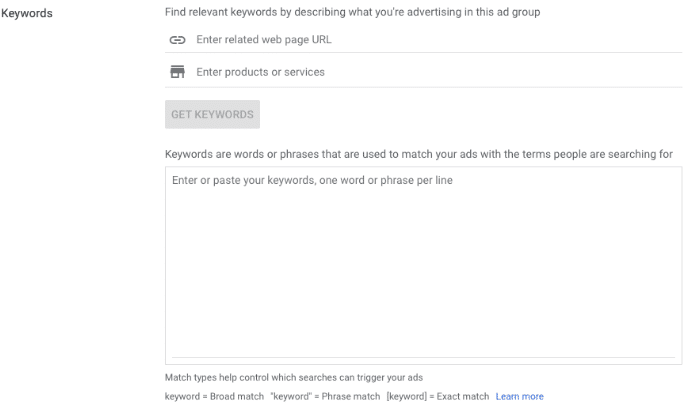
☐ Create a New Ad Group for Every Other Competitor
Using same process
☐ Save and continue
Create Ads
☐ Responsive search ad
☐ Final URL
Make sure you still enter where you want your user to land when they click on your ad

☐ Display URL
Again, this is where you can manipulate your “URL” to reinforce your offer

☐ Headlines
Remember to provide as many headlines and descriptions as possible without redundancy
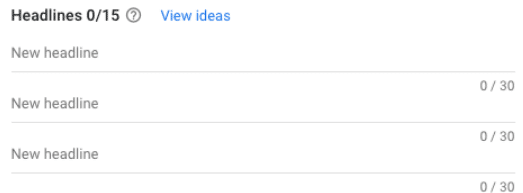
☐ Descriptions

☐ Add URL options
Leave as-is

☐ Save and continue
Campaign Review
Look through your campaign information; if all looks good, click publish!
Now your campaign is live!
Because we still have some work to do in this course, click “Enabled” on the top left hand corner of the page and then click “Pause” in the dropdown menu.
Exclusions
From your Competitor Campaign:
☐ Audiences > click Edit Exclusions
Add audience exclusion
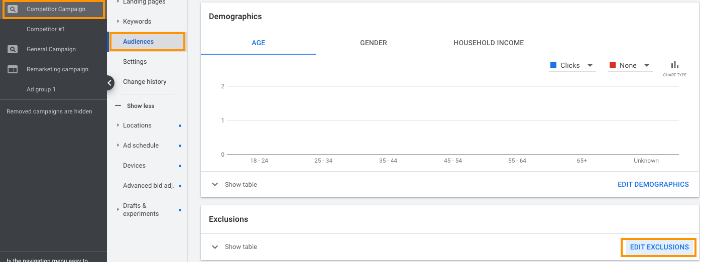
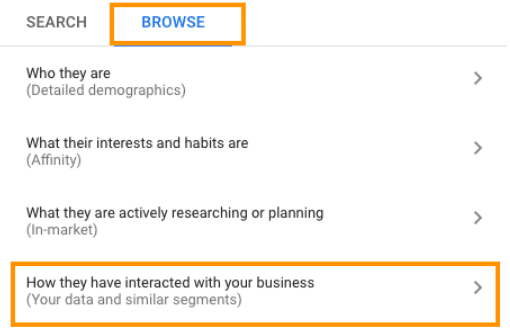
☐ Browse
☐ How They Have Interacted with Your Business
Remarketing and similar audiences
☐ Website Visitors
All converters

☐ Save!
PART NINE
Key Campaign #4: Remarketing Campaign
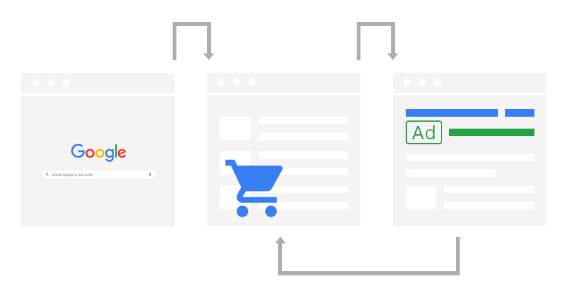
Building Your Fourth Campaign!
Your Remarketing Campaign | 10% of Budget
Remarketing campaigns bring visitors back to you. They also ensure the rest of your campaigns are working! And if they work well, they can slash the cost of each lead—sometimes in half. Remarketing campaigns:
- Reengage interested prospects
- Build your brand authority
- Increase visibility
- Improve your sales cycle
- Increase conversions
- Relatively inexpensive
Let’s Build our Remarketing Campaign!
☐ Go to Ads.Google.Com and login
☐ Tools and settings

☐ Shared library > Audience manager
☐ Audience sources
Left side of page
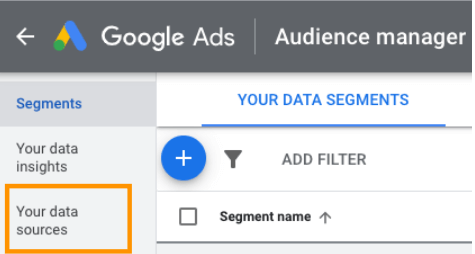
☐ Google Ads Tag > Click corner button
Set up tag

☐ Edit the Google Ads tag data source: Remarketing
Only collect general website visit data to show ads to your website visitors

☐ Restricted data processing
Does your website comply with California’s Consumer Privacy Act (CCPA)? If you aren’t sure, click exclude California residents from remarketing lists

☐ Save and Continue
☐ Reinstall the tag on your website: Tag setup
Use Google Tag Manager
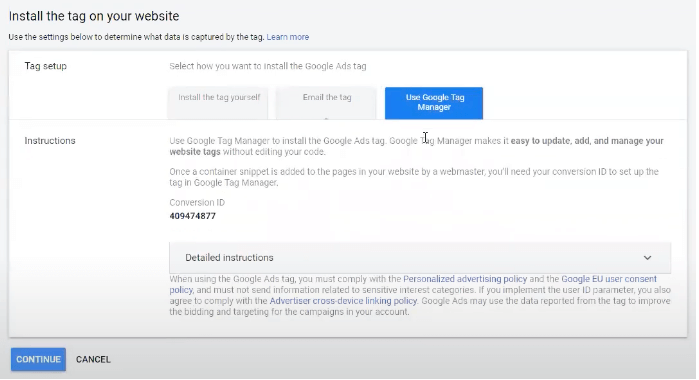
☐ Copy the Conversion ID
☐ Open Google Tag Manager in a new tab
TagManager.Google.Com
☐ In GTM: select tags
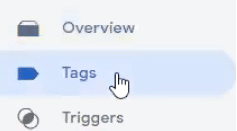
☐ New
Name “Remarketing Tag” on top left corner
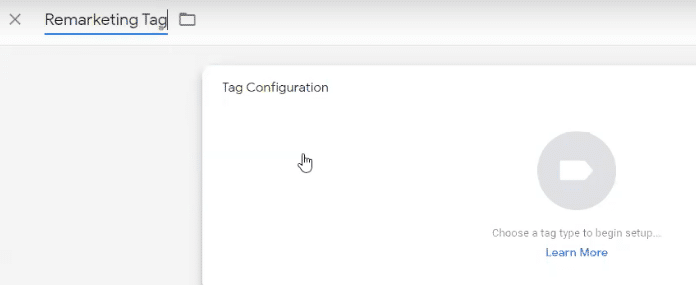
☐ Tag configuration
Google Ads Remarketing
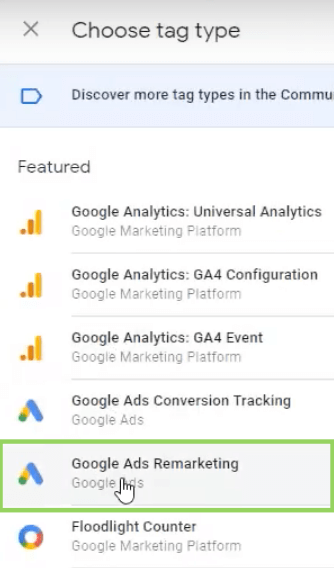
☐ Paste Conversion ID
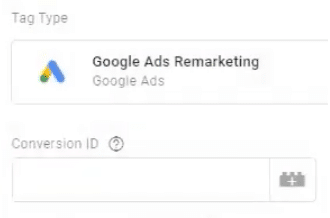
☐ Triggering
All pages > Add

☐ Save
☐ Submit
☐ Publish
Now we want to check Google Tag Assistant to make sure this new tag is firing. Need a refresher? Go back to our conversion tracking lessons!
☐ Open a new window and go to your website
☐ Click the GTA extension in your browser
☐ Enable
☐ Refresh your page
☐ Click the GTA extension again
You should see three tags listed under “Result of Tag Analysis,” including your new remarketing tag
Now, Go Back to Where You Left Off in Google Ads
☐ Continue
You should still be on the “Reinstall the tag on your website” page
☐ Done!
Remarketing Campaign: Campaign Settings
Now, Let’s Build!
☐ Go to Ads.Google.Com and login
☐ (+) New Campaign
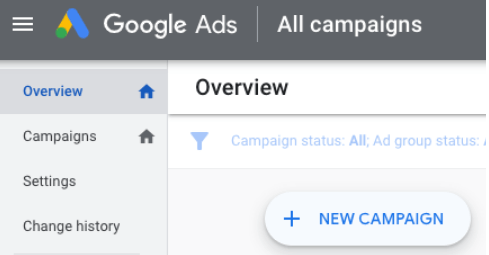
☐ Select the goal that would make this campaign successful to you Create a campaign without a goal’s guidance
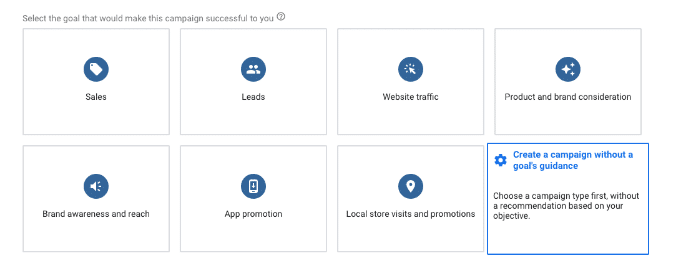
☐ Campaign type
Display
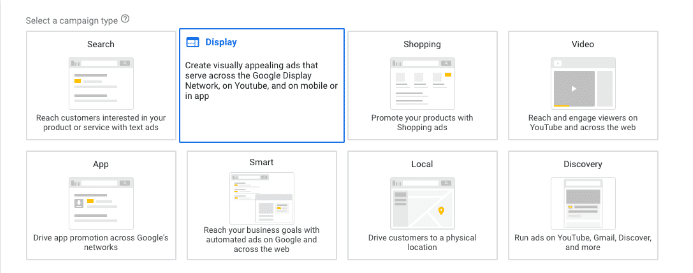
☐ Select a campaign subtype
Standard display campaign

☐ Select the results you want to get from this campaign
Paste your business’s website

☐ Continue
☐ Campaign name
Remarketing Campaign

☐ Targeting and audiences: Locations
Select the geographic region based off how likely people are to convert

☐ Location options: Target
People in or regularly in your targeted locations

☐ Exclude
People in your excluded locations

☐ Languages
Only select applicable language to you

☐ Bidding: What do you want to focus on?
High Quality Traffic
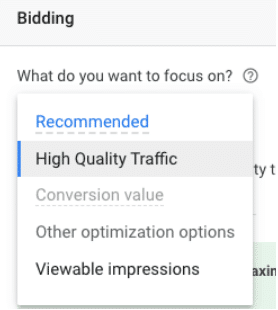
☐ How do you want to get conversions?
Automatically maximize traffic
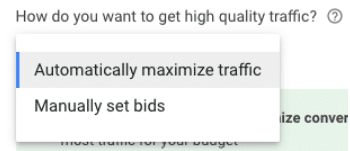
☐ Budget
15% of your total budget

Show more settings: Conversions
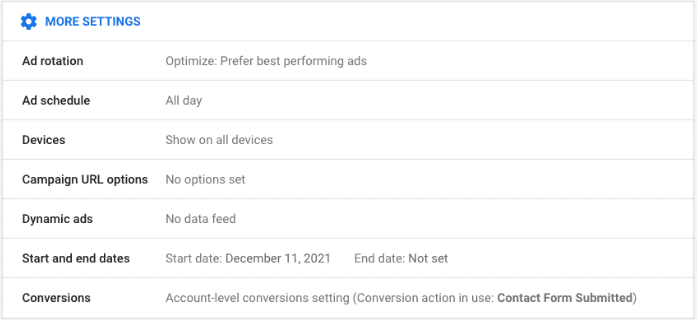
☐ Ad rotation
Optimize: Prefer best performing ads
☐ Ad schedule
All day
☐ Devices
Leave as-is
☐ Campaign URL Options
Leave as-is
☐ Dynamic Ads
Leave as-is
☐ Start and end date
Leave as-is unless you have specific dates
☐ Conversions
Use the account-level “Include in Conversions” settings
☐ Content exclusions
Select site-types where you don’t want your ad to appear
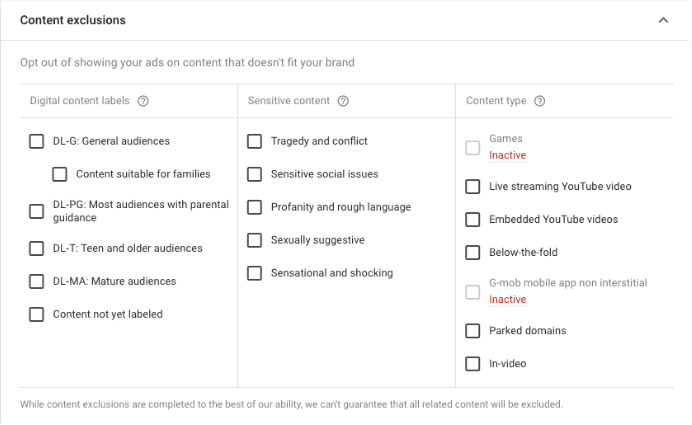
☐ Add targeting
Leave as-is
Remarketing Campaign: Ad Groups
…Picking up where we left off in our remarketing campaign (set up ad groups) build:
☐ Ad group name
For the sake of this lesson, let’s only create a single ad group for your remarketing ads and name this “General Remarketing”
☐ Audiences
Browse > How they have interacted with your business > All visitors
☐ Targeting expansion
Off!
Remarketing Campaign: Creating the Ads
…Picking up where we left off in our remarketing campaign (create ads):
☐ New responsive display ad
☐ Final URL
Enter the URL (landing page) where you want your audience to end up for this particular ad—your homepage works!

☐ + Images and logos
Upload your logo, select “Logo,” and save
☐ Upload images
Upload as many images as you can
☐ Upload any videos you have as well
☐ Headlines
Fill out five headlines
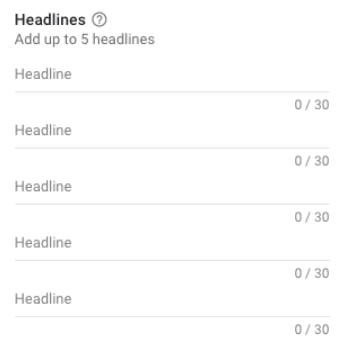
☐ Long Headline

☐ Descriptions
Fill out five descriptions
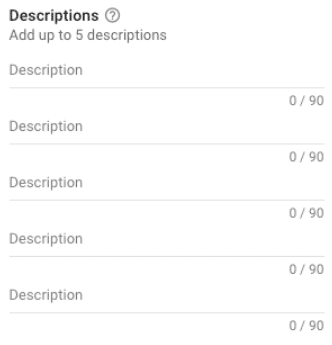
☐ Business name
Make sure you enter the business name users will use to find you

☐ Additional format options
Leave as-is
☐ More options: Call to action text
Choose a call to action that most closely aligns with your business
☐ Custom colors
If you have your HEX codes, feel free to add them here! Opt in to show this ad on text and native ad placements
☐ Add to ad group
☐ Create another ad!
☐ Create campaign
☐ Continue to campaign
Because we still have some work to do in this course, click “Enabled” on the top left hand corner of the page and then click “Pause” in the dropdown menu.
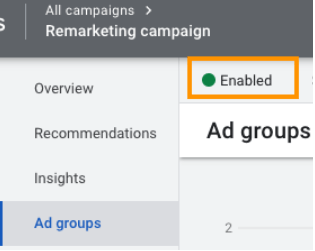
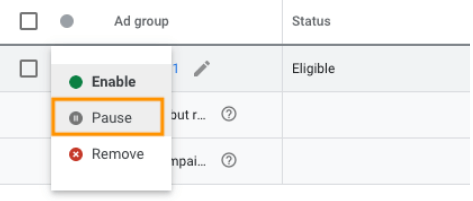
Remarketing Campaign: Exclusions
(I.e. don’t show these ads to people who already took us up on our offer!)
From your Google Ads dashboard:
☐ All campaigns > Remarketing campaign
For this lesson, we are going to make a campaign-wide rule (don’t show any remarketing ads to folks who have already converted); but you could also choose to only make this exclusion in certain ad groups within this remarketing campaign!
☐ Audiences > Edit Exclusions
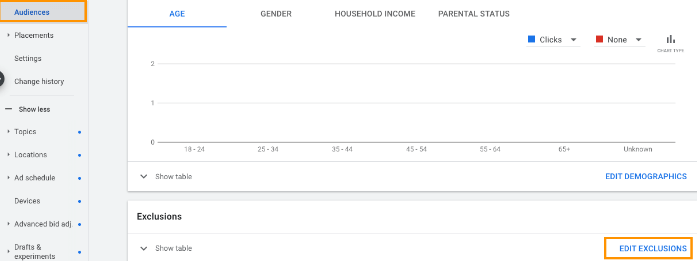
☐ Exclude from (dropdown)
Campaign

☐ Search > All converters

☐ Save
Now, Google will only show your remarketing ads to people who have not converted.
Remarketing Campaign: Creating Audiences
We built our remarketing audience and added an exclusion list. Now let’s learn how to build more advanced audiences so that you can massage your remarketing campaigns to better suit what is working for you further down the road. So, from your Google Ads dashboard:
☐ Tools and settings > Audience manager
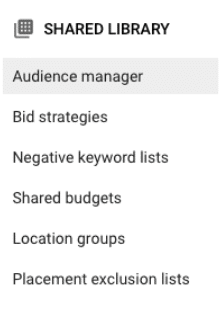
☐ Audience lists > Remarketing >
☐ + Website visitors
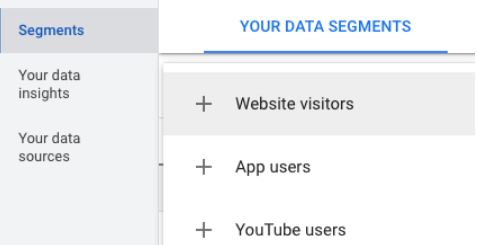
☐ Audience name
This is the more specific audience type you will target, perhaps categorized by the specific page/service/product they visited on your site

☐ List members
You can play around here! For this training, we’ll make it easy and stick with “Visitors of a page”
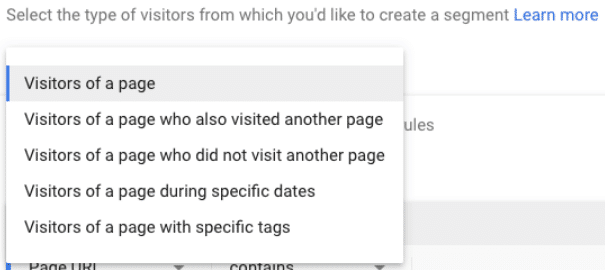
☐ Visited page
Again, you can play around here; for this training, simply choose “Match any rule group” and your desired URL

☐ Pre-fill options
Leave as-is

☐ Membership duration
540 days

☐ Description
Explain what this audience means so that anyone who hopped into your Google Ads account could understand without digging through all the details

☐ Create audience
*The audience is built but you still need to build a campaign for that audience! However, you can apply this audience to any campaign that has already been built.
PART TEN
Key Campaign #5: DSA Campaign
Let’s Build our DSA Campaign!
Your DSA Campaign | 16% of Budget
Dynamic Search Ads (DSA) fills in the gaps in your keyword-targeted campaigns. With DSA campaigns, your site will appear in the search results when someone searches for a term that’s closely related to a frequently used phrase or title found on your website.
DSA Campaign: Buildout
Go to campaigns:
- Click the “+” symbol
- New campaign
- Create a campaign without a goal’s guidance
- Search
- Skip “Select the results you want to get from this campaign”
- Continue

Type: Search
Campaign Name:
Network: Search Network > Only choose “Search Network” and select “Include Google Search Partners”
Skip start and end date
Skip Campaign URL Options
Click on “Dynamic Search Ads setting” > yourdomain.com
For newer websites, you’ll have to wait until Googlebots scan or “crawls” your site (usually around 1 month after your site is published

Language: All languages
Select a target source > Use Google’s index of my website
Ad Schedule: All day

Budget: 16% of budget
Bidding: Conversions > Set a target cost per action
Conversion: Account-level conversion setting
Ad rotation: “Optimize: Prefer best performing ads”
Sitelink extensions: Choose the ones that are most appropriate for you.
Once finished, click Save and continue.

It will automatically choose “Dynamic.”
Ad group name: All Webpages

Select URL > contains > Enter the “root” domain where all your products are found (e.g. “underdoggames.com/collections/” or “underdoggames.com/products/”
This will let Google crawl your product pages.
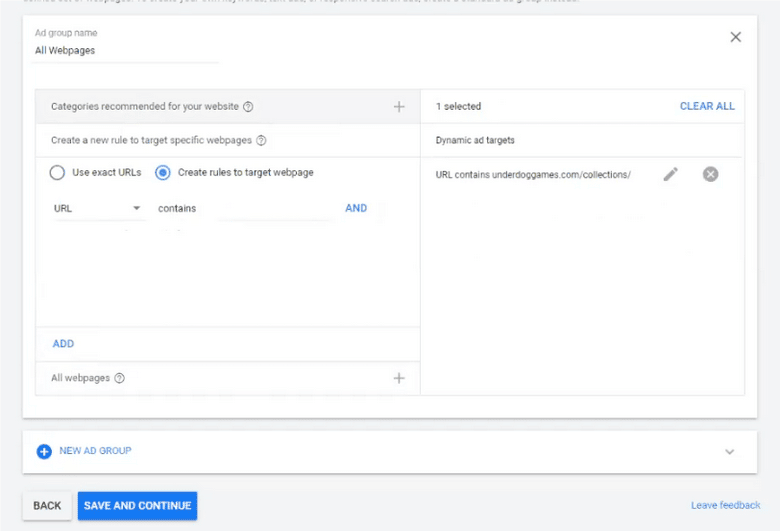
However, if you want to use the exact URLs:
Select “Use exact URLs” > paste the exact URL of the product > Add

- Final URL
- Headline – will be pulled right from your page title
- Display URL
- You can only add descriptions
- Use the full length
- Should be about your products
- If you have a theme for your store, put it here.
Once finished, click Save and Continue.
To check on what ad group goes to your pages
Go to Dynamic Search Ads > Dynamic Targets
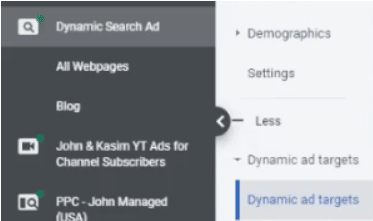

Use this if you don’t want Google to crawl a specific page.
- Copy the URL of the page
- Inside Dynamic Search Ad go to Negative dynamic ad target
- Click Add to > Campaign
- Use exact URLs
- Paste the url here
- Add

Inside Dynamic Search Ad:
- Go to Ad groups
- Select the Target CPA of the ad group
- Click the pencil icon
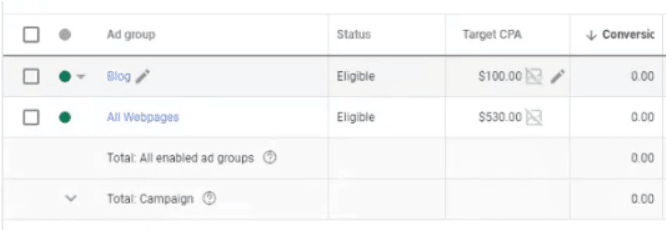

Inside Dynamic Search Ad > Landing pages

- Inside Dynamic Search Ad > Negative Keywords
- Click the “+” symbol
- Add negative keywords or create a list
- Add your brand name
PART ELEVEN
Key Campaign #6: Performance Max

Performance Max Campaign | 20% of Budget
Performance Max is where things get both super exciting and complicated.
While we will walk you through how to build a Performance Max campaign, we strongly suggest going through our Ultimate Guide to Performance Max first.
Performance Max is an entirely different beast in the world of Google Ads—there are different functions and terms that stray from traditional campaigns we went through so far—and it’s critical that you understand how PMax works before jumping into this section.
Read the Ultimate Guide to Performance Max Here
Performance Max Campaign: Buildout
☐ Inside your Google Ads Campaigns dashboard, click “+ New campaign”
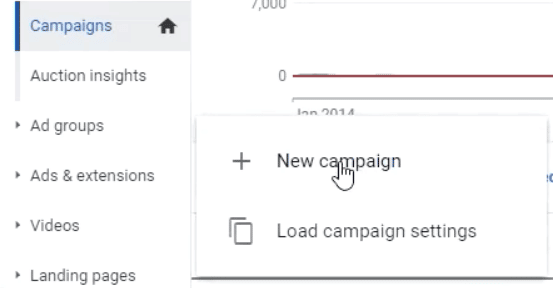
☐ Choose your objective: Leads
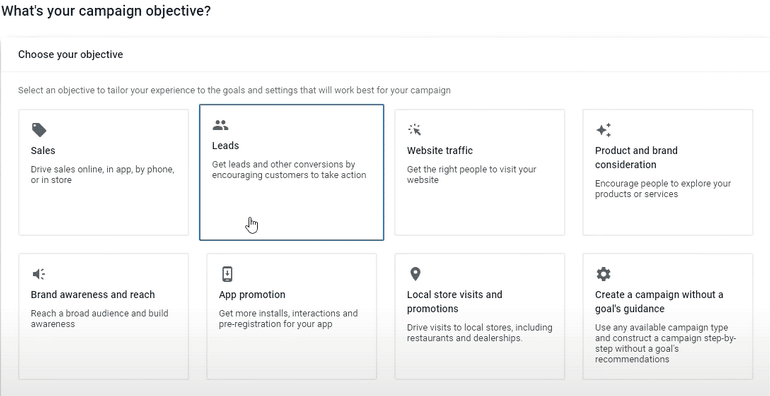
Conversions Actions
☐ Choose the conversion actions for your campaign

☐ Select a campaign type. Choose Performance Max
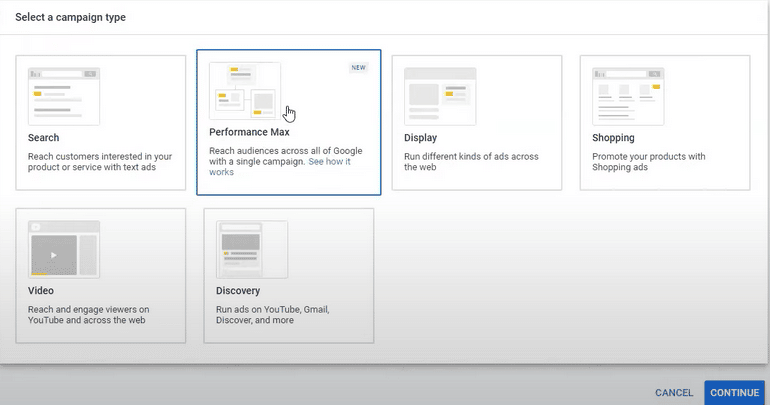
☐ Name your campaign, then click Continue

Budget and Bidding
☐ Add a budget

☐ Bidding: Select conversions
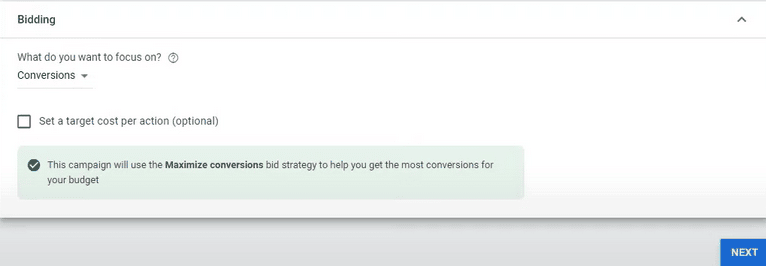
 Important: Bidding for Lead Generation
For lead generation campaigns, we recommend using “Maximize Conversions” as your bidding strategy.
Bear in mind that Maximize Conversions and Maximize Conversion Value are two different bid strategies. They sound the same but it’s easier to get a conversion with Maximize Conversions—because it’s not asking for a large conversion, unlike Maximize Conversion Value. And it’s not asking for a large conversion over three times your spend, unlike tROAS.
On that note, Don’t set a target cost per action (tCPA) or a target return on ad spend (tROAS), at least not in the beginning.
Give it at least 30-60 days to gather enough data and find out how Google operates before putting constraints on it.
Your PMax campaign will eat into other campaign types. And it doesn’t need a budget equal to those other campaigns to steal from them! So, while there is no “golden rule,” we recommend running your campaign as “open” as possible.
Campaign Settings
☐ Choose the locations you want to target

☐ Select the language (English, unless another language is applicable to your business)

Build Your Asset Group
It’s time to build your asset groups: which is all the creative material needed to create any type of ad across Google’s network, including:
- Photos
- Logos
- Videos
- Headlines
- Descriptions
First:
☐ Name your asset group
 Important: Asset Groups
The assets should be customized by the intended audience.
And remember (like ad groups!), every audience gets its own asset group.
☐ Add a final URL

☐ Add images

You can either upload images or get Google to scan your website. If you choose to scan your website, Google will pull up images from your site and social media.
☐ Add logos

You can either upload or scan your site for logos. If you choose to scan your site, Google will get your favicon and use it as your logo.
☐ Add videos

You can either upload videos from your computer or from YouTube. Just add the URL and Google will pull up those videos.
☐ Add headlines
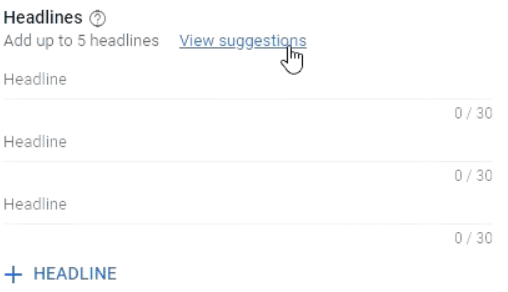
The way “suggestions” work is Google will create headlines based on your site.
Whether you’re using suggestions or not, make sure your headlines are high quality and can capture your users’ interest.
☐ Add long headlines

☐ Add descriptions
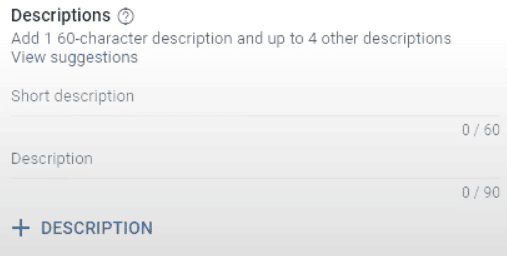
☐ Add a call to action

We highly recommend choosing automated as your call to action. Because we’re in a machine-learning world, it would be best to stick with Google’s choices at least for this section.
☐ Add your business name

☐ Under “More options,” add a display path
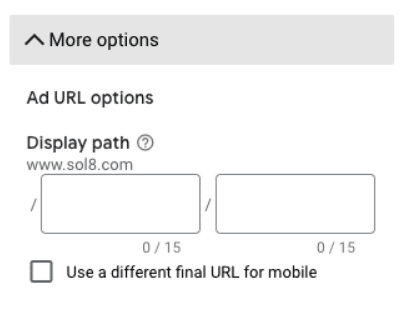
Pro Tip:
Always use a display path.
This helps you to manipulate the Final URL to reinforce your offer.
Before you continue, take a look at what your ads might look like in the preview mode and see if there’s anything you need to change.

Once you’re done, it’s time to create an audience signal for this asset group.
Build Your Audience Signal
Now that you’ve finished selecting your goals, adjusting your settings, and creating your assets, you’re probably wondering how to determine the right audience to target with this campaign.
In your audience signal, you’ll have the ability to tell Google who you think you should target with your ads.

☐ Select CREATE AN AUDIENCE SIGNAL
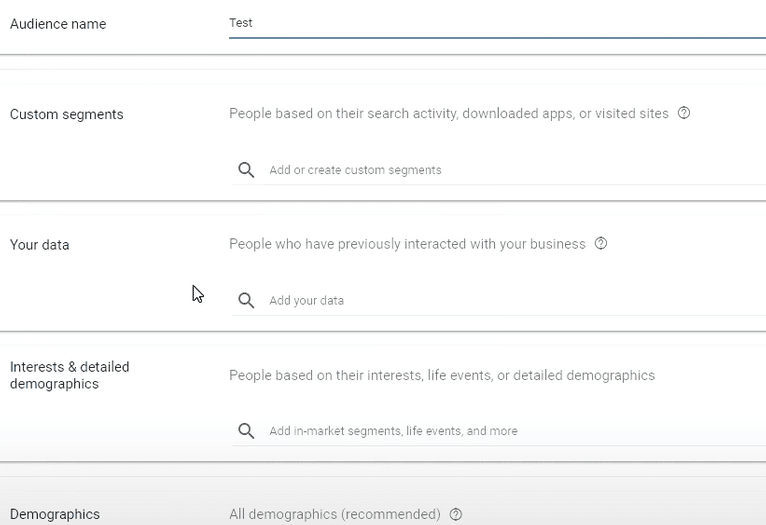
By creating an audience signal, you’re giving Google the type of audience profile you want to target. Google will use this profile to find similar profiles to serve your ads to.
As we discussed in our audience signal section in Part Two, there are multiple ways to create and categorize audience signals, including:
- Custom Segments
- Customer Data
- Interests and Detailed Demographics
- Demographics
In this tutorial, we’ll run through “Interests & Detailed Demographics.”
☐ Name your audience
☐ Skip to Interests & Detailed demographics
☐ Type your product (or relevant keywords for your product) to search for segments that might be applicable to your audience’s interests, life events, or demographics.

You should now see the list of in-market segments, life events, or detailed demographics you added.

☐ Once you’re done, click Save, which will take you to the previous dashboard
☐ Click Next
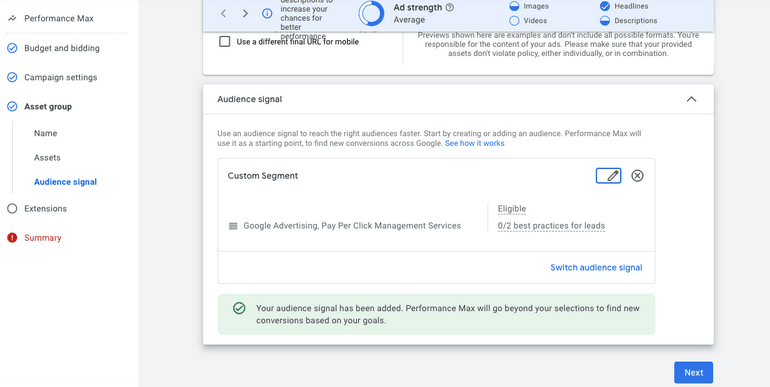
Add Extensions

For sitelink extensions:
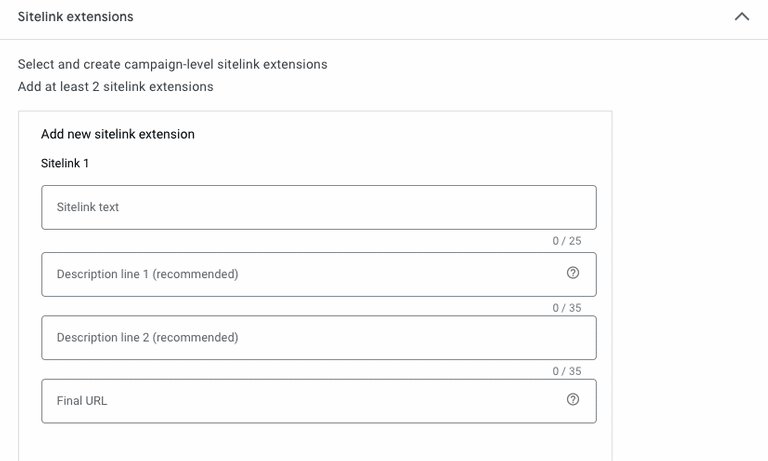
☐ Fill out your Sitelink 1 text (i.e. the header for this sitelink extension)
For example, “About Us,” “Read About the Team,” “Who We Are,” or “Read Our Epic Story”
☐ Fill out “Description line 1”
Elaborate: Where will this click lead the reader?
☐ Fill out “Description line 2”
Elaborate: Why should the reader click?
☐ Fill out “Final URL.” Paste the URL of the page extension
☐ Repeat these steps for however many additional sitelinks, callout extensions, and other extensions you’d like to include without repeating yourself.
Remember, each additional sitelink should be an offer of some sort—even if the offer is just for the reader to learn more!
Now you’re ready to duplicate this asset group!
Learn more in the Performance Max Ultimate Guide
PART TWELVE
Negative Keyword List

Negative Keywords
It’s equally as important to tell Google where you don’t want your ad to appear. Enter: negative keywords.
Inside your Google Ads dashboard:
☐ Tools and settings > Shared library
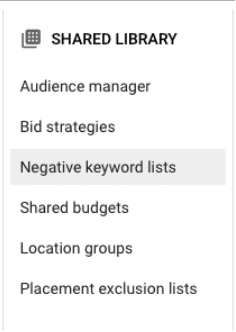
☐ Negative keyword lists

☐ + Add negative keyword list
Name your list; for the sake of this lesson, just create one global negative keyword list for now” “Master Negative Keyword List”
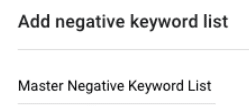
☐ Save
Add any keywords you don’t want to show up for, for example “free”
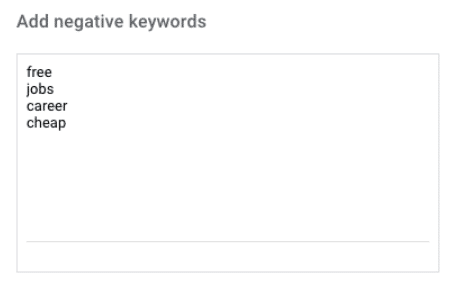
☐ Select keyword list > apply to campaigns
Select all campaigns in popup window

☐ Apply
PART THIRTEEN
Campaign Management

Introduction
While setting up your Google Ads campaign properly is essential, it’s the management (and monitoring and optimization) that comes after which determines success.
That said, there are a whole lot of guides out there that will tell you what buttons to push to set up your campaign—but not what measures to take after.
But that’s what makes this guide different! Let’s get to it:
Campaign Management: Monitor CPC Thresholds
Campaign Management: Keywords
Monitor Cost Per Click (CPC) Thresholds
- Keywords > Columns > Attributes
- Est. first page bid
- Est. top of page bid
- Est. first position
Next, Inside your Google Ads dashboard, let’s check up on our negative keywords to make sure they are up-to-date:
☐ Tools and settings > Shared library
☐ Negative keyword lists
☐ + Add negative keyword list
Name your list; for the sake of this lesson, just create one global negative keyword list for now” “Master Negative Keyword List”
☐ Save
Add any keywords you don’t want to show up for, for example “free”
☐ Select keyword list > apply to campaigns
Select all campaigns in popup window
☐ Apply
Campaign Management: Search Terms Report
Management: Search Terms
The keywords you bid on and the search terms you pay for sometimes end up being two different terms entirely. So, we want to check our Search Terms report:
- Add negative keywords
- Add new keywords/ad groups
- increase/decrease bids
- Change match types
Campaign Management: Auction Insights
Management: Auction Insights
You can actually see who’s competing against you inside Google Ads! From your dashboard:
☐ All Campaigns
☐ Overview
☐ Keywords
☐ Auction Insights
*Note: It is helpful to view auction insights inside your individual ad groups for the most valuable insights!
Optimizing and Monitoring Conversions
Once you start seeing conversions, it’s important to monitor (and then optimize accordingly)! Here’s how to review your conversions from the Google Ads dashboard:
☐ All Campaigns
☐ Overview
☐ Keywords
☐ Search keywords
Here, Google shows you: how much you’ve spent, how many conversions you’ve received, and your cost per conversion
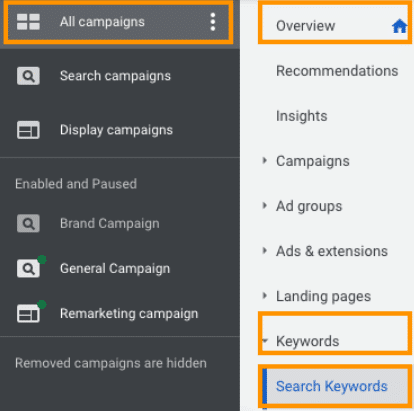
☐ Segment > Conversions > Conversion action
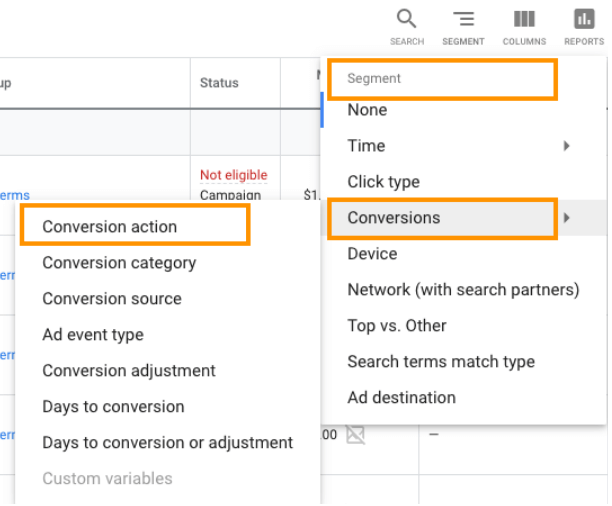
Campaign Management: Ads
Refreshing Your Ads
Over time, you’ll need to update and optimize your ads. Here’s how from the Google Ads dashboard:
☐ All Campaigns > General campaign
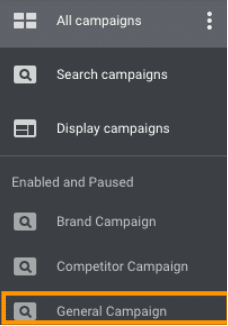
☐ Overview > Ads and extensions
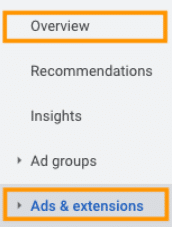
☐ Review your ad performance
See what’s working with your ads and adjust poorly performing ads accordingly
Campaign Management: Bidding Strategies
Manual CPC
- How most campaigns should start
- Enable “Enhanced CPC” once you have five conversions or more
Target CPA
- Need 20 leads a week first
- Good if you have consistent results that you’d like to replicate
Maximize Conversions
- When budget isn’t a concern and you’re looking to produce as many leads as possible
- Examples: business brokers, real estate investors, etc.
Maximize Conversion Value
- Similar to maximize conversions but will take into consideration applied conversion values
Target Impression Share
- For campaigns with perfectly sculpted keyword profiles that need to be shown at every opportunity
Maximize Clicks
- Quantity over quality
- For campaigns looking for as many clicks as possible, usually on lower budgets
- Good strategy when all leads are equal
When you want to change your bidding strategy…
☐ From Google Ads dashboard: All Campaigns > Campaign you want to adjust
☐ Settings
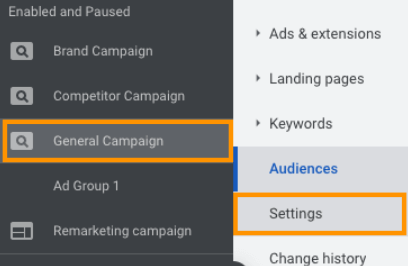
☐ Bidding
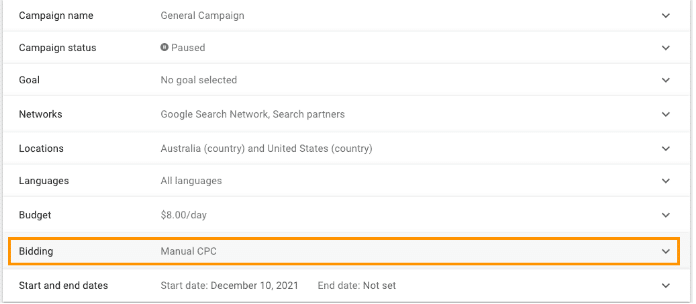
☐ Click dropdown > Select bidding strategy you’d like

Campaign Management: Exit Strategy
- What are “bad” results? (Definite this before running your ads)
- When do you call it quits?
- The Wal-Mart model of traffic
- Auction insights
- Inflated
PART FOURTEEN

Let’s Take Your Campaigns Live!
☐ All Campaigns > Campaigns
This will open up to show all campaign tags we created: Brand Campaign, Competitor Campaign, General Campaign, and Remarketing Campaign
☐ Click the round dropdown > Enable
These campaigns should have been “paused” before
☐ Congratulations! Your campaigns are now LIVE!
What’s Next?
You’re ready to fly, friend!
But if you’re feeling a little overwhelmed at the idea of running these campaigns on your own, the Solutions 8 YouTube channel is chock full of educational content including step-by-step tutorials, detailed explanations, and the latest updates and to help you along your Google Ads journey.
Subscribe to The Solutions 8 YouTube Channel
Or, you can sign up for Traffic Ahead, the weekly newsletter that rounds up the best Google Ads content and delivers it straight to your inbox.
Subscribe to Traffic Ahead: The Sol8 Weekly Update
Author
Patience is the former director of marketing and communications for Solutions 8. A phenomenal content writer, copywriter, editor, and marketer, she has played a prominent role in helping Solutions 8 become an authority in the Google Ads space. Patience is also the co-author of The Ultimate Guide to Choosing the Best Google Ads Agency and You vs Google.
 Patience Hurlburt-Lawton