When it comes to finding your way around the Google Ads dashboard, with all its buttons and menus and options, do you sometimes feel like that meme of the dog with its head tilted to the side in confusion?
We hear you.
Managing a Google Ads campaign is a complex task, and if you’re running more than one? Well, let’s just say your head tilt game may be strong.
Luckily, our dynamic duo—Founder and CEO Kasim Aslam and Senior Client Strategist John Moran—broke it down for us as part of a “how-to” video series they created for the Solutions 8 YouTube channel.

Think of the Google Ads dashboard as having two main buckets: A and B.
Bucket A is essentially your campaign hierarchy, and it’s where you’ll go to view details about campaign performance.
Clicking on the hamburger menu (the icon featuring three stacked horizontal lines) on the left side of the page will expand the navigation menu so you see the Page Menu (the dark gray menu with “All campaigns” at the top) and the Subpage Menu (the light grey menu with “Overview” at the top).
When using the Subpage menu, all of the information you see applies to whatever is highlighted in the Page Menu, and you can use filters and the search option to be more specific about the details you need (e.g., you can search by “Campaign name” or “Campaign type”).
Essentially, Bucket A uses these menus to follow a descending vertical path from the entire campaign view to your ad groups, keywords, ads and extensions, and so on to the most minute detail of each campaign.

Quick tip! If you ever fall too far down the rabbit hole of campaign details, just click the small house icon to return home. It looks like this
Bucket B is where you will find everything else to support your campaigns.
You get to Bucket B by going to the Navigation Menu at the top of your screen and clicking on the all-important “Tools & Settings” button (the icon that looks like a small wrench).
Tools & Settings is basically the other 50% of Google Ads. Even though it serves as the framework for everything you want to run inside the Google Ads platform, a lot of users don’t even know it exists.
“If I were to guess, I would tell you that 50% of professional Google Ads managers don’t know the Tools & Settings section is used for management.”
– Kasim Aslam, Founder & CEO of Solutions 8
Under Tools & Settings, you will find six subsections: Planning, Shared Library, Bulk Actions, Measurement, Setup, and Billing.
Together, they provide numerous tools that allow you to view and manage your analytics data, conversion actions, attribution data, linked accounts, bulk actions, rules, negative keywords list, audiences, and more—so you definitely want to know where they are and how to use them.
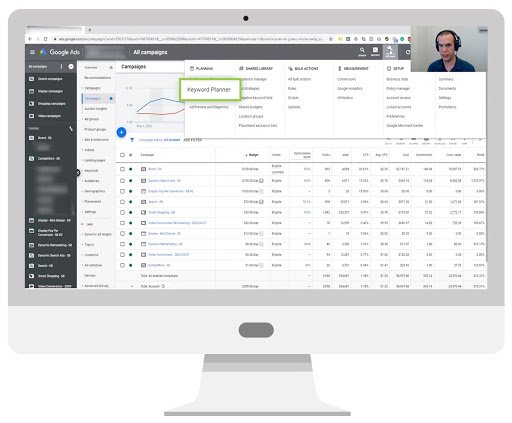
How to Set Up a Local Campaign in Google Ads
Ready to build your campaign? Here’s how to make it happen:
Campaign Settings
While in Google Ads, click on the “Campaigns” tab on the left. Click the blue plus sign, then “New Campaign” from the drop-down menu.
You’ll see the usual page with campaign goals. If you qualify for a Local campaign, there will be a box called “Local store visits and promotions.” Click on this and continue. The only option under “Select a campaign type” will be Local.
Next, you’ll be asked to select the type of locations you want to advertise. This lets you choose which locations to market (rather than marketing to, say, a 10-mile radius from your business.) You can also create location groups to market a batch of similar stores, if you’d like.
In the next screen, you’ll choose the following settings:
- Campaign Name
- Language
- Budget
- Bidding
- Campaign
- Optimization (store visits, call clicks, driving directions)
- Start and End Dates
- Product Feed
A few notes about Campaign Optimization: Before tracking store visit conversions, you’ll need to be approved. You can find the eligibility criteria on Google’s page, About store visit conversions.
The campaign optimization values are also automatically set to $1.00. If you wanted to indicate that one action is more important—like driving directions, for example—you can set that value to $10 and set call clicks to $1.00. In turn, the campaign will make sure you get more driving direction conversions than call clicks. (You can change these values in your conversion settings.) Once you complete this section, click “save and continue.”
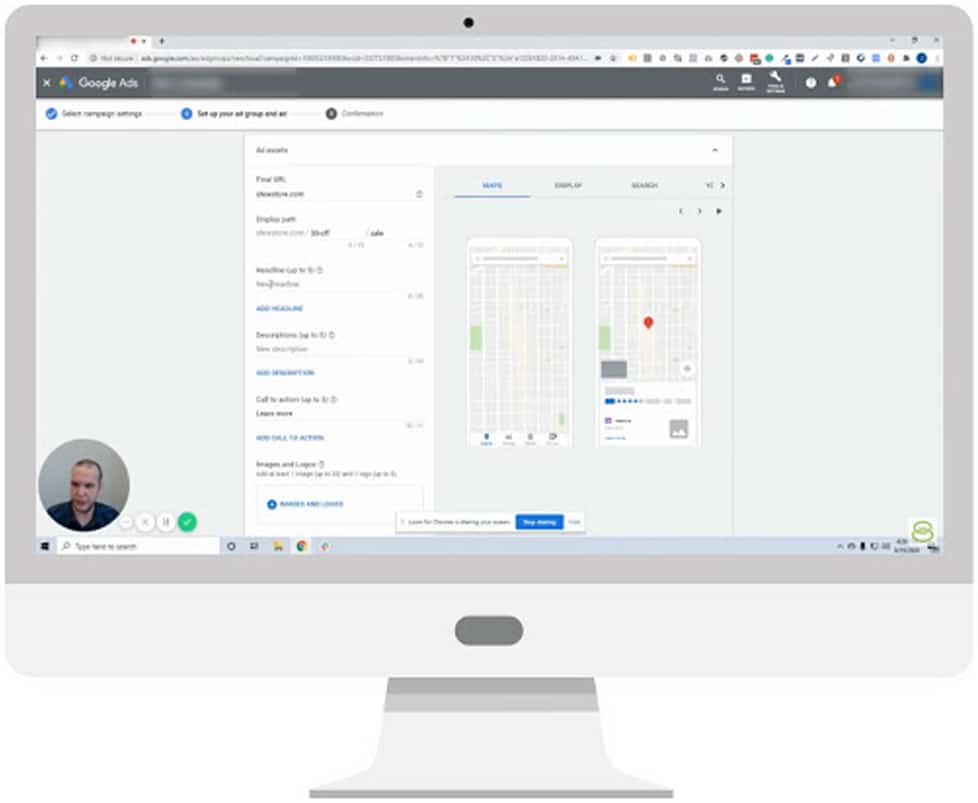
In the Planning subsection, for example, you will find the Google Keyword Planner. This tool allows you to research pre-planned keywords, identify traffic trends, develop forecasts for costs, and predict conversion statistics, all of which can provide valuable insight to help you improve campaign performance.
And there you have it!
When you mentally separate your Google Ads dashboard into Bucket A and Bucket B, it becomes exponentially easier to navigate so you can see how your campaigns are performing and make any necessary changes.

Of course, if you still have questions, the Solutions 8 team is just a call, chat, or email away. And don’t forget to subscribe to our YouTube channel for more helpful videos!
To help you find the right agency for your Google Ads campaigns, read on the 8 critical qualities a reputable Google Ads agency should have.
Author
Patience is the former director of marketing and communications for Solutions 8. A phenomenal content writer, copywriter, editor, and marketer, she has played a prominent role in helping Solutions 8 become an authority in the Google Ads space. Patience is also the co-author of The Ultimate Guide to Choosing the Best Google Ads Agency and You vs Google.
 Patience Hurlburt-Lawton

