If you’re a lead generation business, your customers probably don’t purchase products or services directly from your website.
Which means your potential customers need to call you first to make inquiries or set up an appointment.
That’s why it’s crucial to track those calls and give Google accurate data that will help you find more of the type of customers that you want.
One of the easiest ways to do that is by using Google’s phone call conversion tracking.
In this step-by-step tutorial, you’ll be able to set up and install a phone call conversion tracking that tracks people who click your ad and calls the number displayed on your website.
Once you know which among your calls provide the most value to your business, you can effectively optimize your campaigns and make better business decisions that will help increase your ROI.
Let’s dive in!
Get a copy of this guide for FREE! Just enter your email below.
Choose your goal
1. Inside of Google ads, go to Tools & Settings and click Conversions.
2. Inside Conversions, look for the “+” icon and click it.
3. Set up your conversion action by clicking Phone Calls
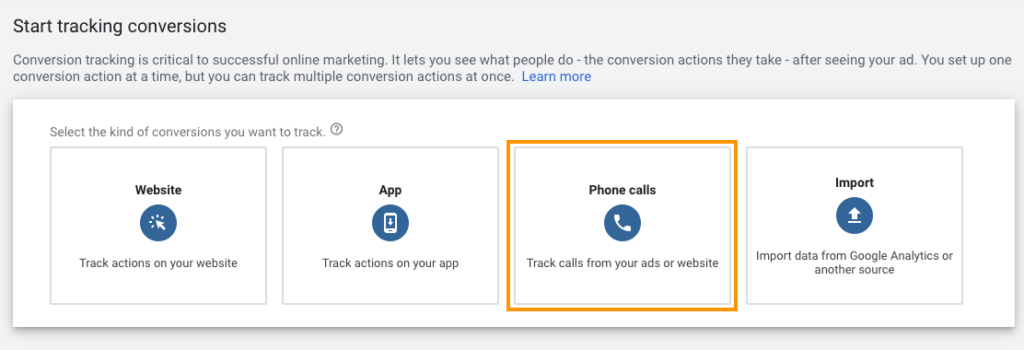
4. Select “Calls to a phone number on your website.”

5. Click Continue.
Creating an action
Conversion Name
Start by naming your conversion. We use “Phone call leads” but you can call it anything you like.

Value
We recommend you choose “Don’t use a value for this conversion action (not recommended).” And here’s why.
One of the things Google does is use the value to learn more about us (advertisers) using machine learning. Sometimes it can help us. But a lot of times, it won’t. This is one of those moments – it won’t benefit you.
Count
The option Every means that if someone calls multiple times, each call is counted as a lead. But counting the same person as multiple leads probably won’t make sense–it will only confuse your data.
We recommend choosing One.

Call length
As we stated here, most agencies often use the “elapsed time of the call” to determine the quality of a phone call lead. But if the call is about something else–a customer service call, wrong number, or spam–then that call becomes “false conversion.”
To avoid false conversions, it’s important to listen and score your calls. Set this to 60 seconds for now, but remember it shouldn’t be the only metric to use for determining whether or not each call is a lead.

Click-through conversion window
Leave it to its default.

Include in “Conversions”
Don’t forget to click “Include in “Conversions” so you can track everything we’re doing here.
Attribution model
If you don’t know which attribution works for you, choose Time Decay for now. It’s a multi-touch attribution model which gives some credit to the different channels that might have contributed to a conversion.
However, if you want to use your preferred attribution, choose that instead.

Setting up the tag
After creating an action, you need to set up your tag to make sure that it actually works on your site.
There are three ways to install your tag. You can add the tag to your website code, email the tag to your webmaster, or install the tag using Google Tag Manager.
We recommend using Google Tag Manager.
First, let’s add a Conversion Linker tag.
1. Go to your Google Tag Manager account
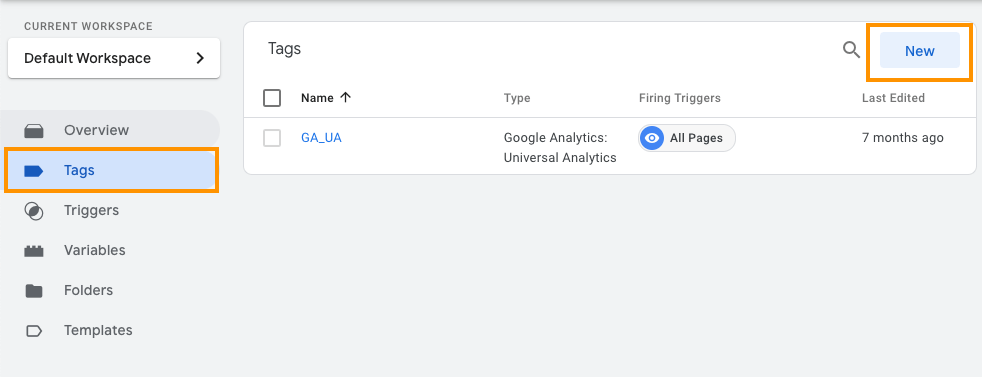
2. In your Google Tag Manager dashboard, click Tags and then click New.
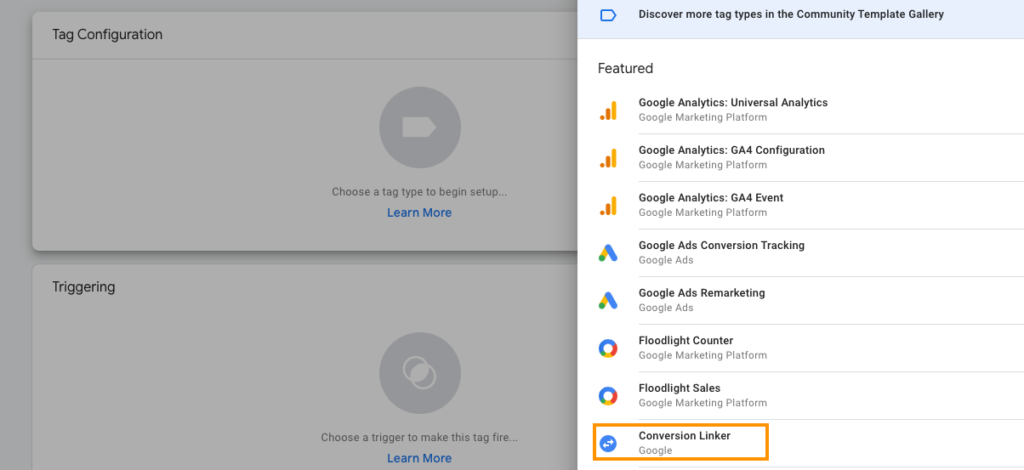
3. Click Tag Configuration and select Conversion Linker.
4. Under Linker Options, select “Enable linking on all page URLs.” This is the most commonly used option because it fires up on all pages.
5. Save and publish your tag.
Next, let’s add your conversion tag.
1. In your Google Tag Manager dashboard, click Tag then click New.

2. Click Tag Configuration and select Google Ads Calls from Website Conversion
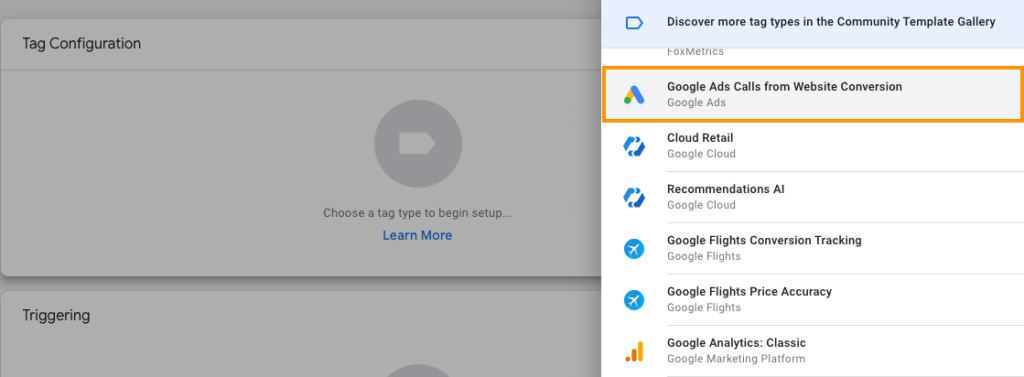
3. Fill out the following information:
Displayed Phone Number to Replace – this is the phone number you have on your website.
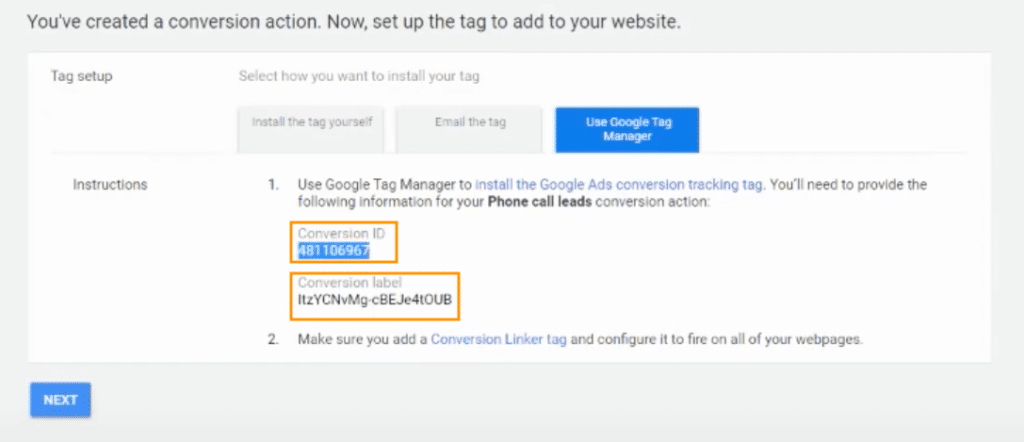
Conversion ID and Conversion Label – these are found in the Google Ads page where you left off.
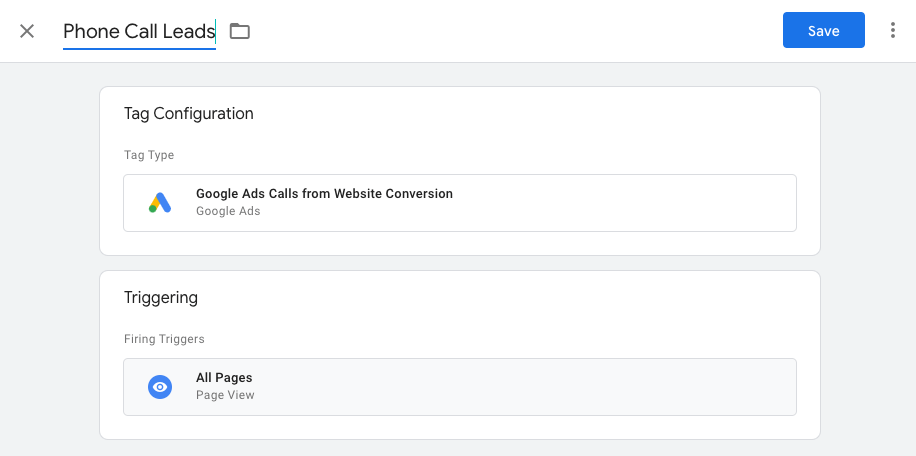
4. Once finished, under the Tag Configuration click Triggering and select All Pages. This means the tag will fire on every page of your website.

5. Name your tag and click Save.
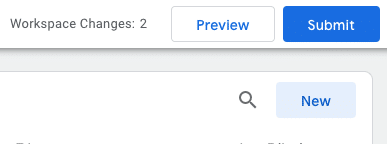
6. Back to Google Tag Manager dashboard, click Submit.
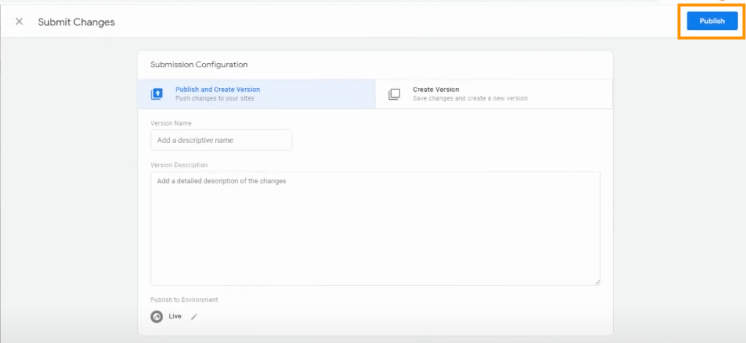
6. You can add details to your Submission Configuration if you like. Once finished, click Publish.
And there you have it. Now you know how to install and set up your phone call conversion tracking in Google Ads!
Just a quick disclaimer. While Google’s phone call conversion tracking is a good place to start, we don’t use it. That’s because its call conversion tracking is limited.
We use an all-in-one call management tool that is more effective and reliable than Google’s. And we highly recommend you give it a try.
Want to get more tutorials like this? Head over to our YouTube channel! We literally shoot a video every single day to give you the latest news, updates, strategies, and step-by-step tutorials about everything Google!
Author
Patience is the former director of marketing and communications for Solutions 8. A phenomenal content writer, copywriter, editor, and marketer, she has played a prominent role in helping Solutions 8 become an authority in the Google Ads space. Patience is also the co-author of The Ultimate Guide to Choosing the Best Google Ads Agency and You vs Google.
 Patience Hurlburt-Lawton

