Want to run video ads inside of YouTube? You might be onto something.
After all, YouTube is the second most popular search engine behind Google—which is probably why 55% of marketers use it to generate leads and increase sales.
But after you create the perfect video(s) to advertise your brand and bring in those leads…what do you do with them? How do you create a YouTube ad campaign?
We’re about to walk you through how to set up and run a successful lead generation campaign on YouTube, step-by-step.

Want to get a permanent copy of this guide?
Enter your email below.
How to Create Your Lead Generation Campaign, Step-By-Step.
To start, just go to your Google Ads Dashboard, click campaigns, then click the “+” symbol to add a new campaign.

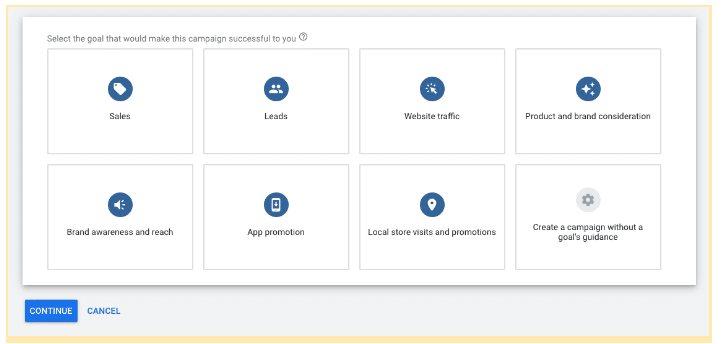
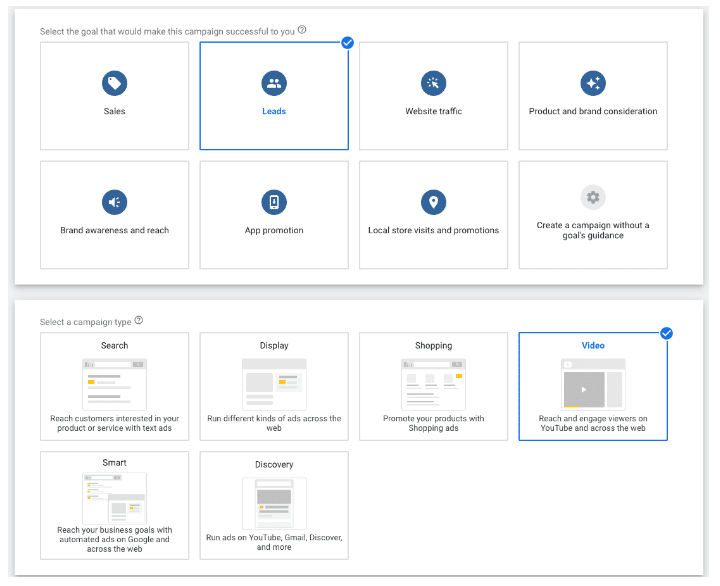
You’ll be prompted here to “select a goal that would make this campaign successful to you”
Selecting Your Goal and Campaign Type
Here’s the thing.
Depending on which goal you choose (sales, leads, website traffic, etc.) for your video campaign, Google will make either an executive decision or offer up more options and features for your campaign.
For example, if you choose “Sales” as your goal (followed by “Video” as your campaign type), Google automatically assumes you’ll want to focus on driving conversions.
But, if you choose the goal “Brand Awareness” and the campaign type “Video,” you’ll get a whole slew of options like:
- Skippable In-stream
- Bumper
- Non-skippable in-stream
- Outstream
- Ad sequence
This is Google’s way of putting training wheels on your campaign.
In the past, Google limited your options if you selected a goal.
But now, Google limits your options if you don’t select a goal (they won’t tell you what other options you have).
Since this is a Lead Generation Campaign for YouTube, here are our recommended settings: Choose “Leads” as your goal and “Video” as your campaign type.
We have had better performance with this goal guidance than anything else.
Create Your Campaign

Start by entering your campaign’s name. Choose a name that’s relevant and easy to remember.
Next, if your campaign is at $50,000 in lifetime spend, you probably need to use Lead Forms.
If you don’t have them, it’s not a deal-breaker. Just leave it blank for now.

Want to use Lead Forms? Check out our blog on how to use lead forms inside YouTube ads here.
Bidding Strategy
Select Maximize conversions first. The only time you need to use Target CPA is when you have achieved around 10 conversions. Why? Because your conversions WILL tell you how much your Target CPA should be.

Pro tip: Add 10% buffer to your target CPA.
If your conversion is $50, then your Target CPA should be $55.
From there, you should decrease your CPA by 10% every week (or two) as long as:
- Google is meeting those CPAs
- Impression rates aren’t dropping

This strategy helps you find the Target CPA that works for you, so you can scale as efficiently as possible.
Budget and Dates
We recommend you spend $20.00 daily–a pretty aggressive budget for video. While you’re not necessarily paying for “view,” the scope of what you’ll get from this budget is worth it. However, if you need to go lower than that, it’s totally fine.

But watch out. Some marketers will tell you to go for as low as $1.00. Don’t do it. It’s not going to get you the conversions you need–especially if you’re in a competitive industry.
Networks
Uncheck “Video partners on the Display Network.” We’re going to choose the exact sites you want your ads to show inside of Placements. And you’ll learn that once we’re in the Creating Your Ad Group section. For now, only check “YouTube videos.”

Locations and Language
For locations, we always leave it to “United States.” However, if your target is outside the U.S., you can set a different location by selecting “Enter another location,” just type the country you’re targeting.

To make sure that you’re effectively on channels that use the English language, set Languages to “English,”
Locations: United States (you can enter another location too)
Language: Keep it in English to make sure you’re on English channels.

Content Exclusions: Inventory type
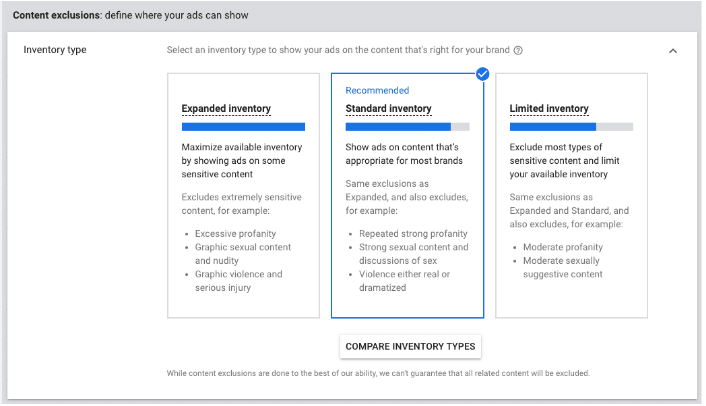
In this section, Google asks you to choose an “inventory” that your ads belong to. Each category dictates how explicit your content is. Our recommendation is to choose “Standard Inventory,” unless you have a product or brand that specifically distinguishes you into an Expanded or Limited Inventory.
Not sure about which category you belong to? Here’s a quick guide to help you decide:
Expanded inventory. Only use this if your content actually lives in this targeted niche. (e.g an “aggressive” clothing brand)
Standard Inventory. Same exclusions as expanded but less explicit. This is what we recommend.
Limited Inventory. This excludes most types of sensitive and explicit content. (e.g. churches, kids, family, etc.)
To learn more about inventory types, click on “Compare Inventory Types.”
Content exclusions: Excluded types and labels
This is important. The reason why we recommend opting out from Embedded YouTube videos is because you might not want to show up on someone else’s website–it conveys a different intent and there’s a lower probability to convert those users.
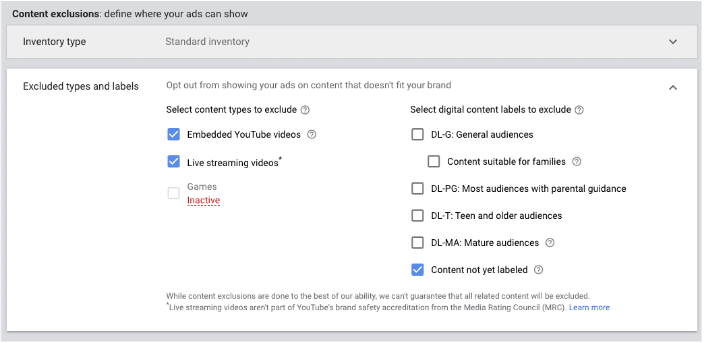
We also recommend you to opt out from live streaming videos, and here’s why:
If someone’s watching a live video, they are probably highly engaged in it which means they’ll be less likely to convert.
Does this mean that you should always opt out from showing your ads on specific websites or live streams? It depends on your goals. But as Kasim mentioned, the goal of doing this is to show up inside of the YouTube machine while the user’s intent has not changed yet.
Now, with the excluding digital content labels, it’s up to you to decide if you want to exclude yourself from the specific “ratings.” You can always just leave everything out and just check “Content not yet labeled.”
Ad Extensions
One of the most important ad extensions is the Sitelink extensions. These are hyperlinks that when clicked, take the users directly to your website or landing page (e.g your product page) and can significantly increase your conversions.
If you have no idea how to set it up, watch our full step-by-step tutorial on how to use sitelink extensions here.
Additional Settings
There are four additional settings inside a lead generation campaign–conversions, devices, frequency capping, and ad schedule. These settings help Google identify where exactly should people see your ads and how often.
Conversions
If you have multi-variant conversion settings, multi-touch points, or different conversions you want to track for this campaign, click “Choose conversion actions.” Otherwise (and in most cases) just use the account-level conversions.

Important: No matter what you do, make sure you’re tracking conversions.

Devices
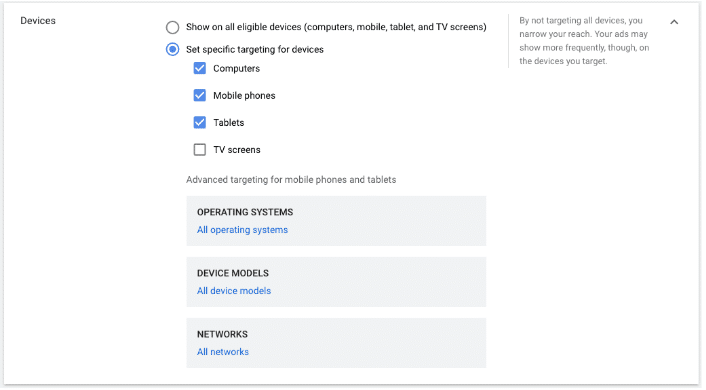
Exclude TV screen and only keep Computers, Mobile, and Tablets on.
But… shouldn’t I be showing ads on TV screens?
Good question. It might be counterintuitive to deselect that option, but here’s the thing.
People don’t interact with TVs the same as they would with the other three devices. Meaning, users are less likely to take action because TVs have limited capabilities. For example, you can’t take them to your landing page. So if you need visits and searches, TVs are out of the question.
Frequency capping

Whether it’s Cap impression frequency or Camp view frequency, setting up a frequency cap gives you a broader reach–which works well for a brand awareness campaign. But since this is a conversion-based campaign, we recommend that you leave them both unchecked.
Ad Schedule
You might be tempted to add a specific schedule–don’t. Just set it to “All day.”
Create your ad group
You can split your ad group by offer, by approach, or by target audience. Remember, Google wants 5 videos inside an ad group to split-test against each other.
Demographics
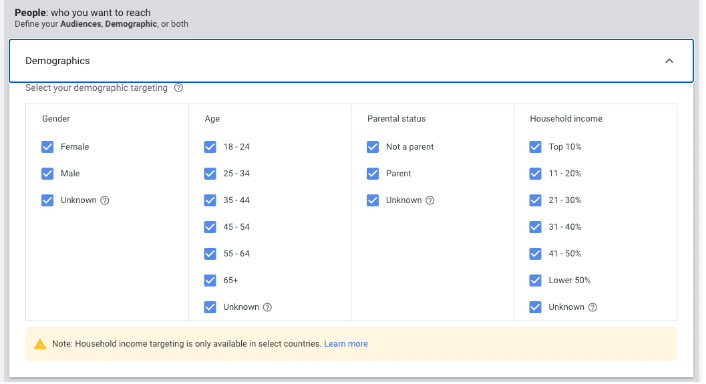
Here, you’ll see a lot of options to select your demographic targeting–gender, age, parental status, and household income. We won’t touch this because we haven’t seen how front end demographics segmentation helps a campaign. So, it’s best to leave it to its default setting.
Audiences
You could set audiences here if you want to but we’ll show you a better way–so, it’s best to leave this for now. Same goes with Keywords, Topics, and Placements.

Creating your Video Ad
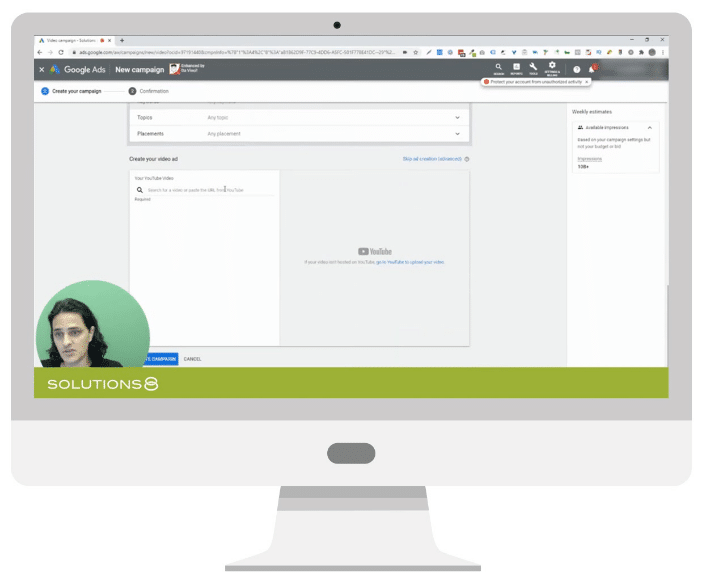
Before you start creating your video ad, you should have already created your video–that’s where you’ll post the ad.
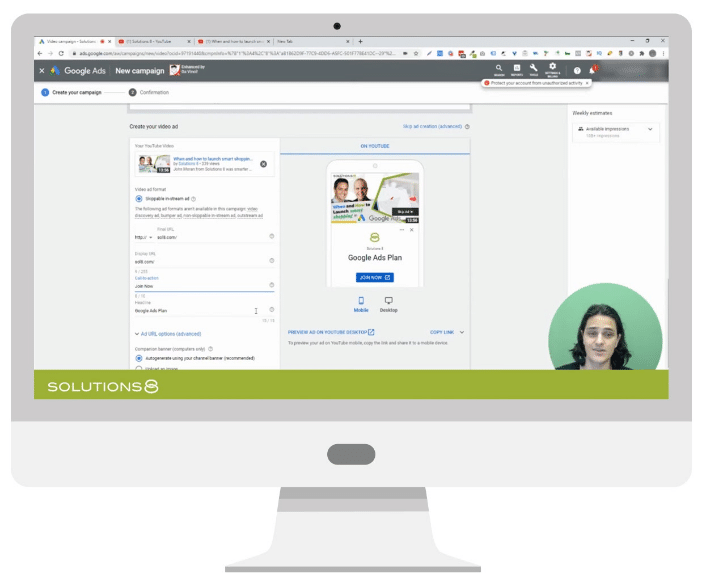
Just grab your YouTube video link and paste that link in the “Your YouTube Video” section.

Quick Note: Skippable In-stream VS Non-skippable In-stream
In the video tutorial, the Video ad format available to us was “Skippable in-stream ad.”

However, skippable in-stream and non-skippable in-stream are the most commonly used campaign subtypes, so let’s touch on these quickly:
Skippable in-stream allows you to see how people engage with your ads. This is what we recommend. With this option, you only pay if they continue watching the ad for 30 seconds (or the full duration, if it’s less than 30).
What’s even more awesome is if your audience decided to “Skip Ad,” your brand still had a good few seconds of exposure–and that stays with them! The best part? It’s free.
What about Non-skippable in-stream? Just like the term suggests, these are ads that people cannot skip at all. It’s best used if you need to have your audience watch your entire ad.
But be careful. It’s impossible to gauge your audience’s engagement and ad relevance because in this setting, everyone is “forced” to “engage” in your ad. Only use it if your goal is to maximize your reach.
It’s a good strategy to check the options available in each goal and campaign type first, before you decide to continue.
We highly recommend using in-stream ads because they’re the type of ads that stick–the ones users think about.
Display URL and Final URL
Next, don’t forget to add the page you want users to land on once they click your ad in the “Final URL” and not in “Display URL.”
Here’s the difference:

The Display URL doesn’t have to be real. But it has to be relevant to what your offer is in your landing page. This helps to increase trust and click-through rates.
You’ll also be prompted to add a call-to-action (CTA).
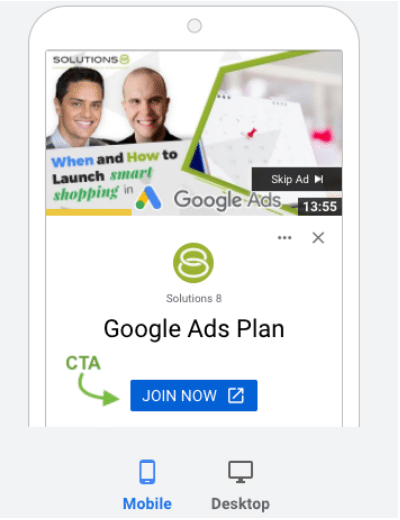
Use a CTA that tells the users how you want them to engage and what’s the next step for them. Here are some of the most commonly used CTAs:

Headline
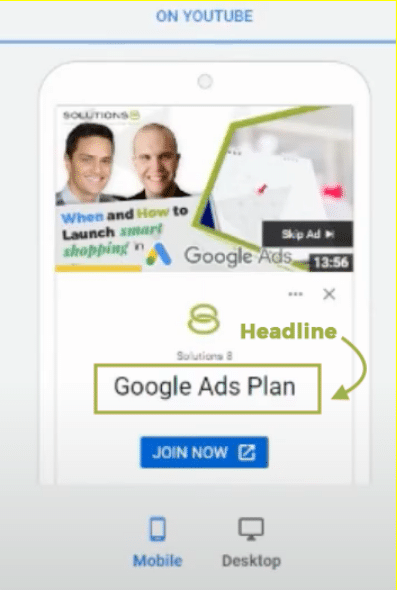
Another biggie when it comes to creating your ad. Keep in mind that your headline should describe what your offer is or what your users are going to get. However, unlike headlines on a regular responsive ad, this headline can only use up to 15 characters.

Being creative and intentional will help you come up with the best headline for your ad.
Ad URL Options (Advanced)
These are advanced options for tracking. If you know how to use them, feel free to set them up. If not, it’s okay to ignore them for now.
Companion banner (computers only)
The last option we advise you to select is “Autogenerate using your channel banner (recommended).” This setting lets Google create the ad for you instead of uploading an image. Most of the time, uploading an image hurts Google’s responsive display capabilities.

And now you’re ready! Just enter your ad name and click “Create Campaign.”
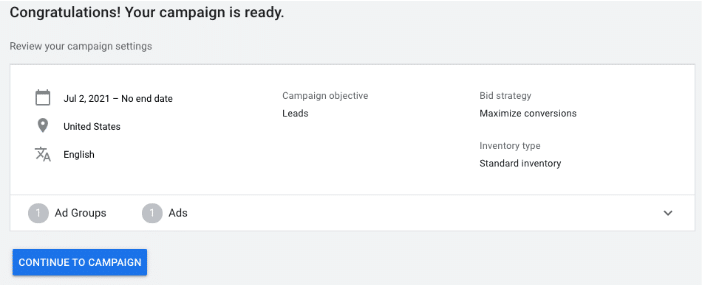
One last thing before we dive into creating your custom audiences. Make sure that you have at least 5 videos. All you have to do is create a campaign (again) for each video.
The good news is you already have created one. Just repeat the steps by following the previous walkthrough and you should be able to finish them all in no time!
Creating Custom Audiences
As promised, we’re going to create custom audiences that will give you more control over the type of audience you want to reach. Let’s dive in!
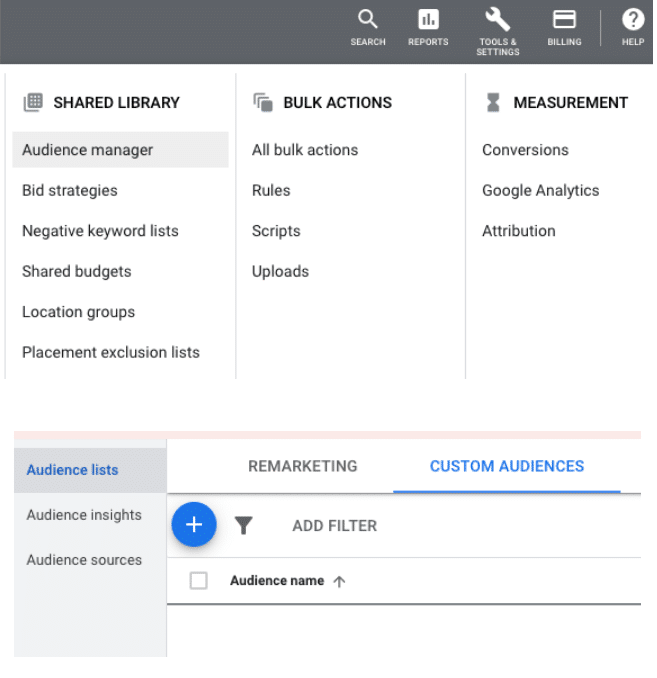
To start, in your Google Dashboard, Go to Tools > Audience Manager > Audience lists > Custom Audiences > click the “+” symbol and add an audience name.
This is where the magic happens. You’ll be given a couple of options to choose from but before we pick one, it’s important to understand what each option can do for you and how you’ll benefit from it.
People with any of these interests or purchase intentions
Using this option, you can add interests or purchase intentions about your service, products, or niche. Google will recommend some search terms related to the words you type in based on intent. Plus, you’ll be able to see the market size available to you.
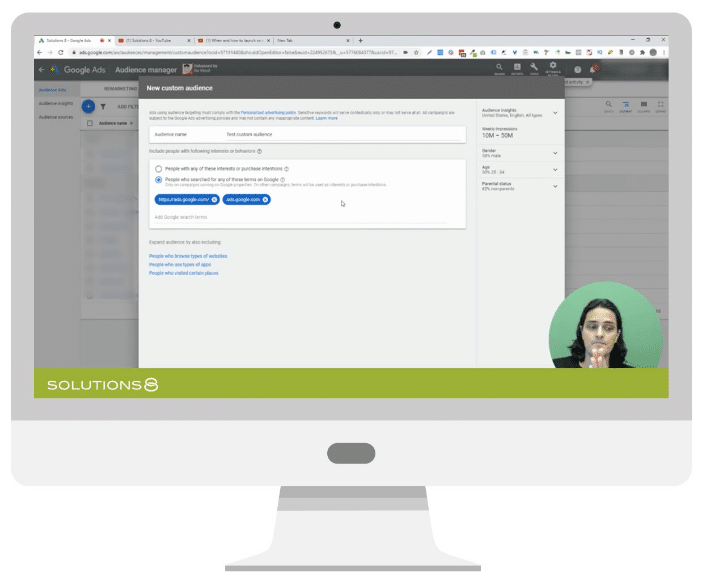
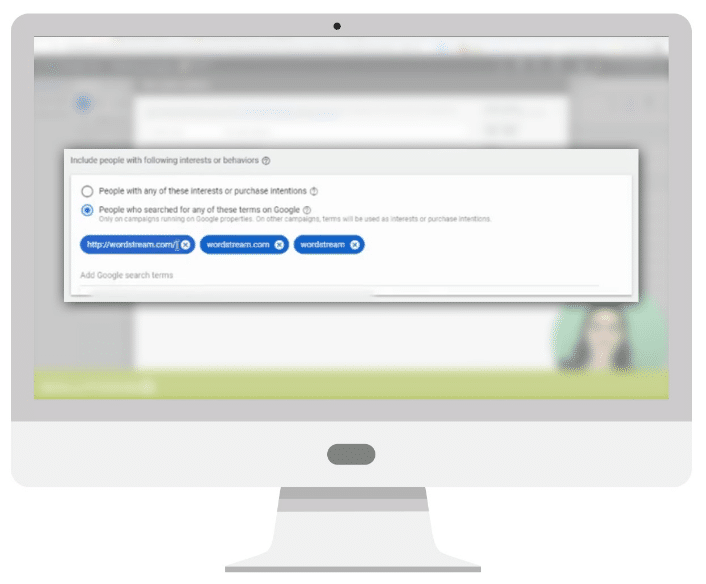
People who searched for any of these terms on Google and People who browse websites similar to
If you want to get even more specific, you can target people who have searched for any specific terms. This stuff is crazy!
Think about it.
You can target your competitors and tell Google exactly who you want to get in front of!
All you have to do is type in the URL (or search terms) of your competitor and you’ll be able to target anyone who’s gone to that specific website.
Just make sure that you target one competitor per ad group. Having multiple competitors (multi-variant targeting) inside of the same ad group won’t give you the best results–it’s hard to identify what’s working or not.
So, competitor-a.com should be in one ad group and competitor-b.com should be in another ad group.

Pro tip: Find the login page of a website, and use that URL. For example, if you’re targeting a website built in Shopify, you use their specific Shopify URL instead of just “Shopify.com.”
People who use apps similar to and People who visited these places
Aside from search terms and websites, you can also target people based on the apps that they’re using and the places they visited. Just search for the app by typing its name and it will populate results that match the app.
Similarly, to find places people visited, just type a product or service and Google will give you results that match the type of places relevant to the product or service. For example, if you’re targeting “chiropractors,” you’ll see a drop down list of options like Beauty & Wellness Locations, Spas, Massage Therapists, etc.
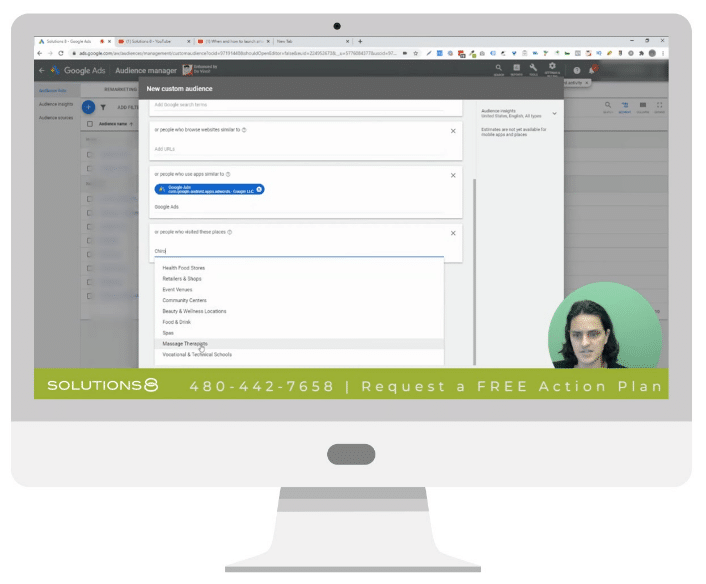
Once you’re finished, don’t forget to click “Create” to save the audience.
How to Add Audiences at an Ad Group-Level
There’s nothing wrong with adding audiences at a campaign-level. But since we’re targeting audiences based on ad groups, then we have to create the audience inside that ad group.
Here’s how to do that.
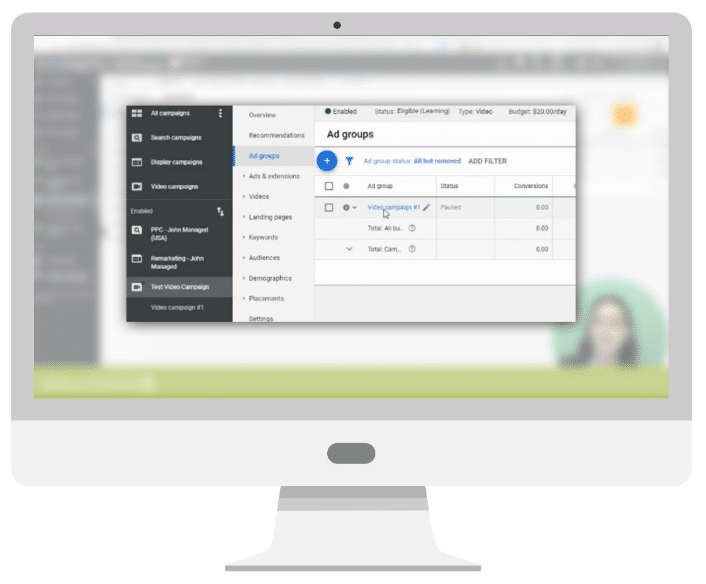
First, inside Google Ads dashboard, select the video campaign you created–it should be on the far left side under “all campaigns.” Next, click “Ad groups” and select the ad group you’ll be using.
The ad group we created in this tutorial is called “Video campaign #1.” Once you found your ad group, select it. Then, go to “Audiences” and click “Add audiences.”

What you’re looking for is the “Your custom audiences” in the “Browse” tab. There you’ll see the custom audience that you previously created, hit save.
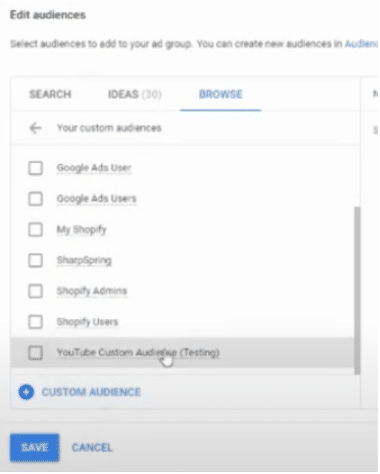
Now, you have successfully added your custom audience under the ad group-level. The next thing to do is to add negative keywords.
Wait… Negative keywords?

We don’t use keywords inside video targeting campaigns but we use negative keywords. They help push away people that you don’t want. For example, you can add negative keywords like “cheap,” “free,” “learn,” or “jobs” so that you won’t attract people searching for these terms.
Do you want to choose the specific YouTube channels and videos you want your ads to show?
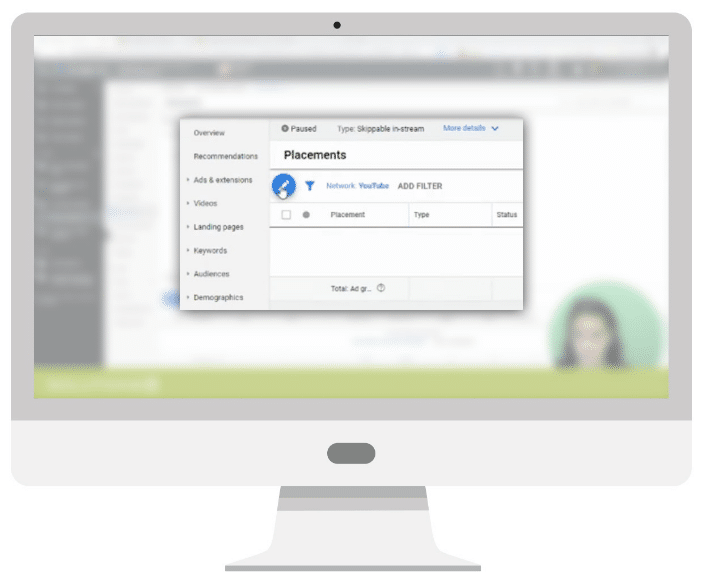
Use Placements. It’s one of the best tactics you can use to attract large audiences easily. Here’s how to do it.
If you’re still inside your video campaign, click on Placements and click the pencil icon. Under edit placement, choose YouTube channels and paste the YouTube channel’s link. The YouTube channel’s name should appear–just select it and hit save.
If you want to show your ads in a specific video, just choose “YouTube videos” instead of “YouTube channels.”
Things to keep in mind:
- Your ad will only appear if their YouTube’s monetization settings is on.
- Separate your segmentation by ad group. Combining audiences will result in an “and” modifier which means your audience should have watched both videos first before they get to see your ad.
And that’s it! You now have an effective lead generation campaign that gets you qualified leads that you can turn into new clients.
If this tutorial helped you, subscribe to our YouTube channel to get more awesome Google Ads tutorials and recommendations, every single day.
Author
Patience is the former director of marketing and communications for Solutions 8. A phenomenal content writer, copywriter, editor, and marketer, she has played a prominent role in helping Solutions 8 become an authority in the Google Ads space. Patience is also the co-author of The Ultimate Guide to Choosing the Best Google Ads Agency and You vs Google.
 Patience Hurlburt-Lawton